
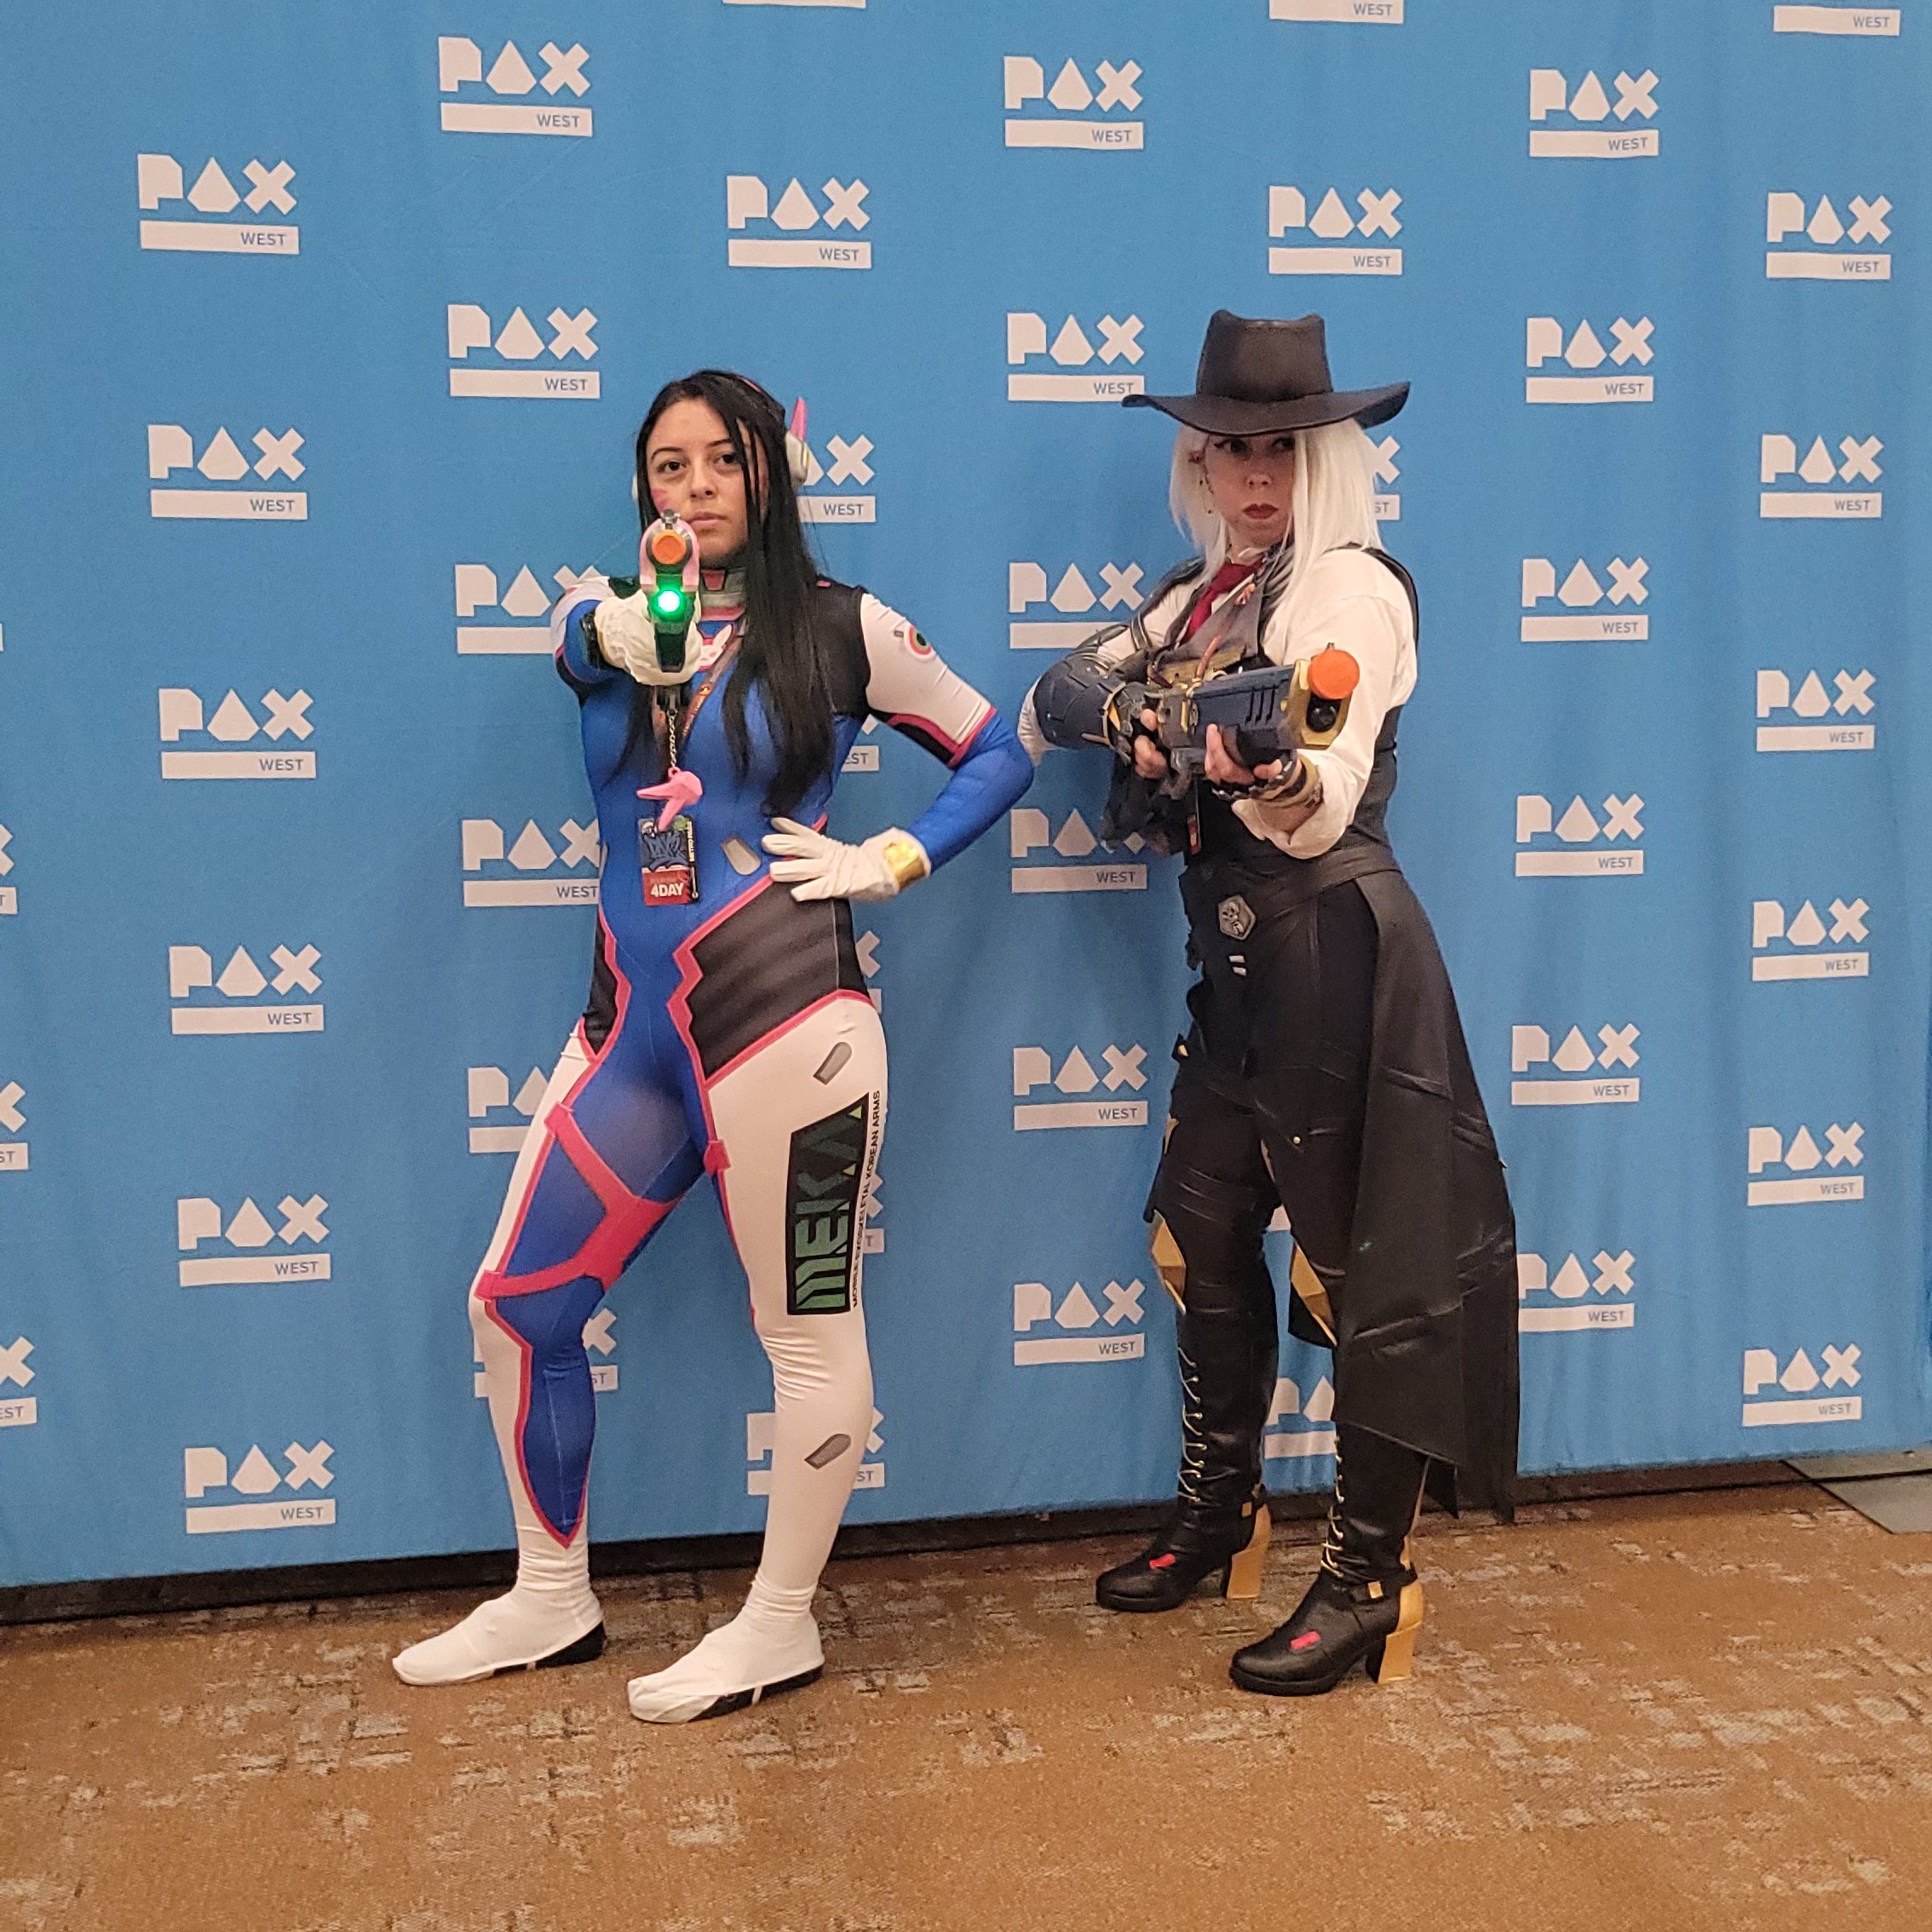
Ashe — Overwatch
Status: Completed • Debut: PAX West 2025
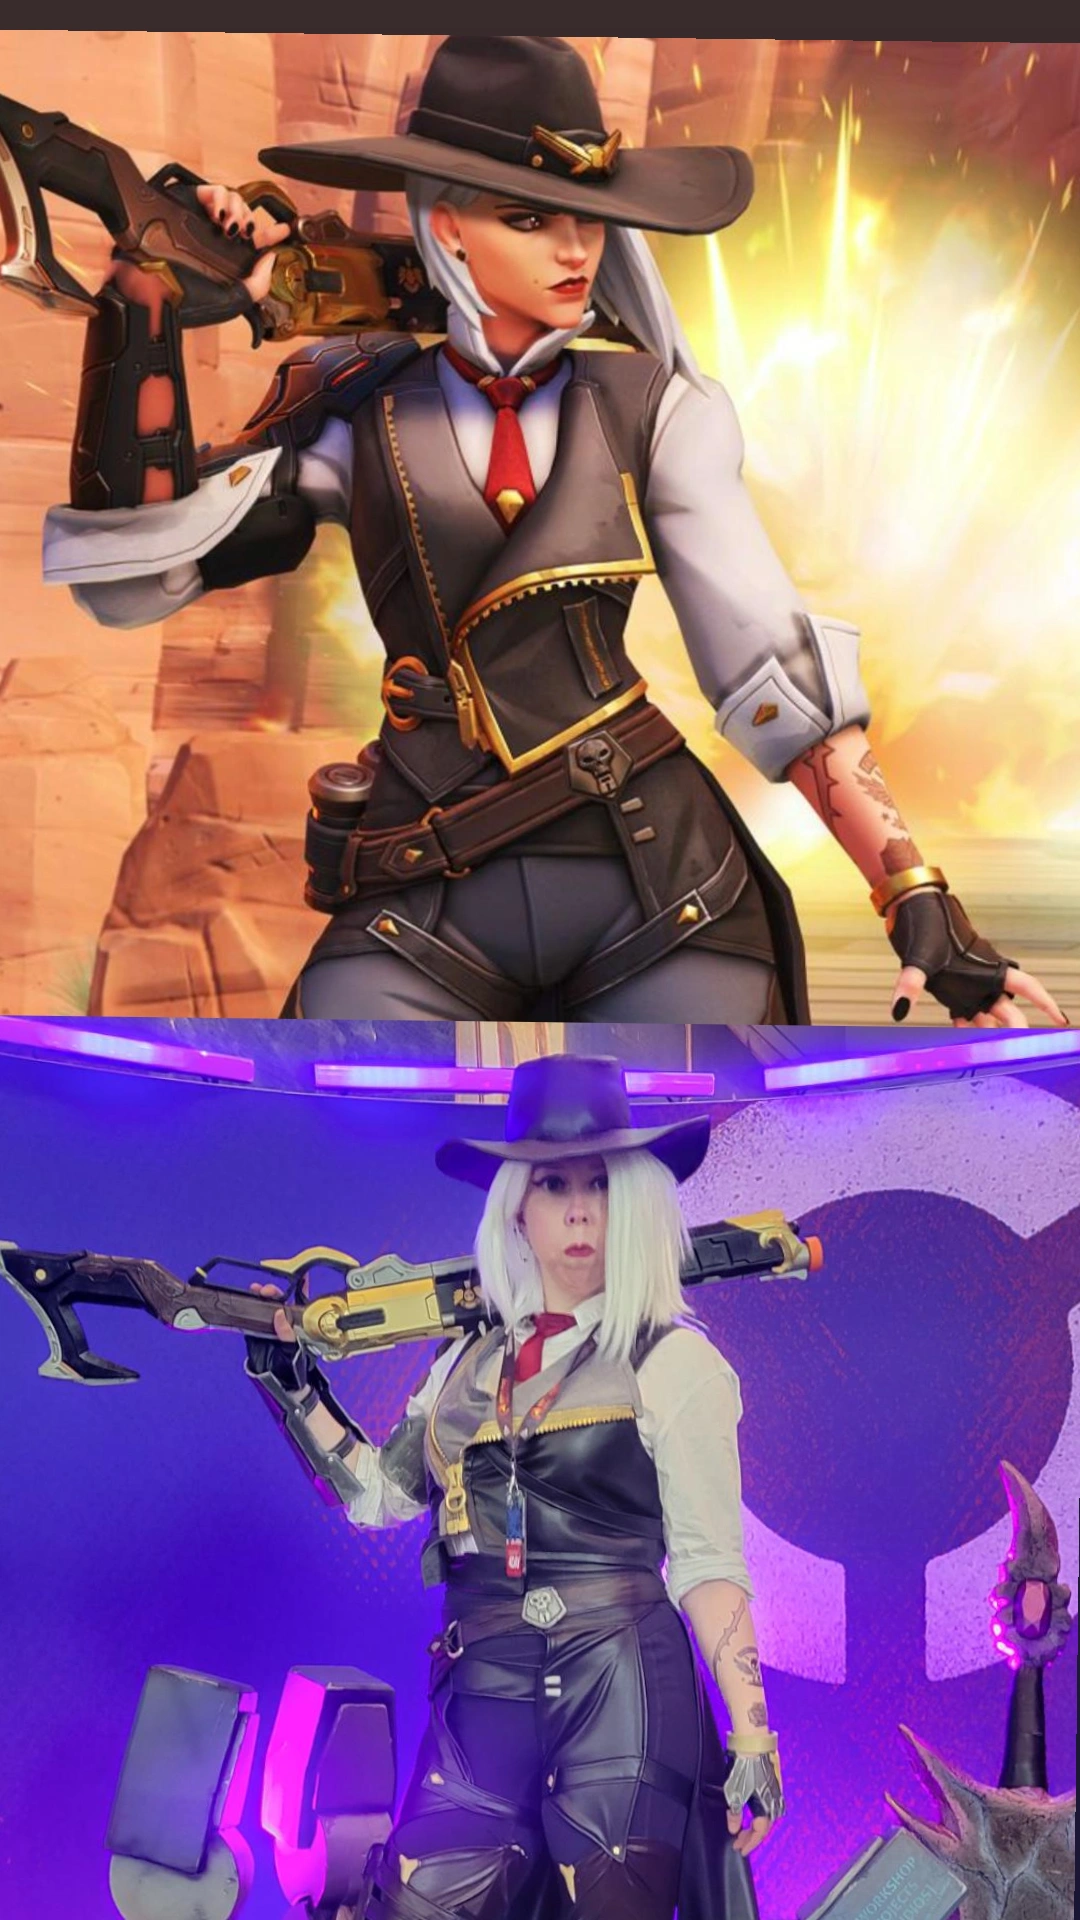
D.Va (my friend, not the mech pilot 😉) suggested Ashe, and it turned out to be a perfect pick. She fits my personality, has a dramatic silhouette, and let me stretch my armor + prop-making skills. But as much fun as it was, I realized I want my next build to be even more personal.
Overview
Core challenges: drafting the vest, sewing vinyl for almost all of it, sewing neatly along foam lines without getting hurt, and completing every piece in time. I'm the screen accurate, handmade type. I need to have it as close to the original as possible, only buying what I absolutely cannot make: wigs, shoes, and patterns. Creativity comes from the engineering of the build, not the outer visuals.
Pieces & Notes
-
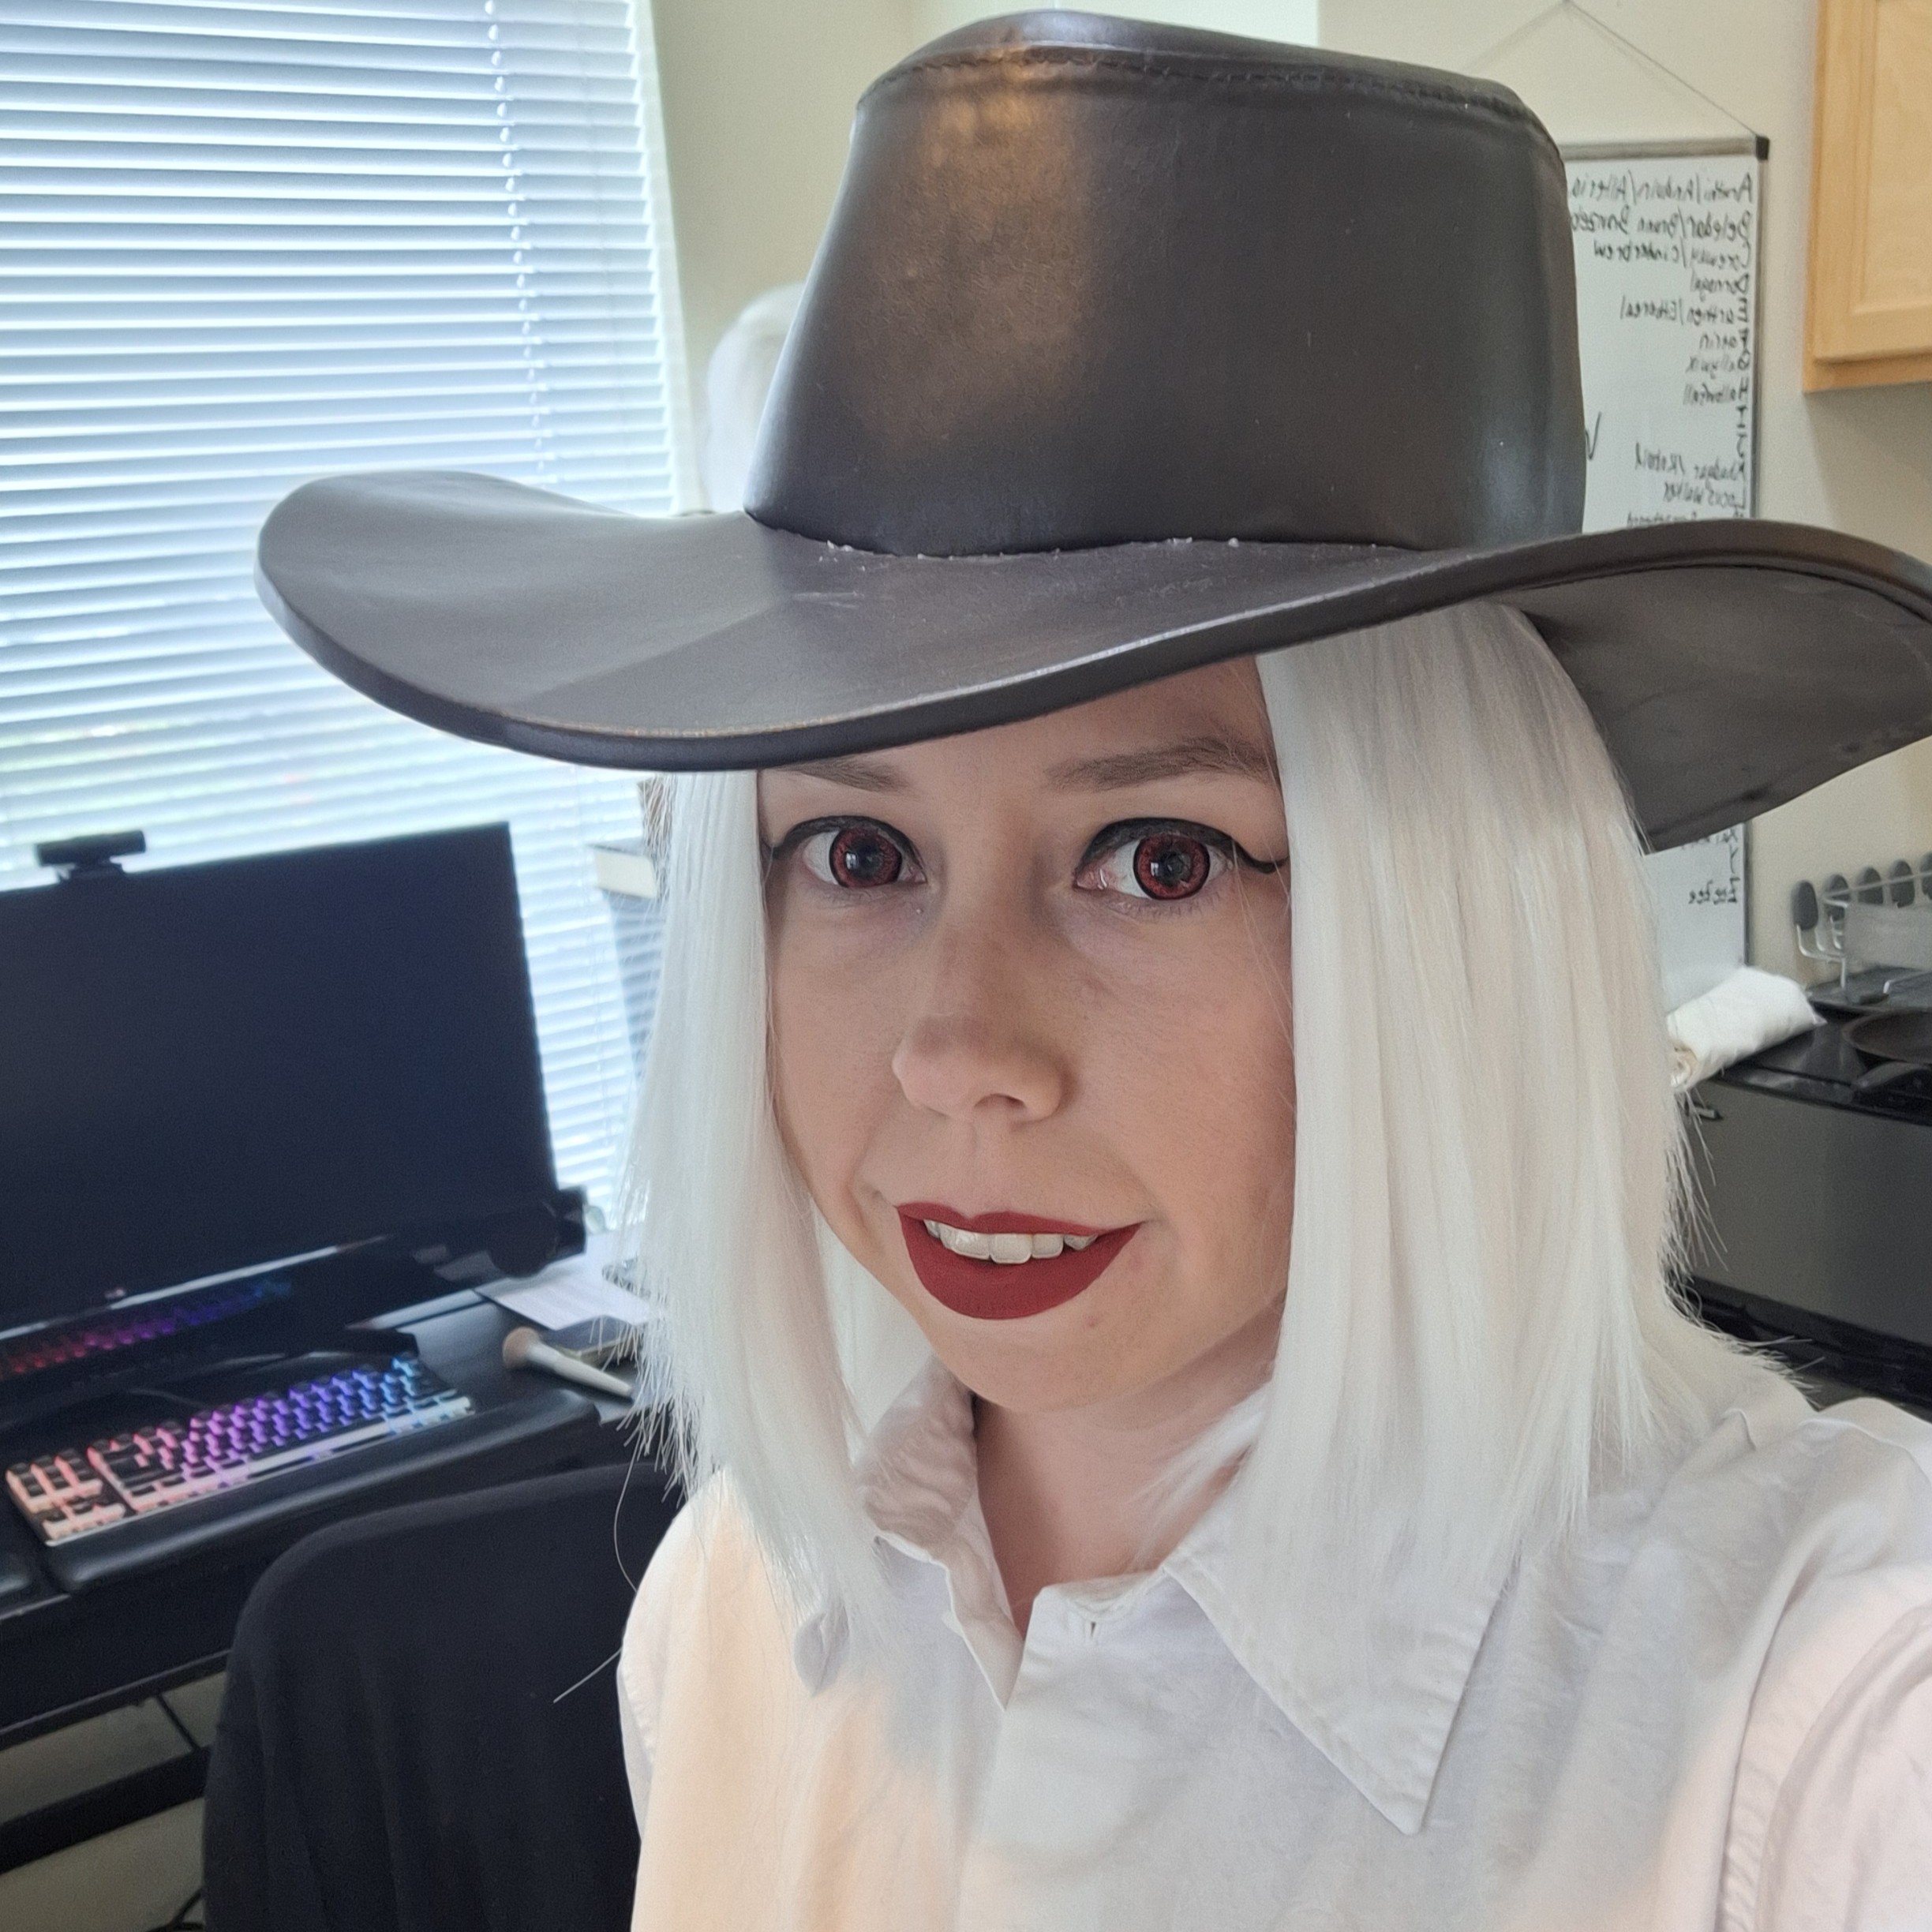
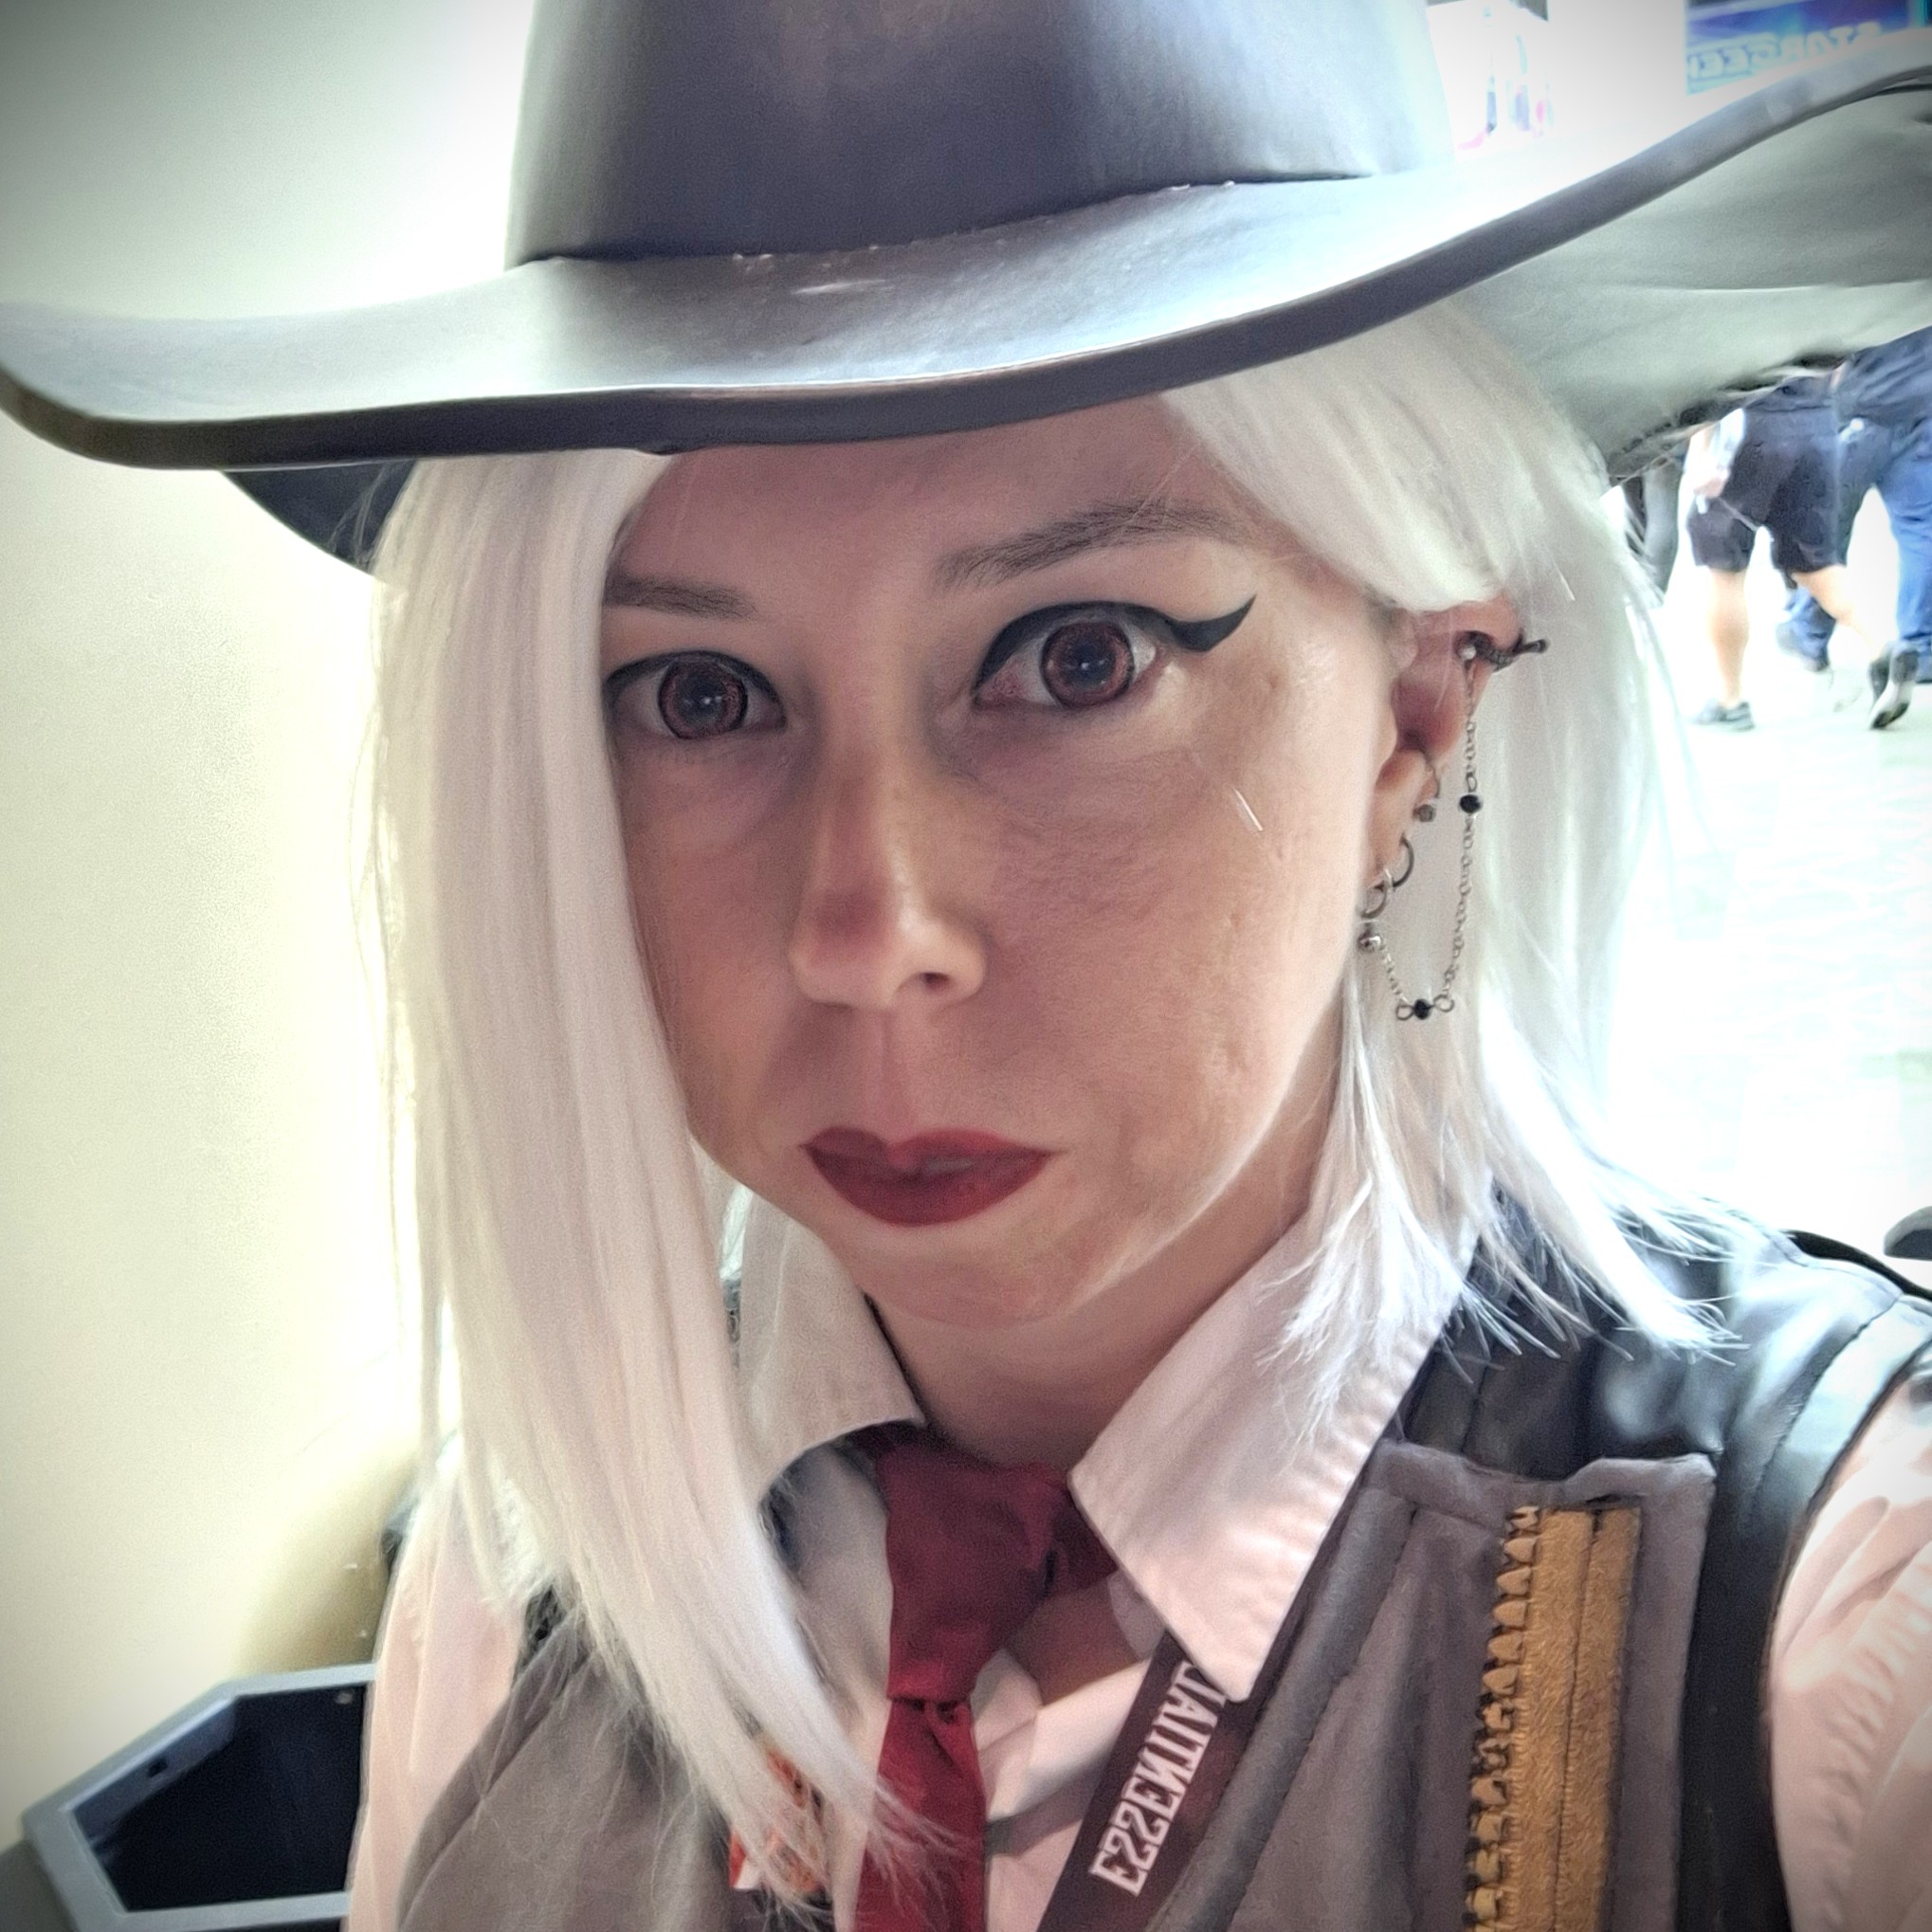
Hat
Faux leather vinyl + foam base. Detailing with brown stitching and subtle Dremel work. Planning to add in the hat piece when I can get it 3D printed.
-
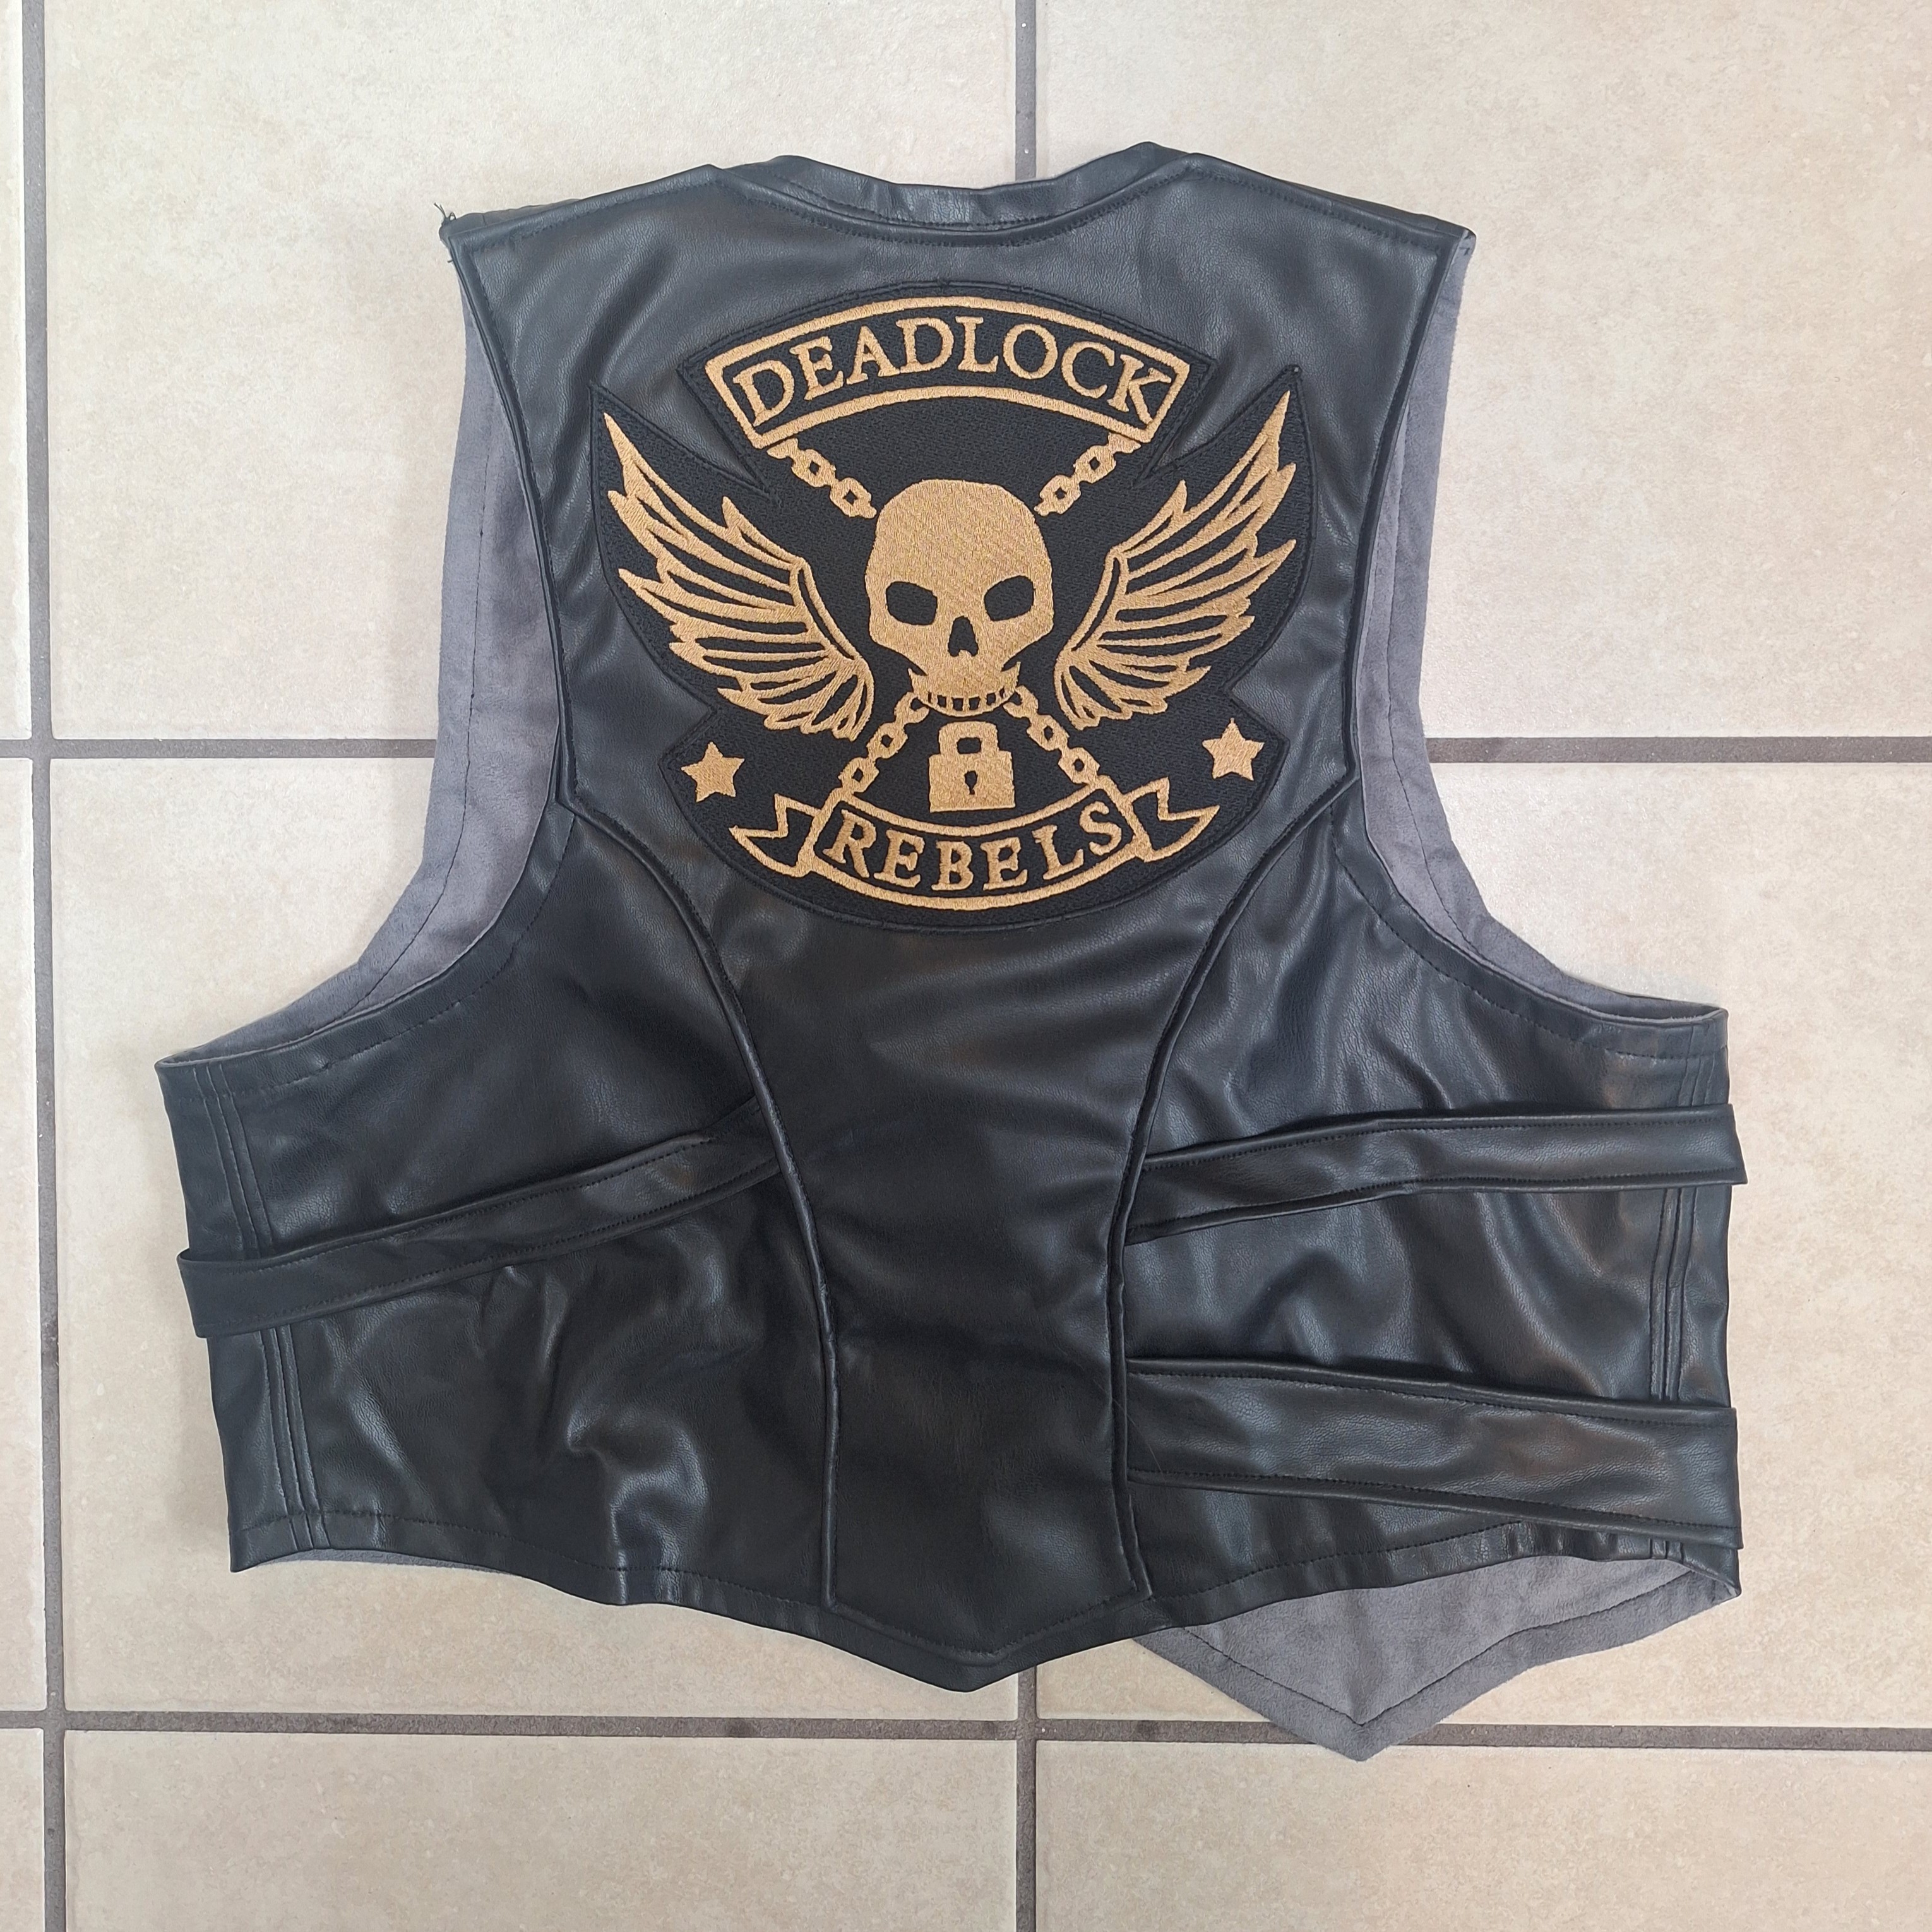
Vest
Self-drafted vest. The outer layer is made from black vinyl and the lining is a grey suede. The patch on the back was purchased on Etsy and the zipper is from Amazon. The buckle was 3D printed by my friend, who edited an STL file from Thingiverse so that I could pass the fabric through the prong.

-
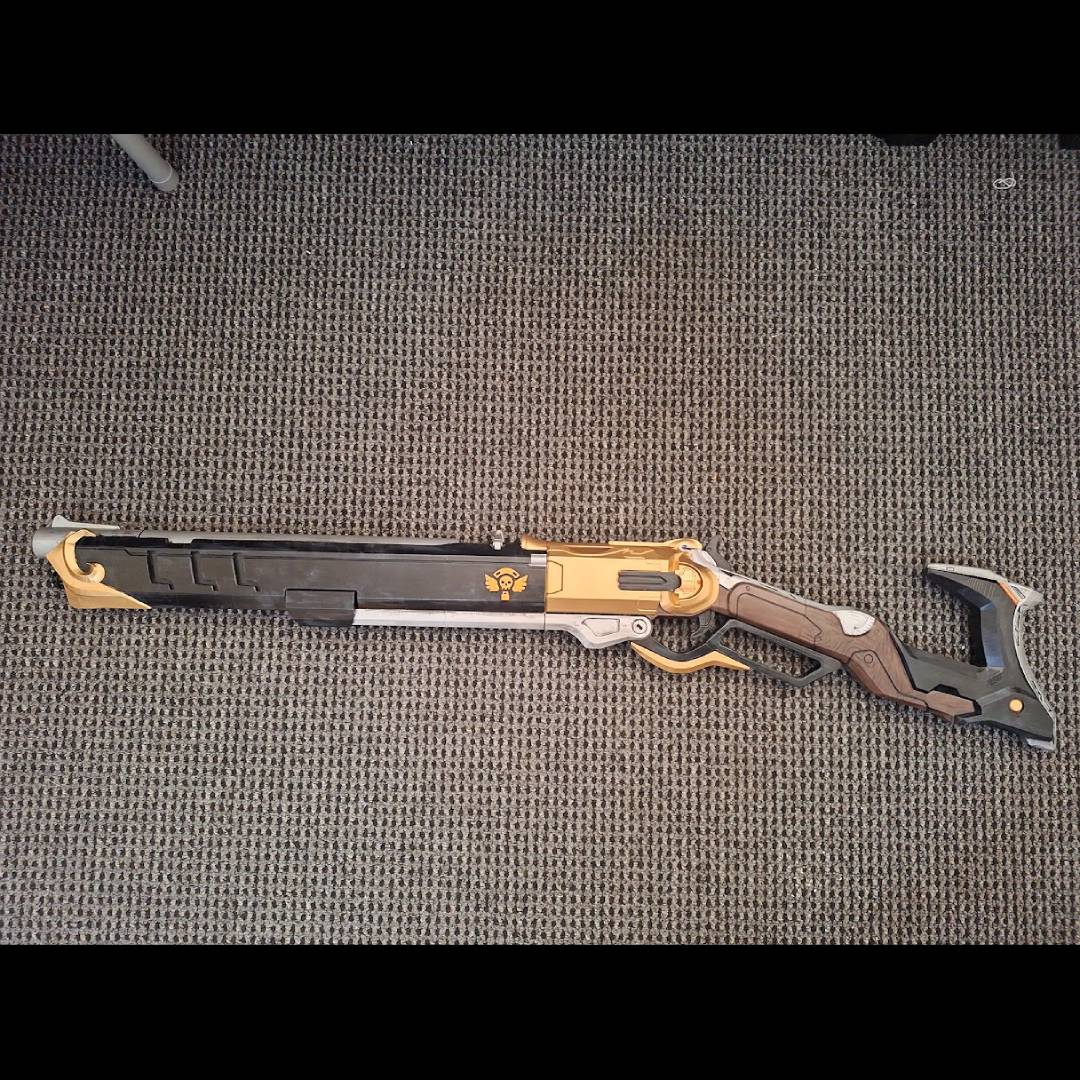
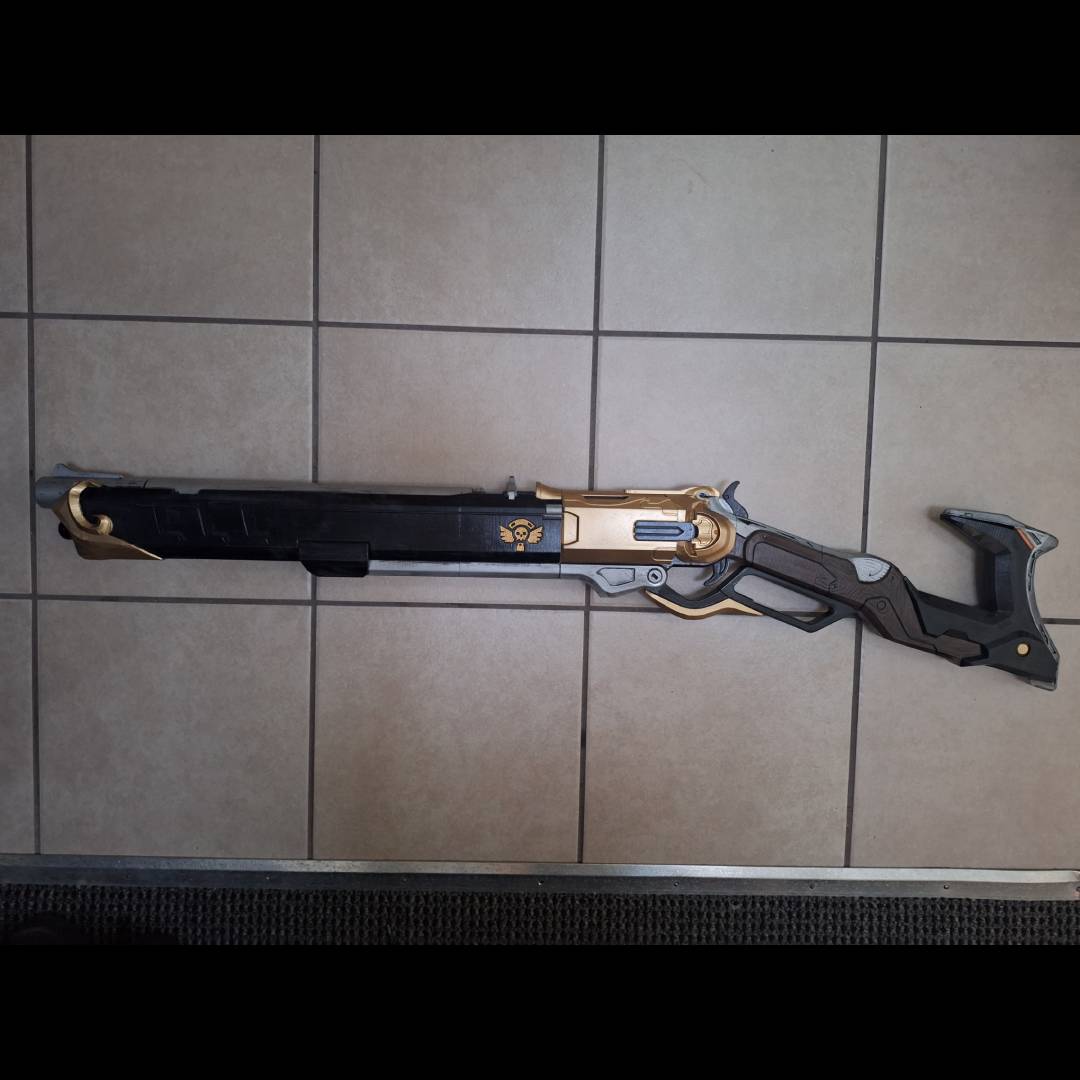
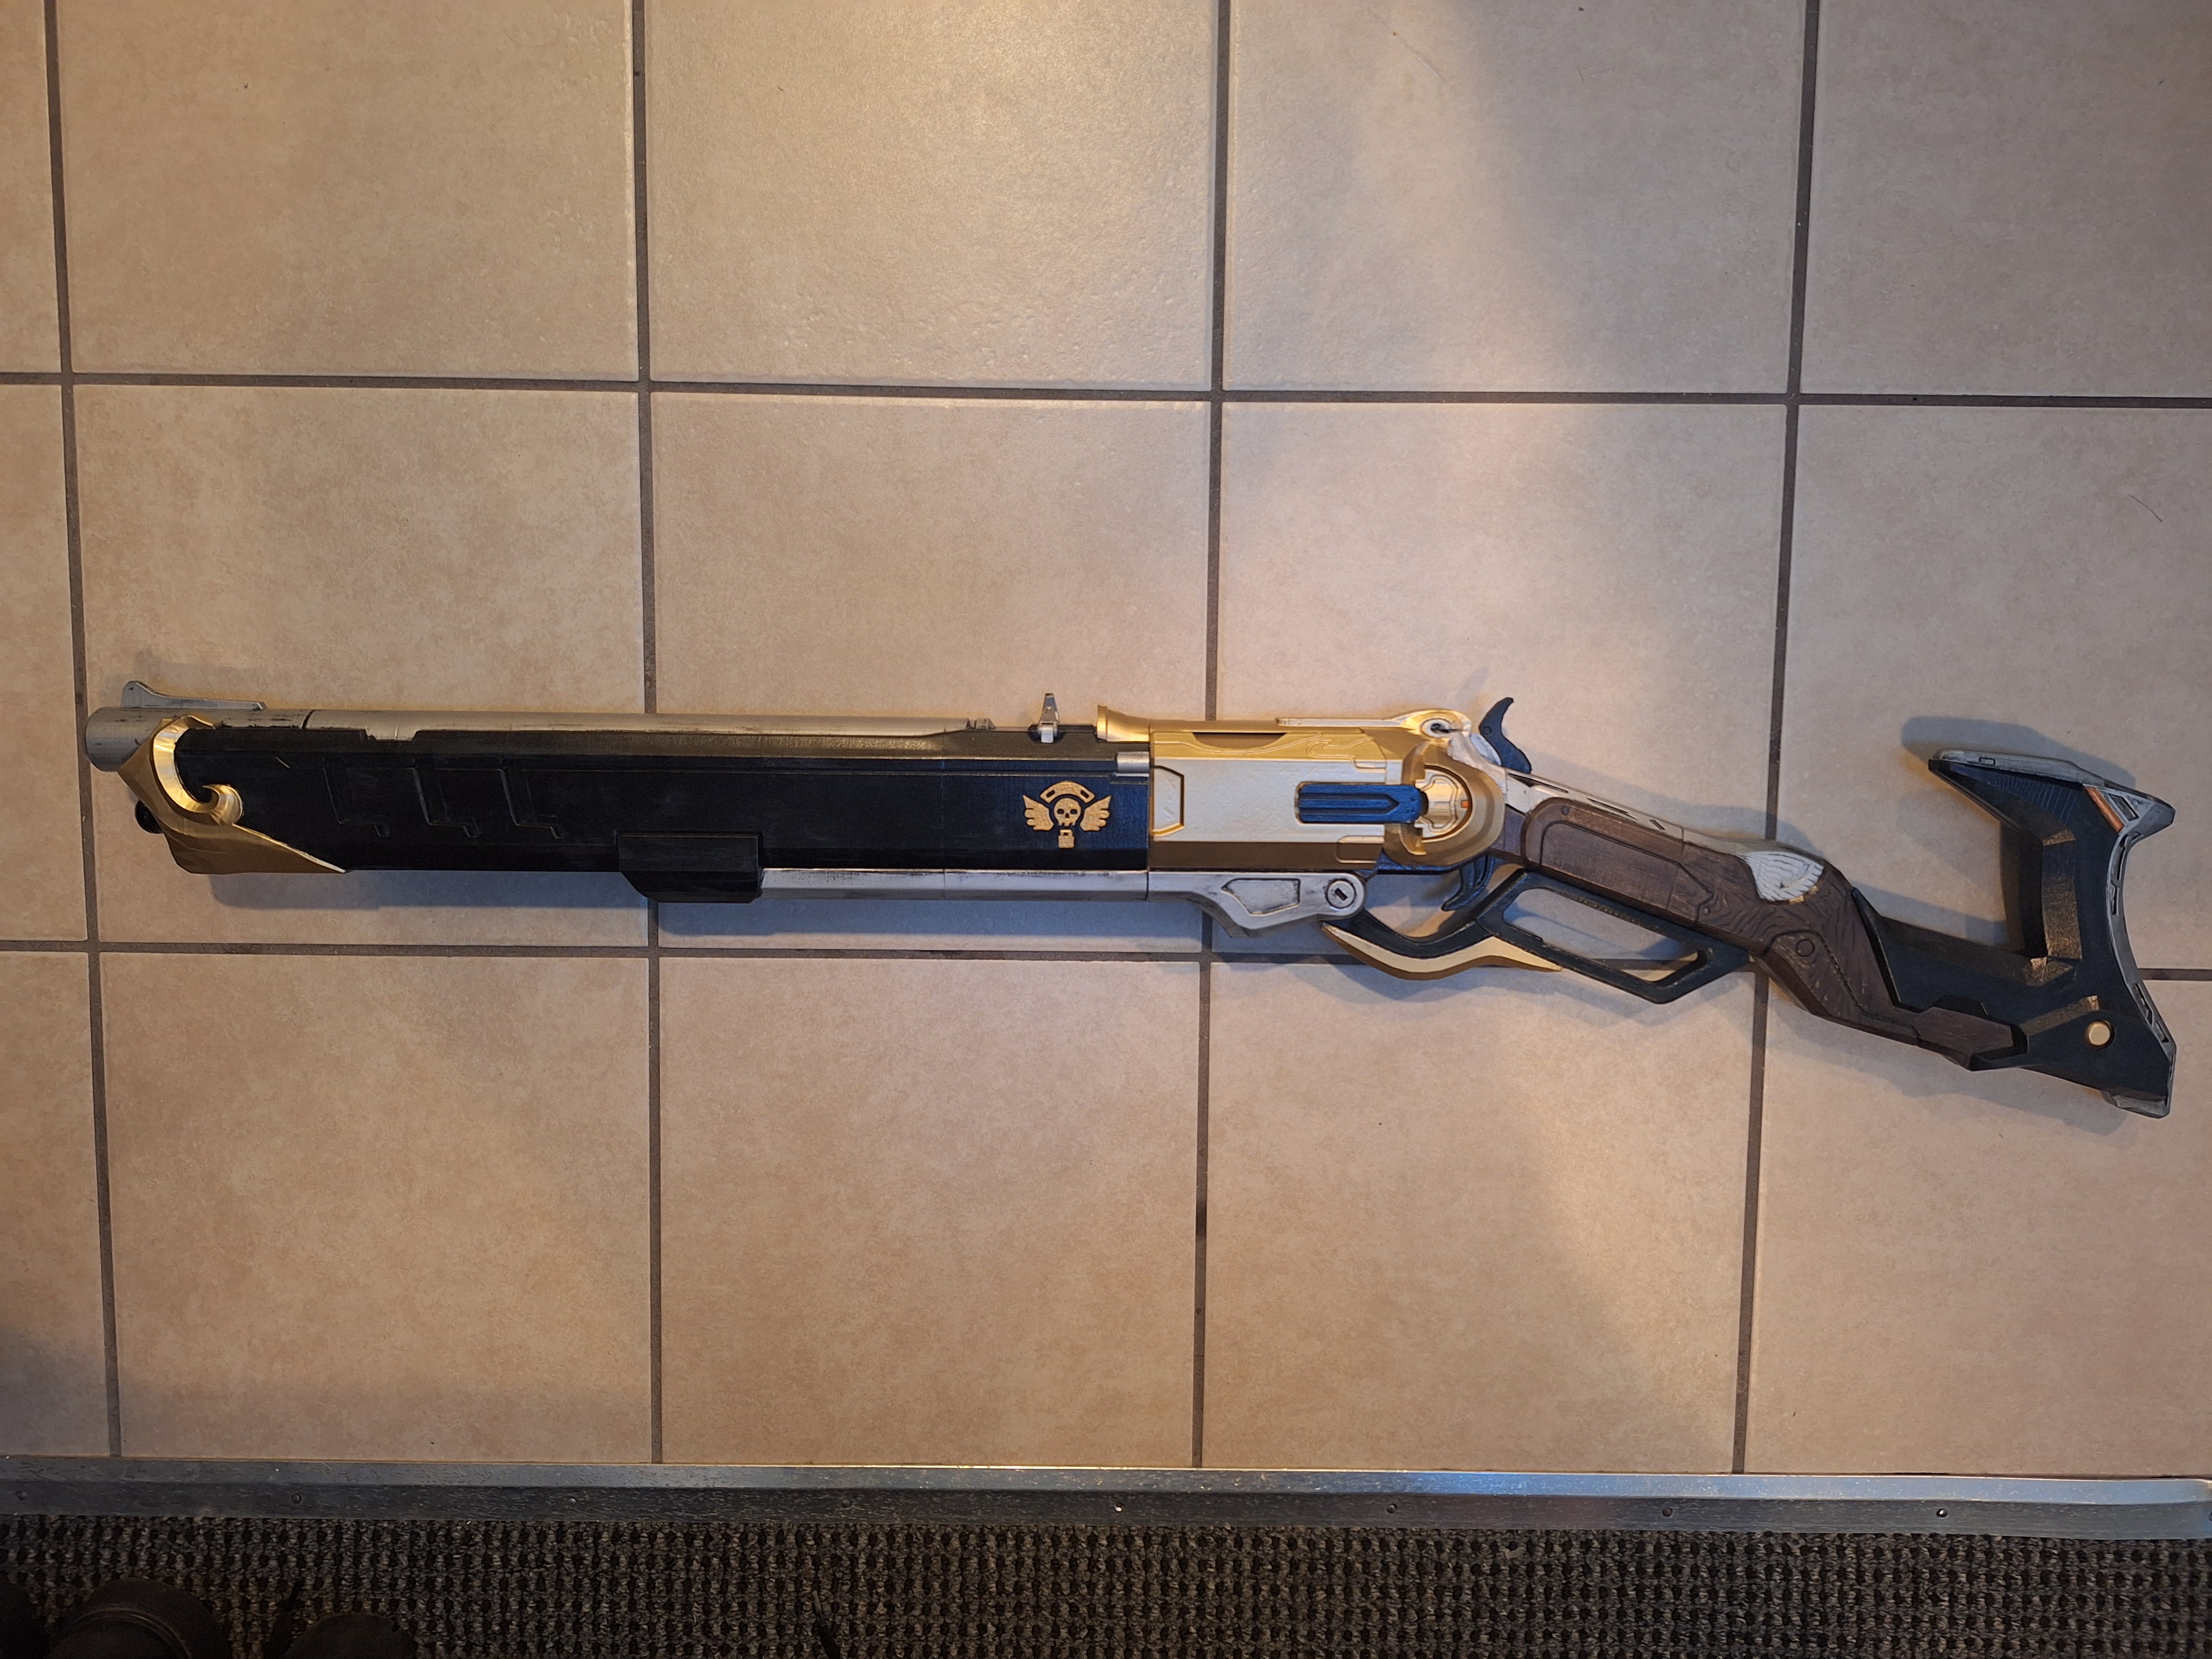
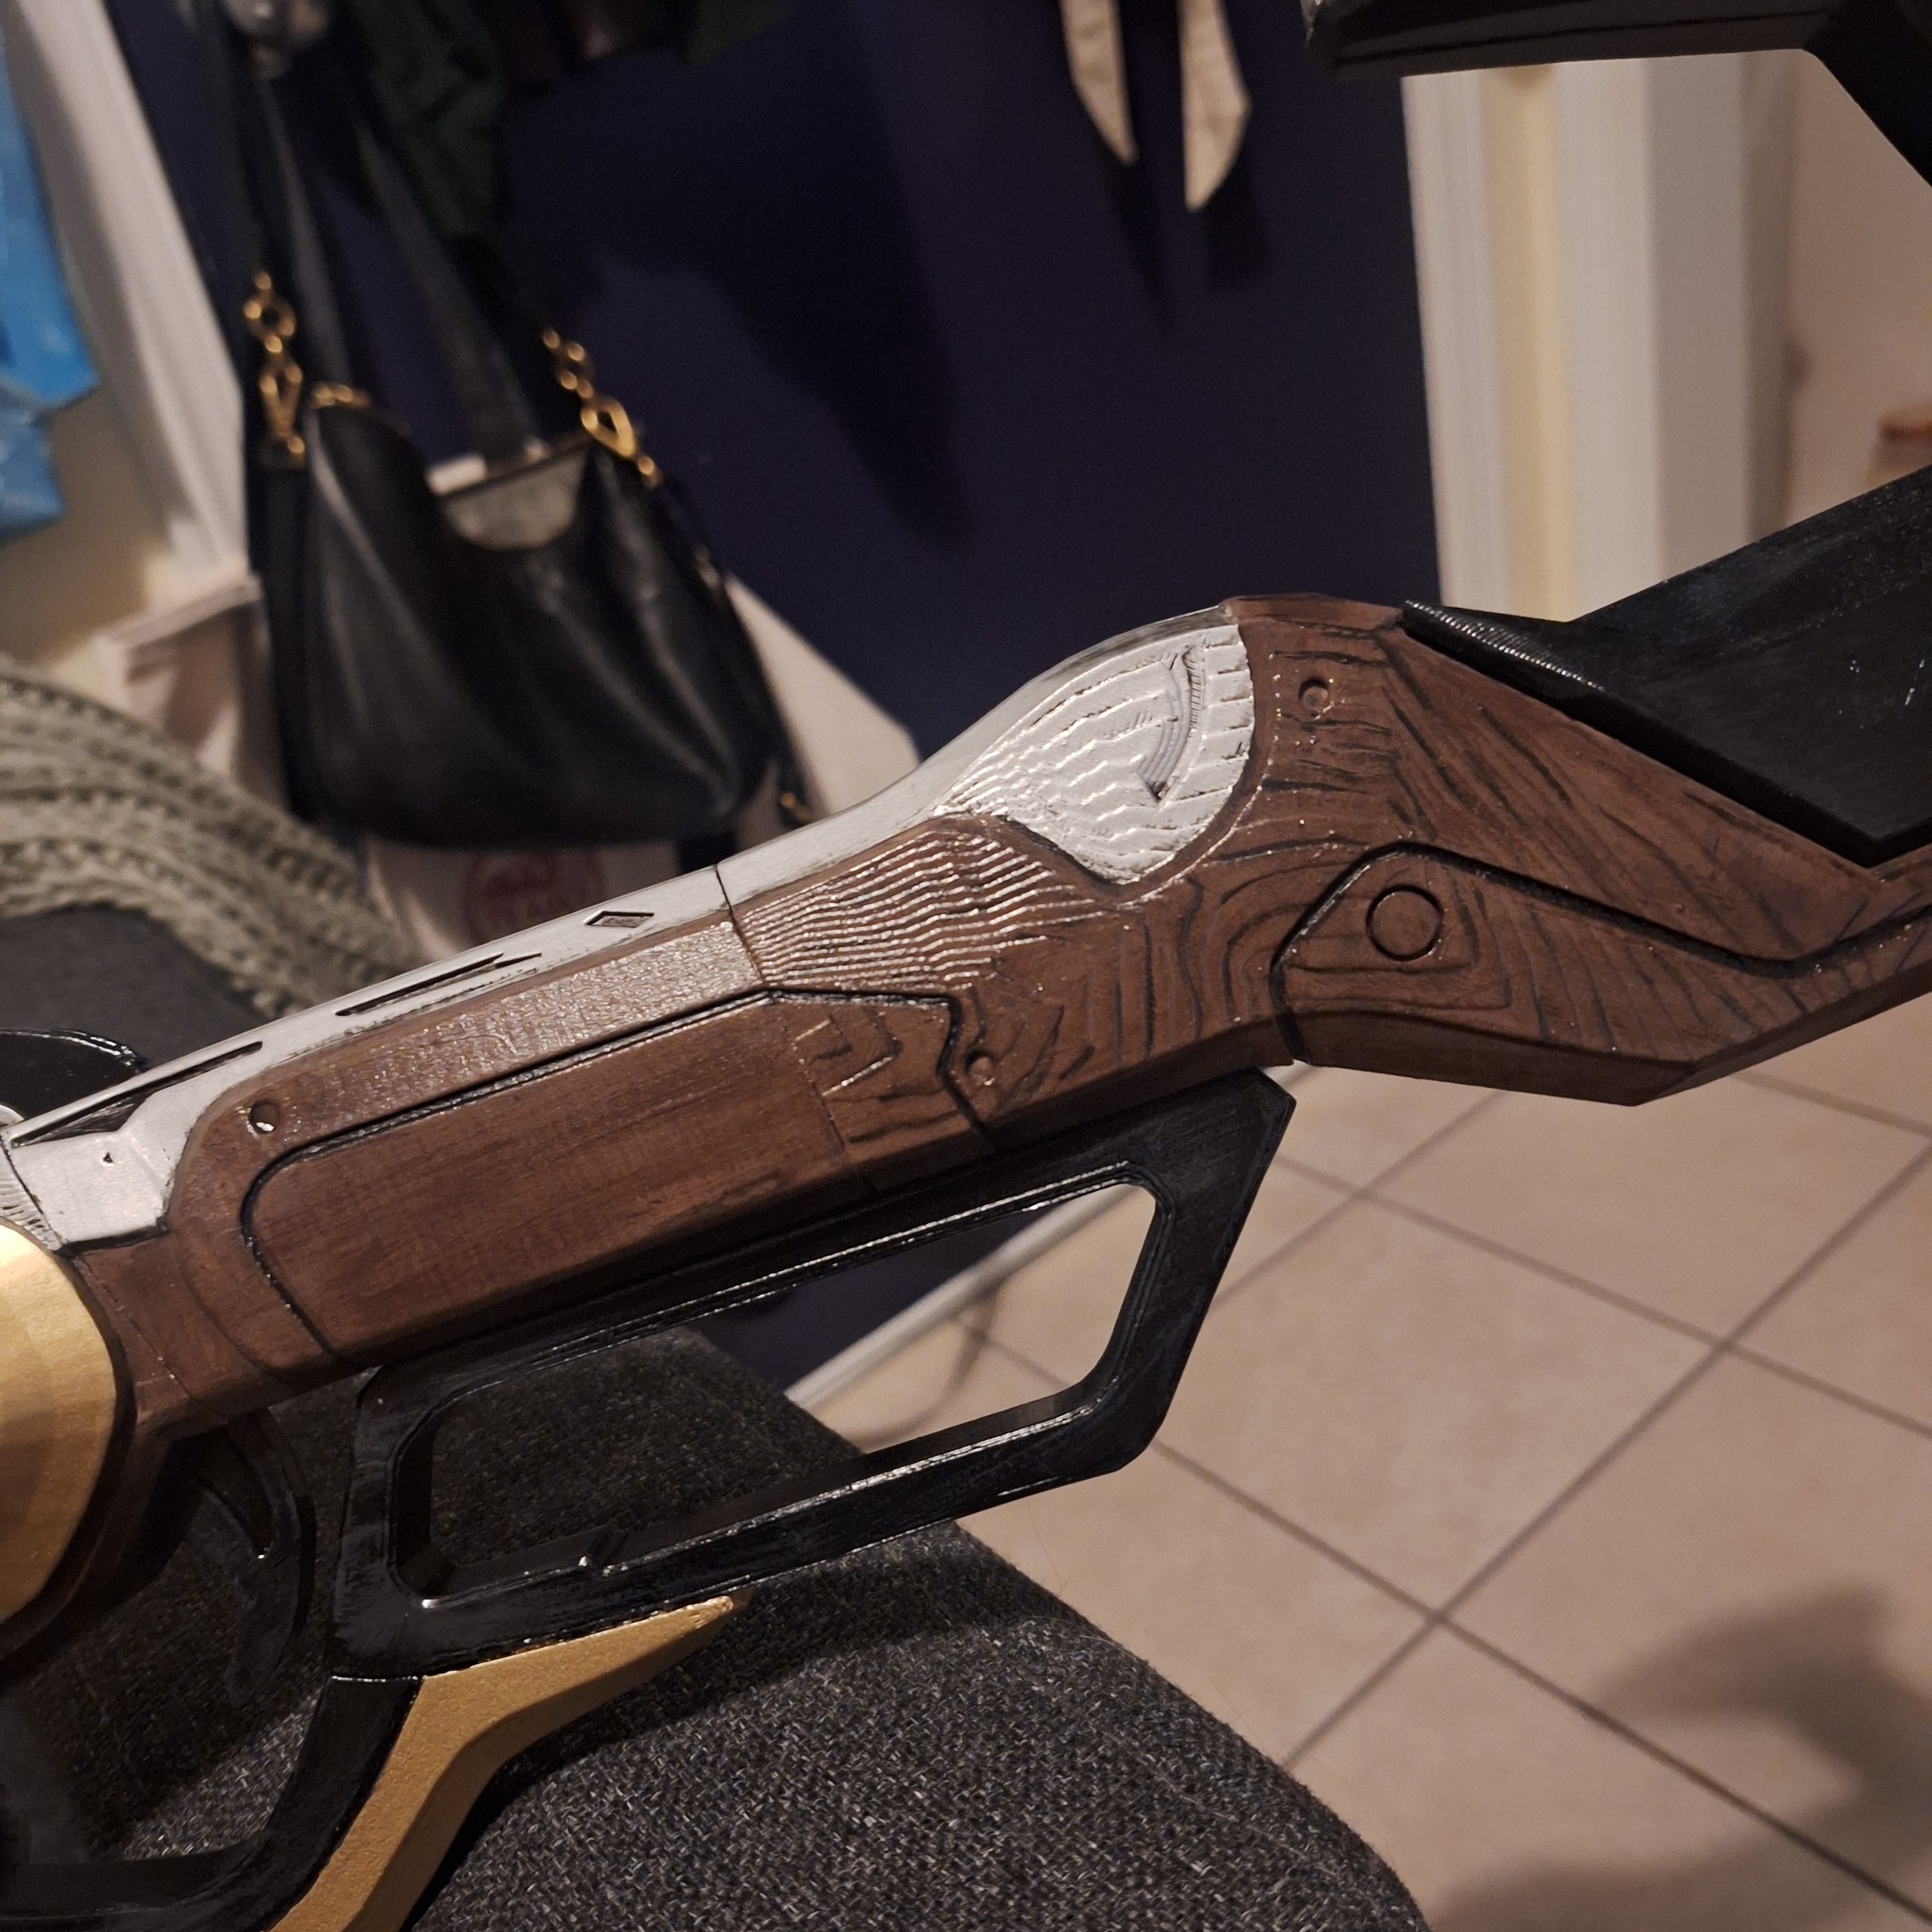
Viper Rifle
This took about 6 weeks to print each piece, glue them together, sand, and paint. It is made from PLA and has metal support rods, which helped a lot with keeping the pieces aligned when gluing. The print was designed with a movable lever and held in place with two small magnets.
-
Grenades
3D printed, spray painted, glued magnets to the tea lights to hold the tops and bottoms together
Grenades completed. Short loop, no sound. -
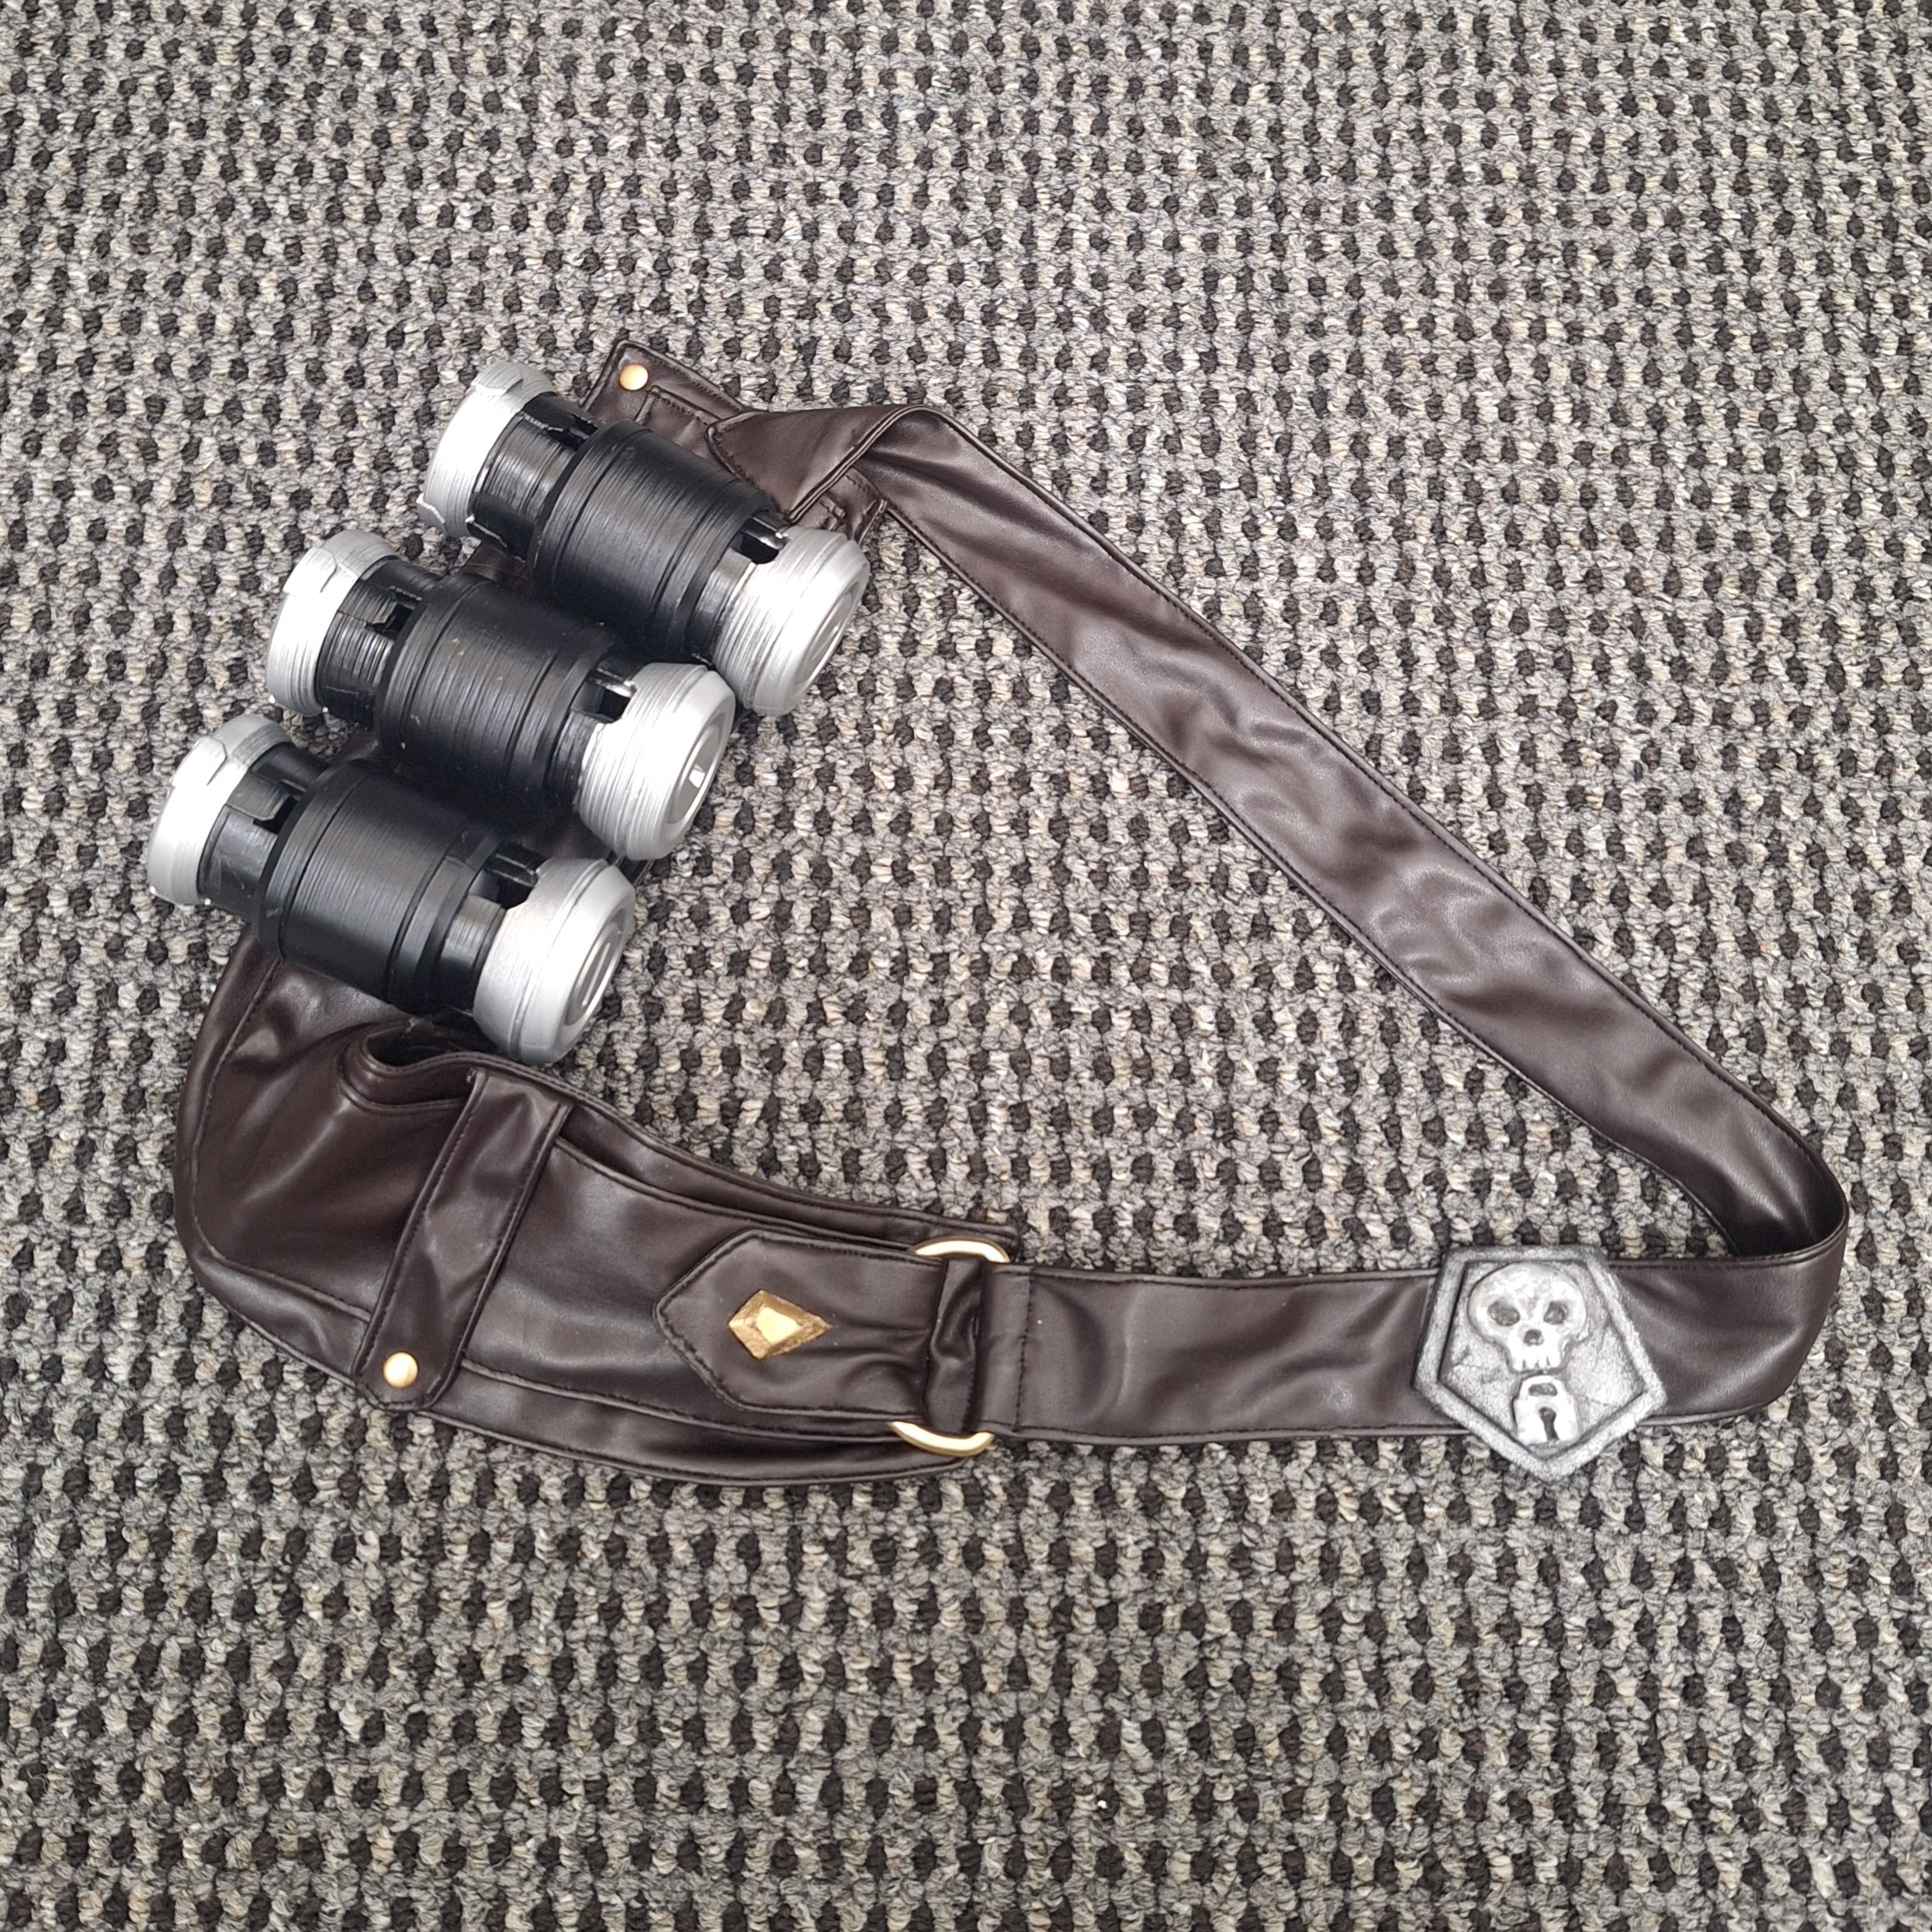
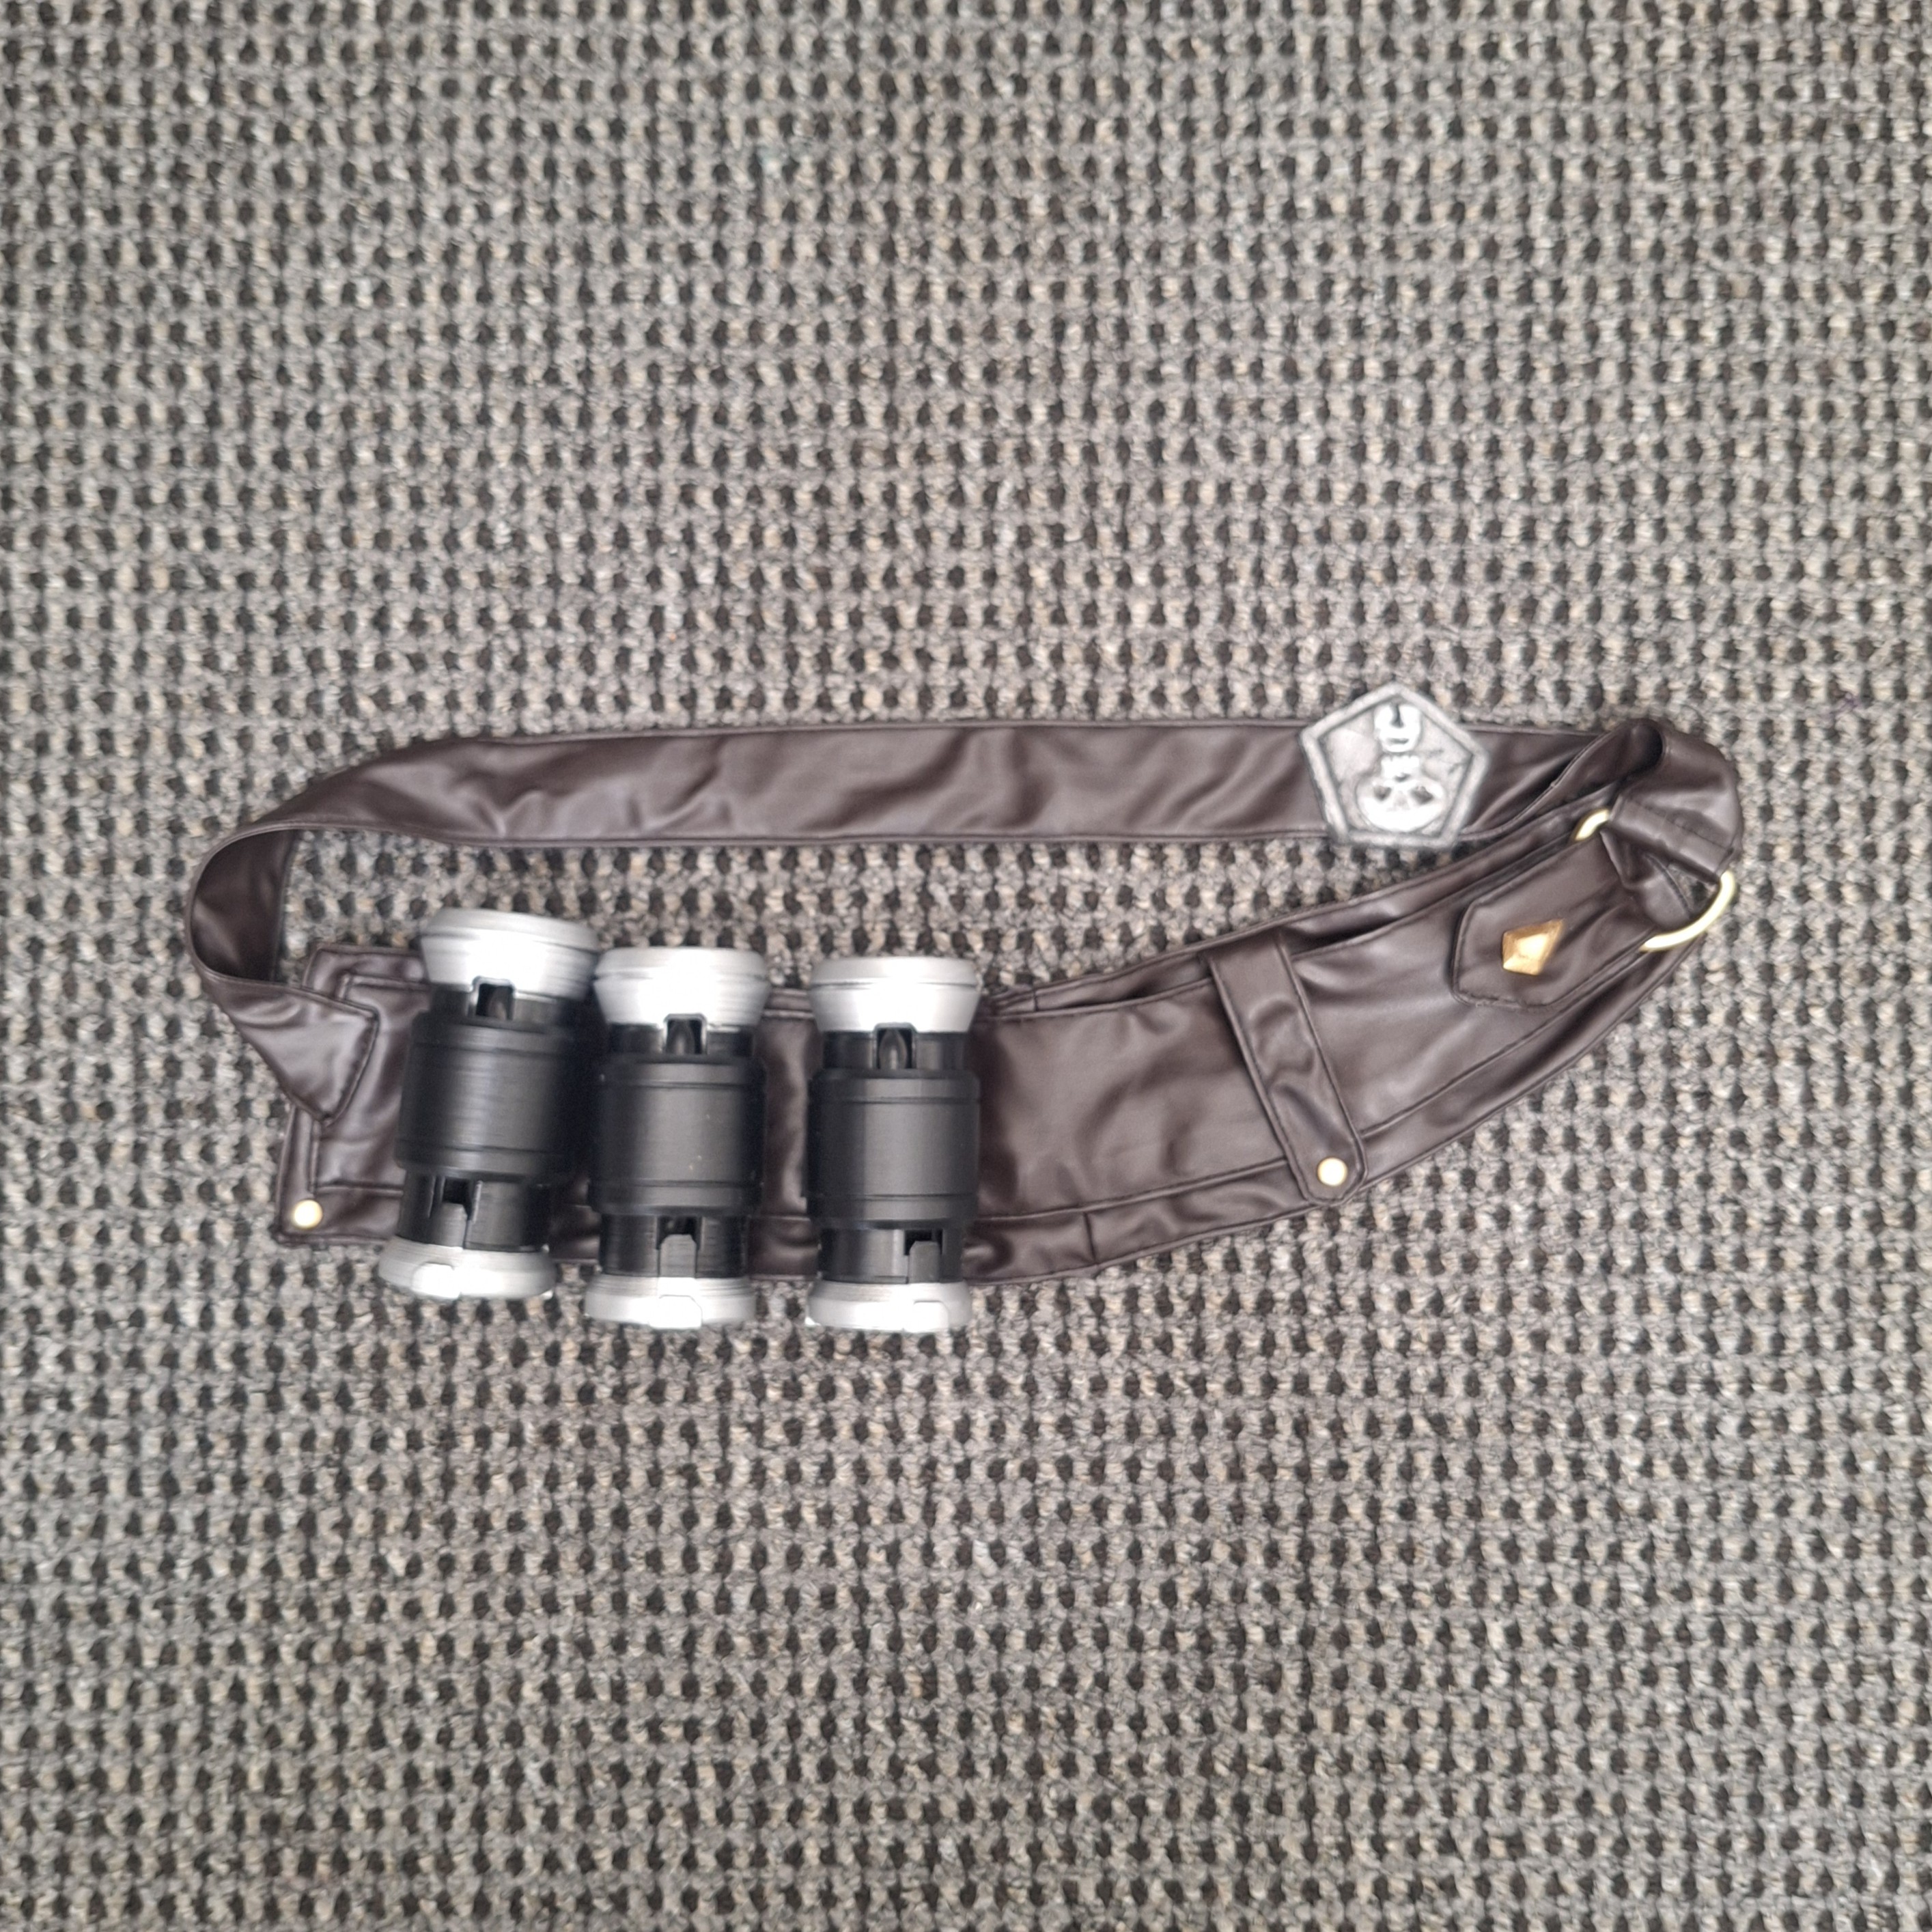
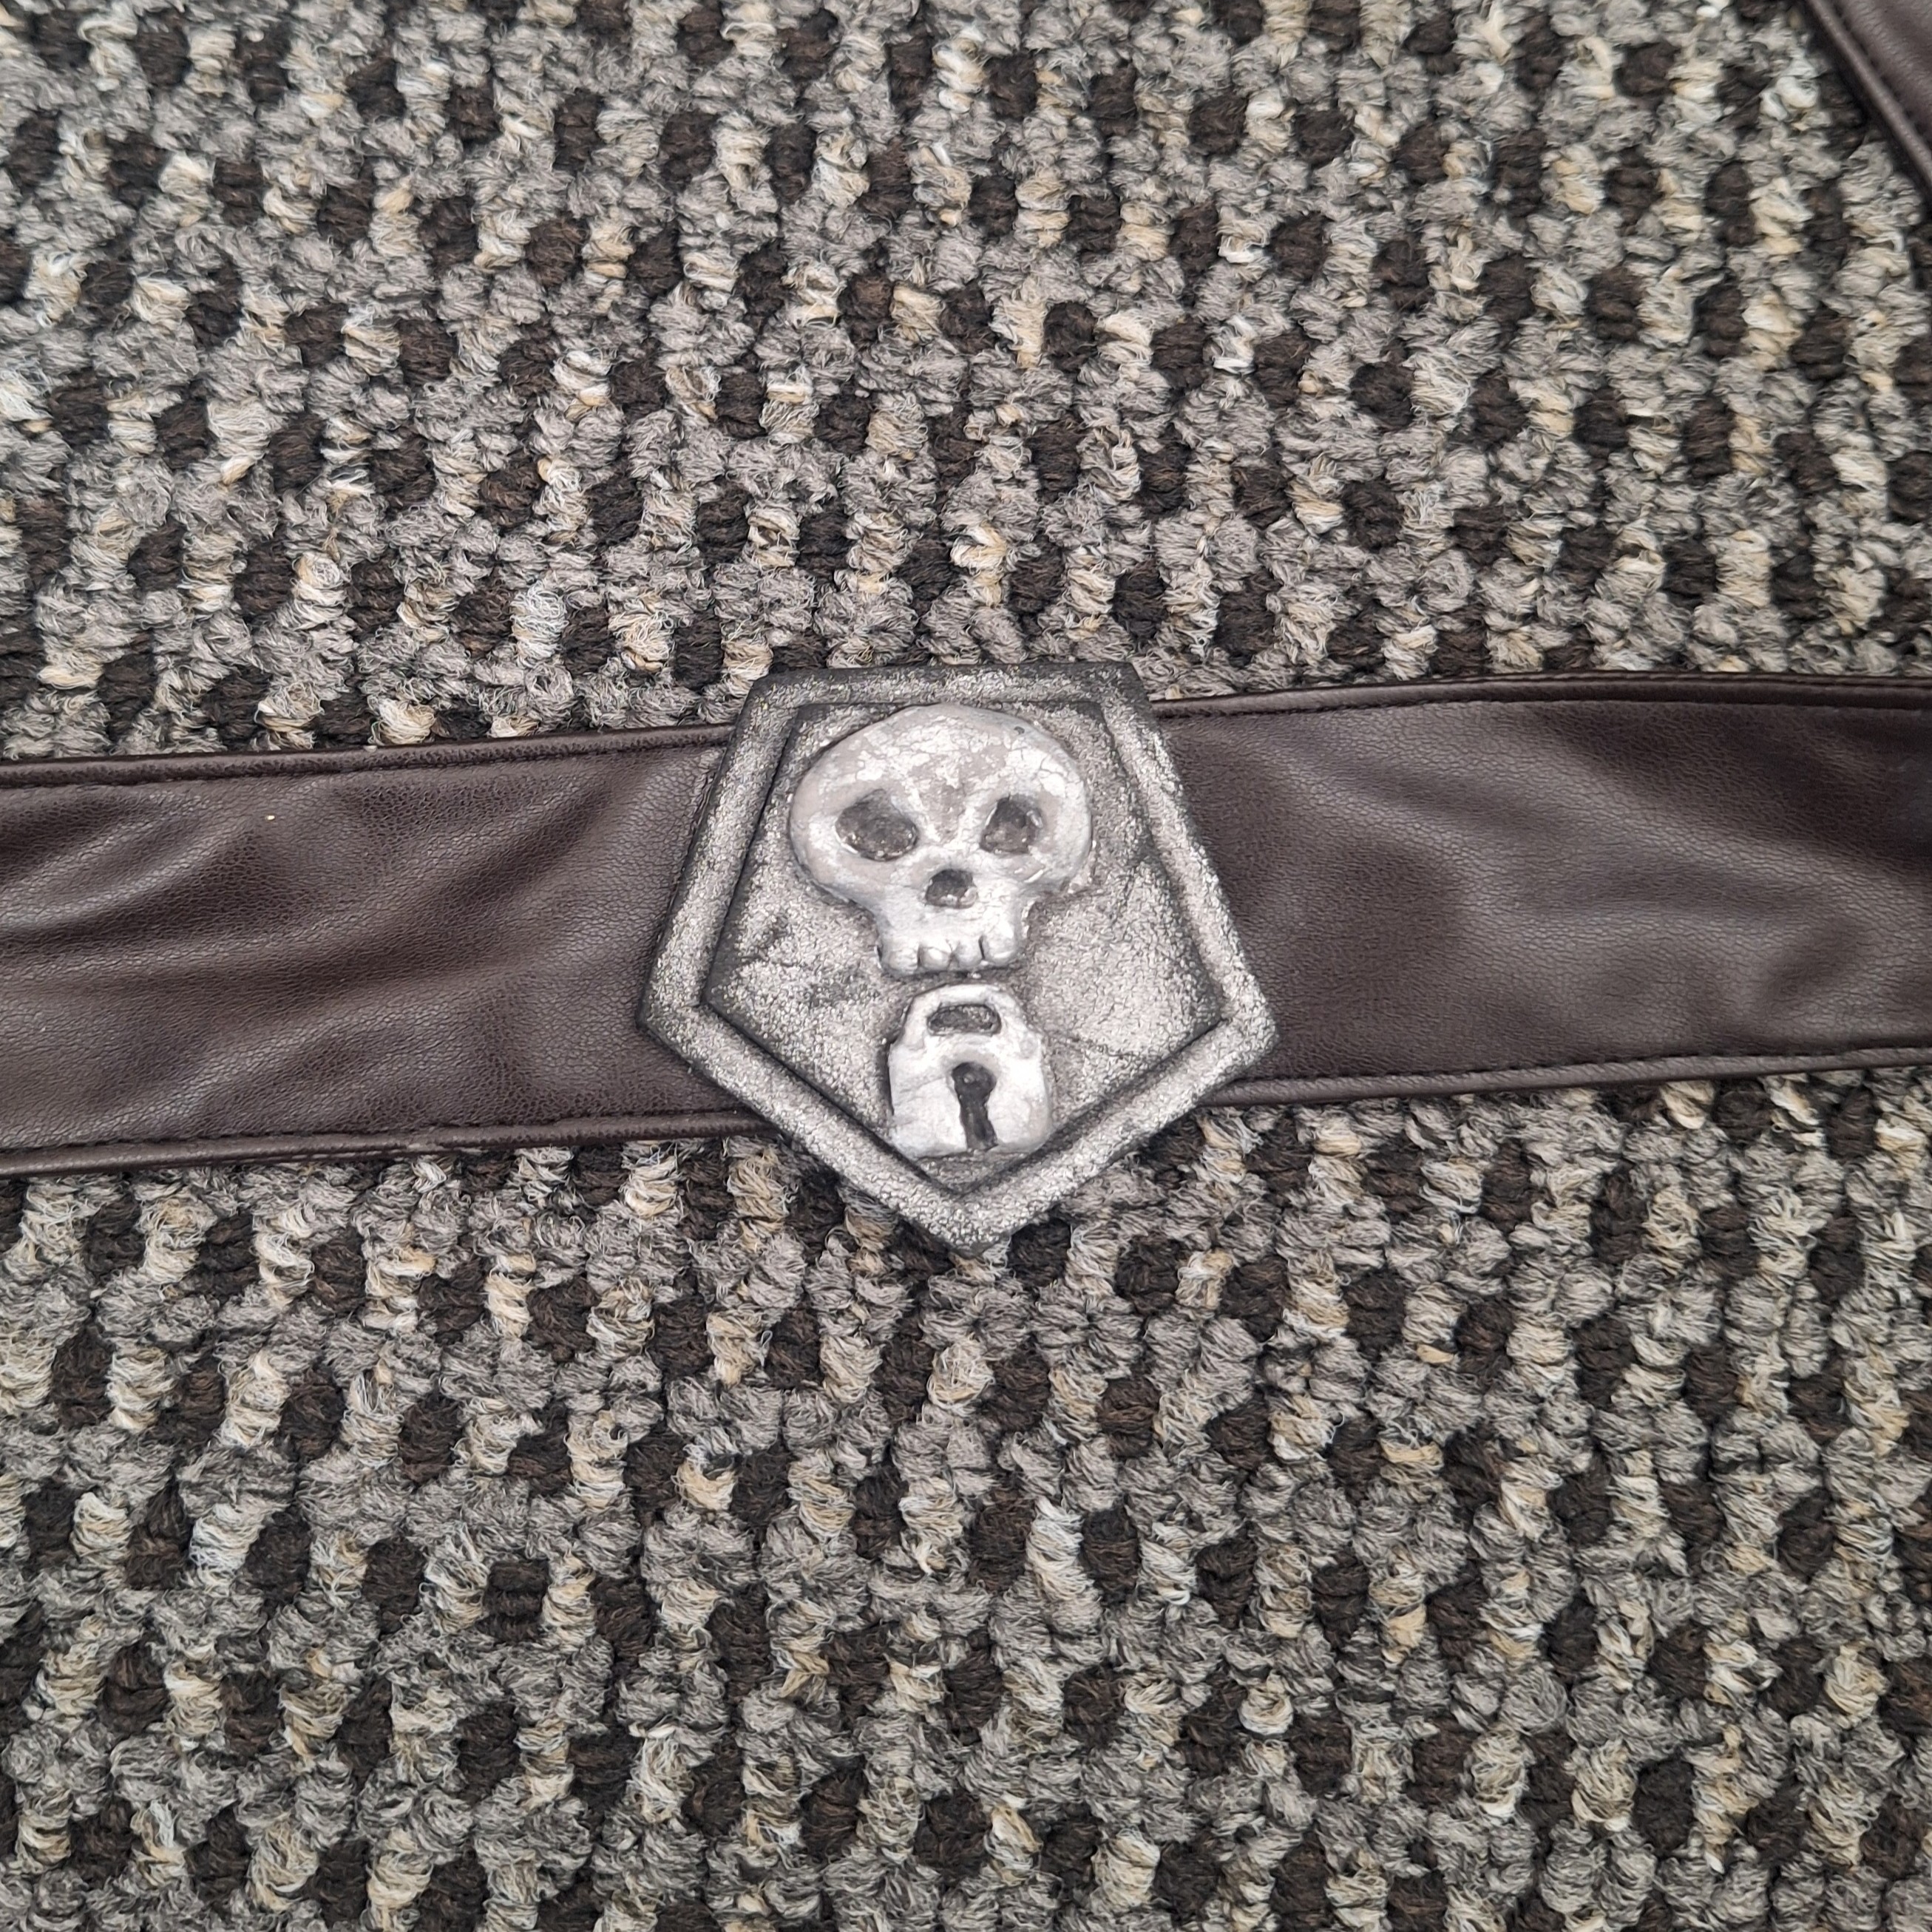
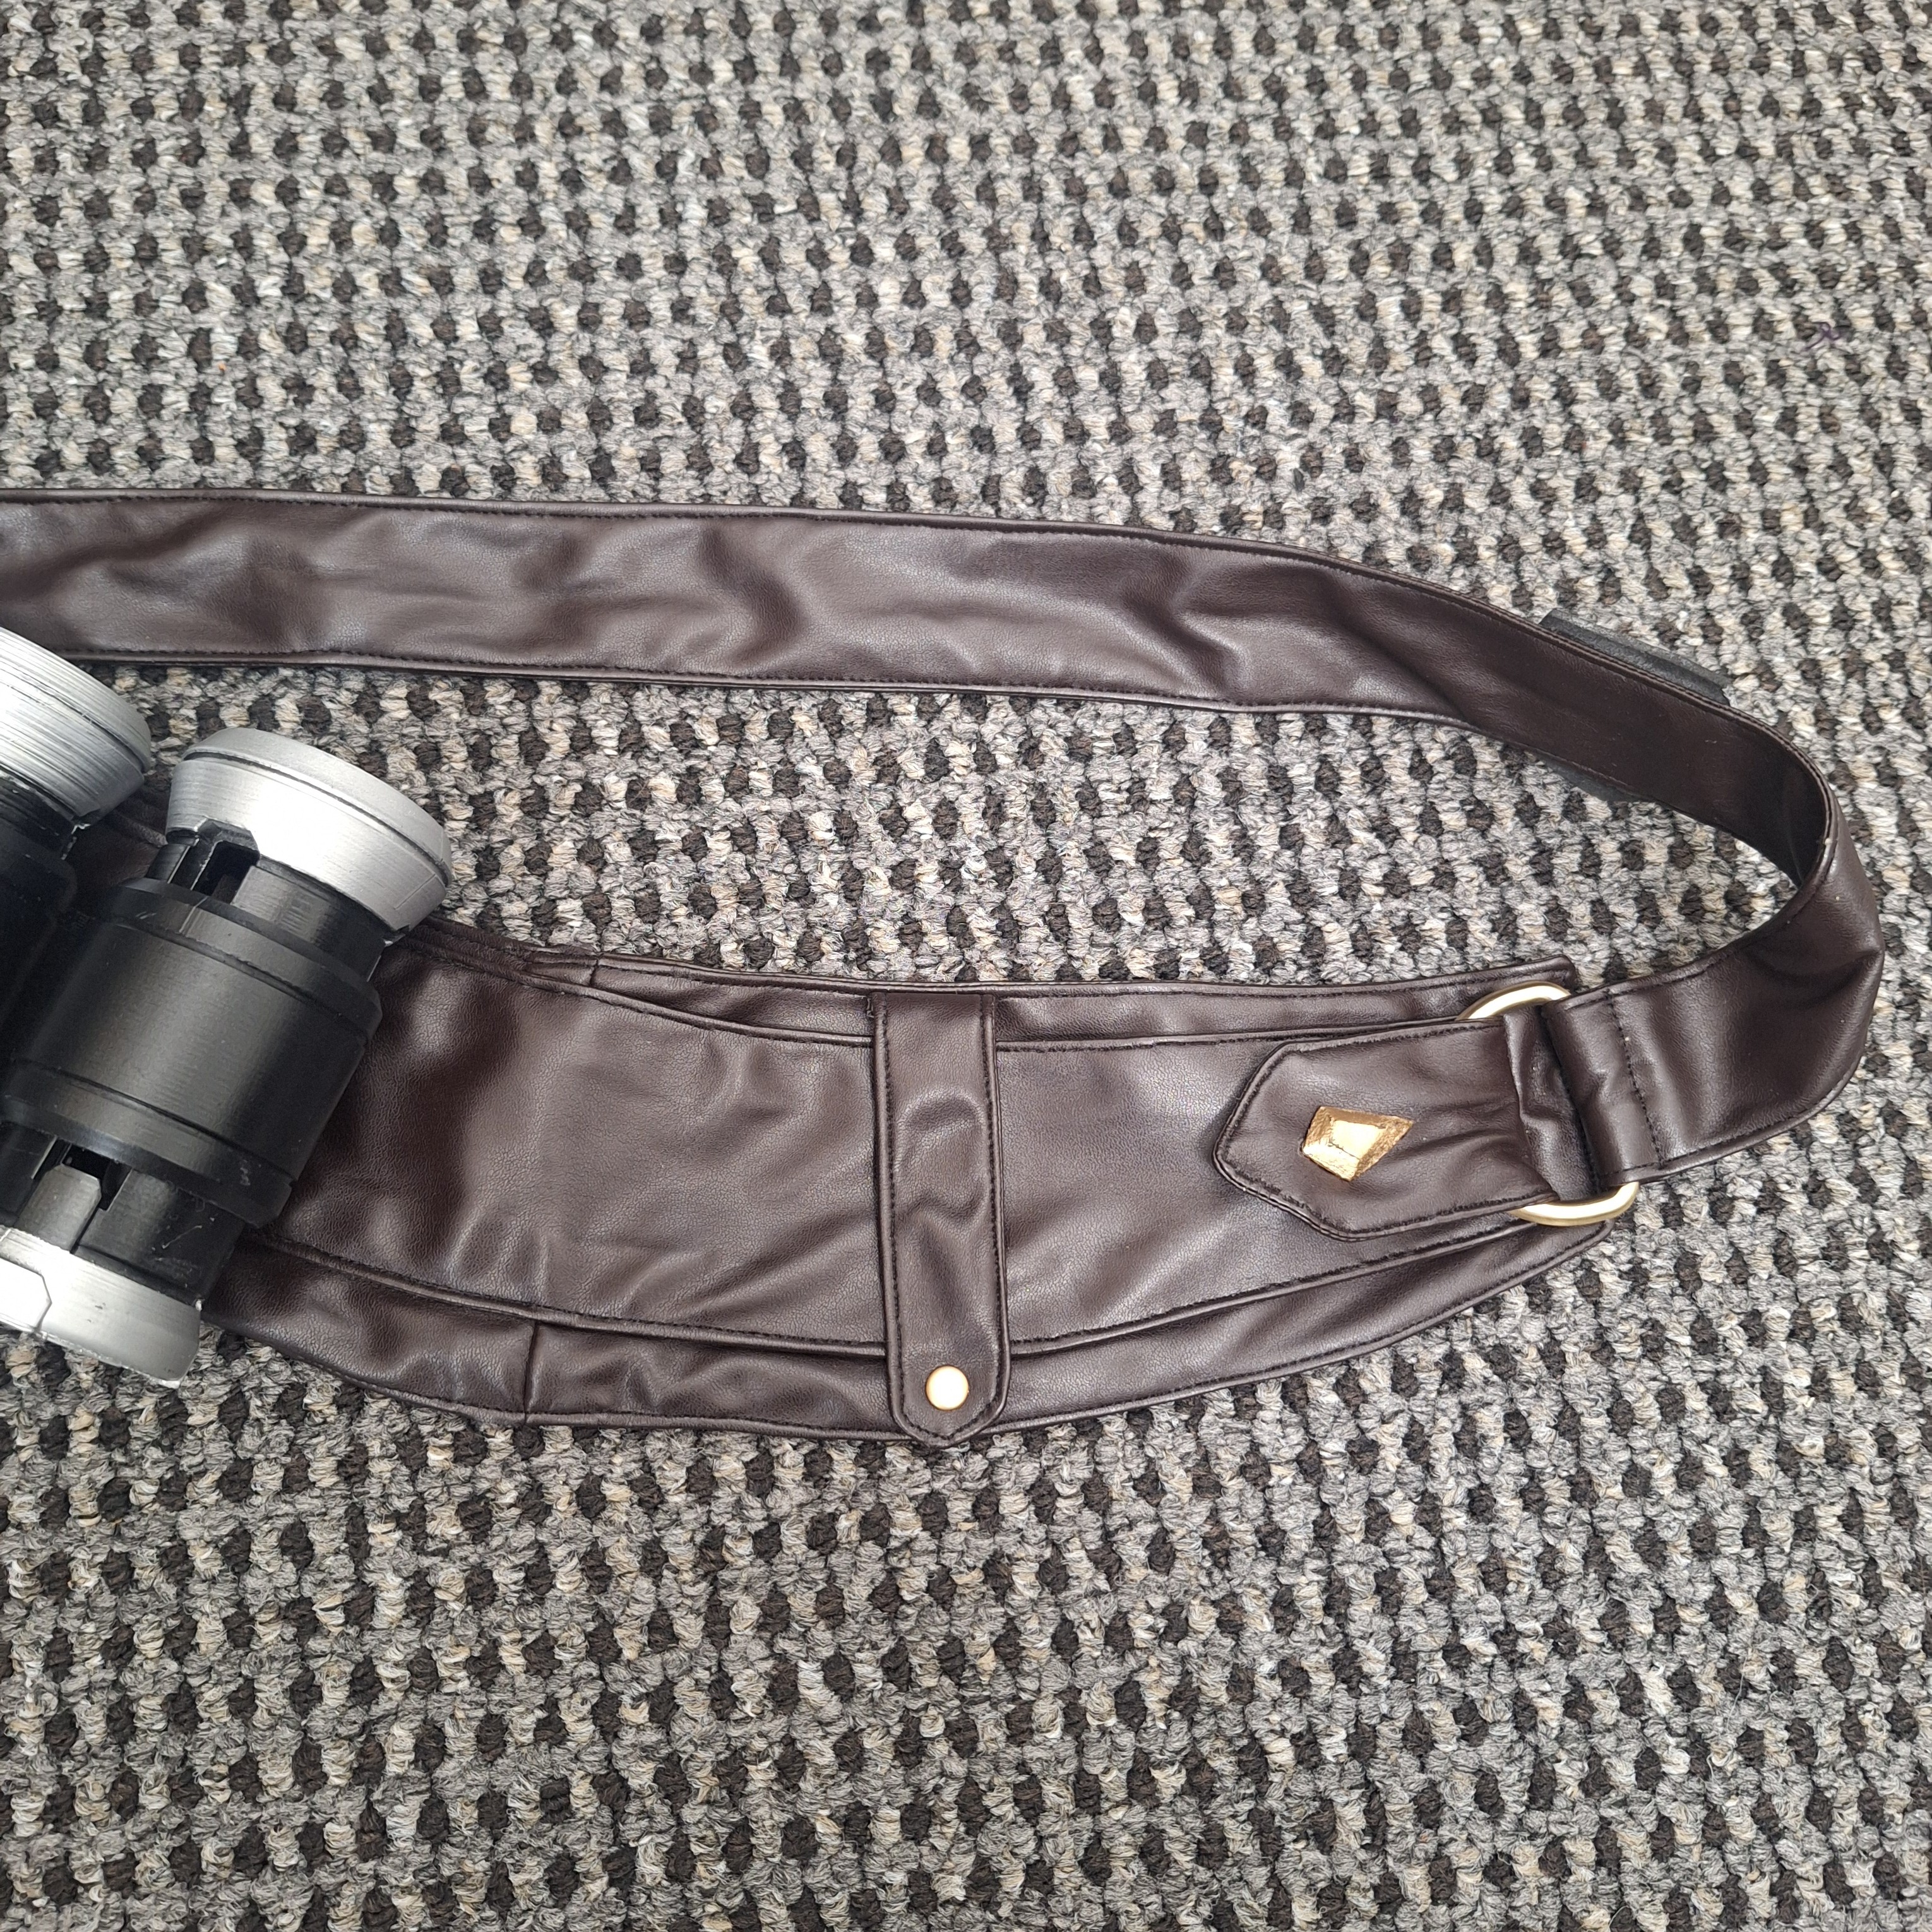
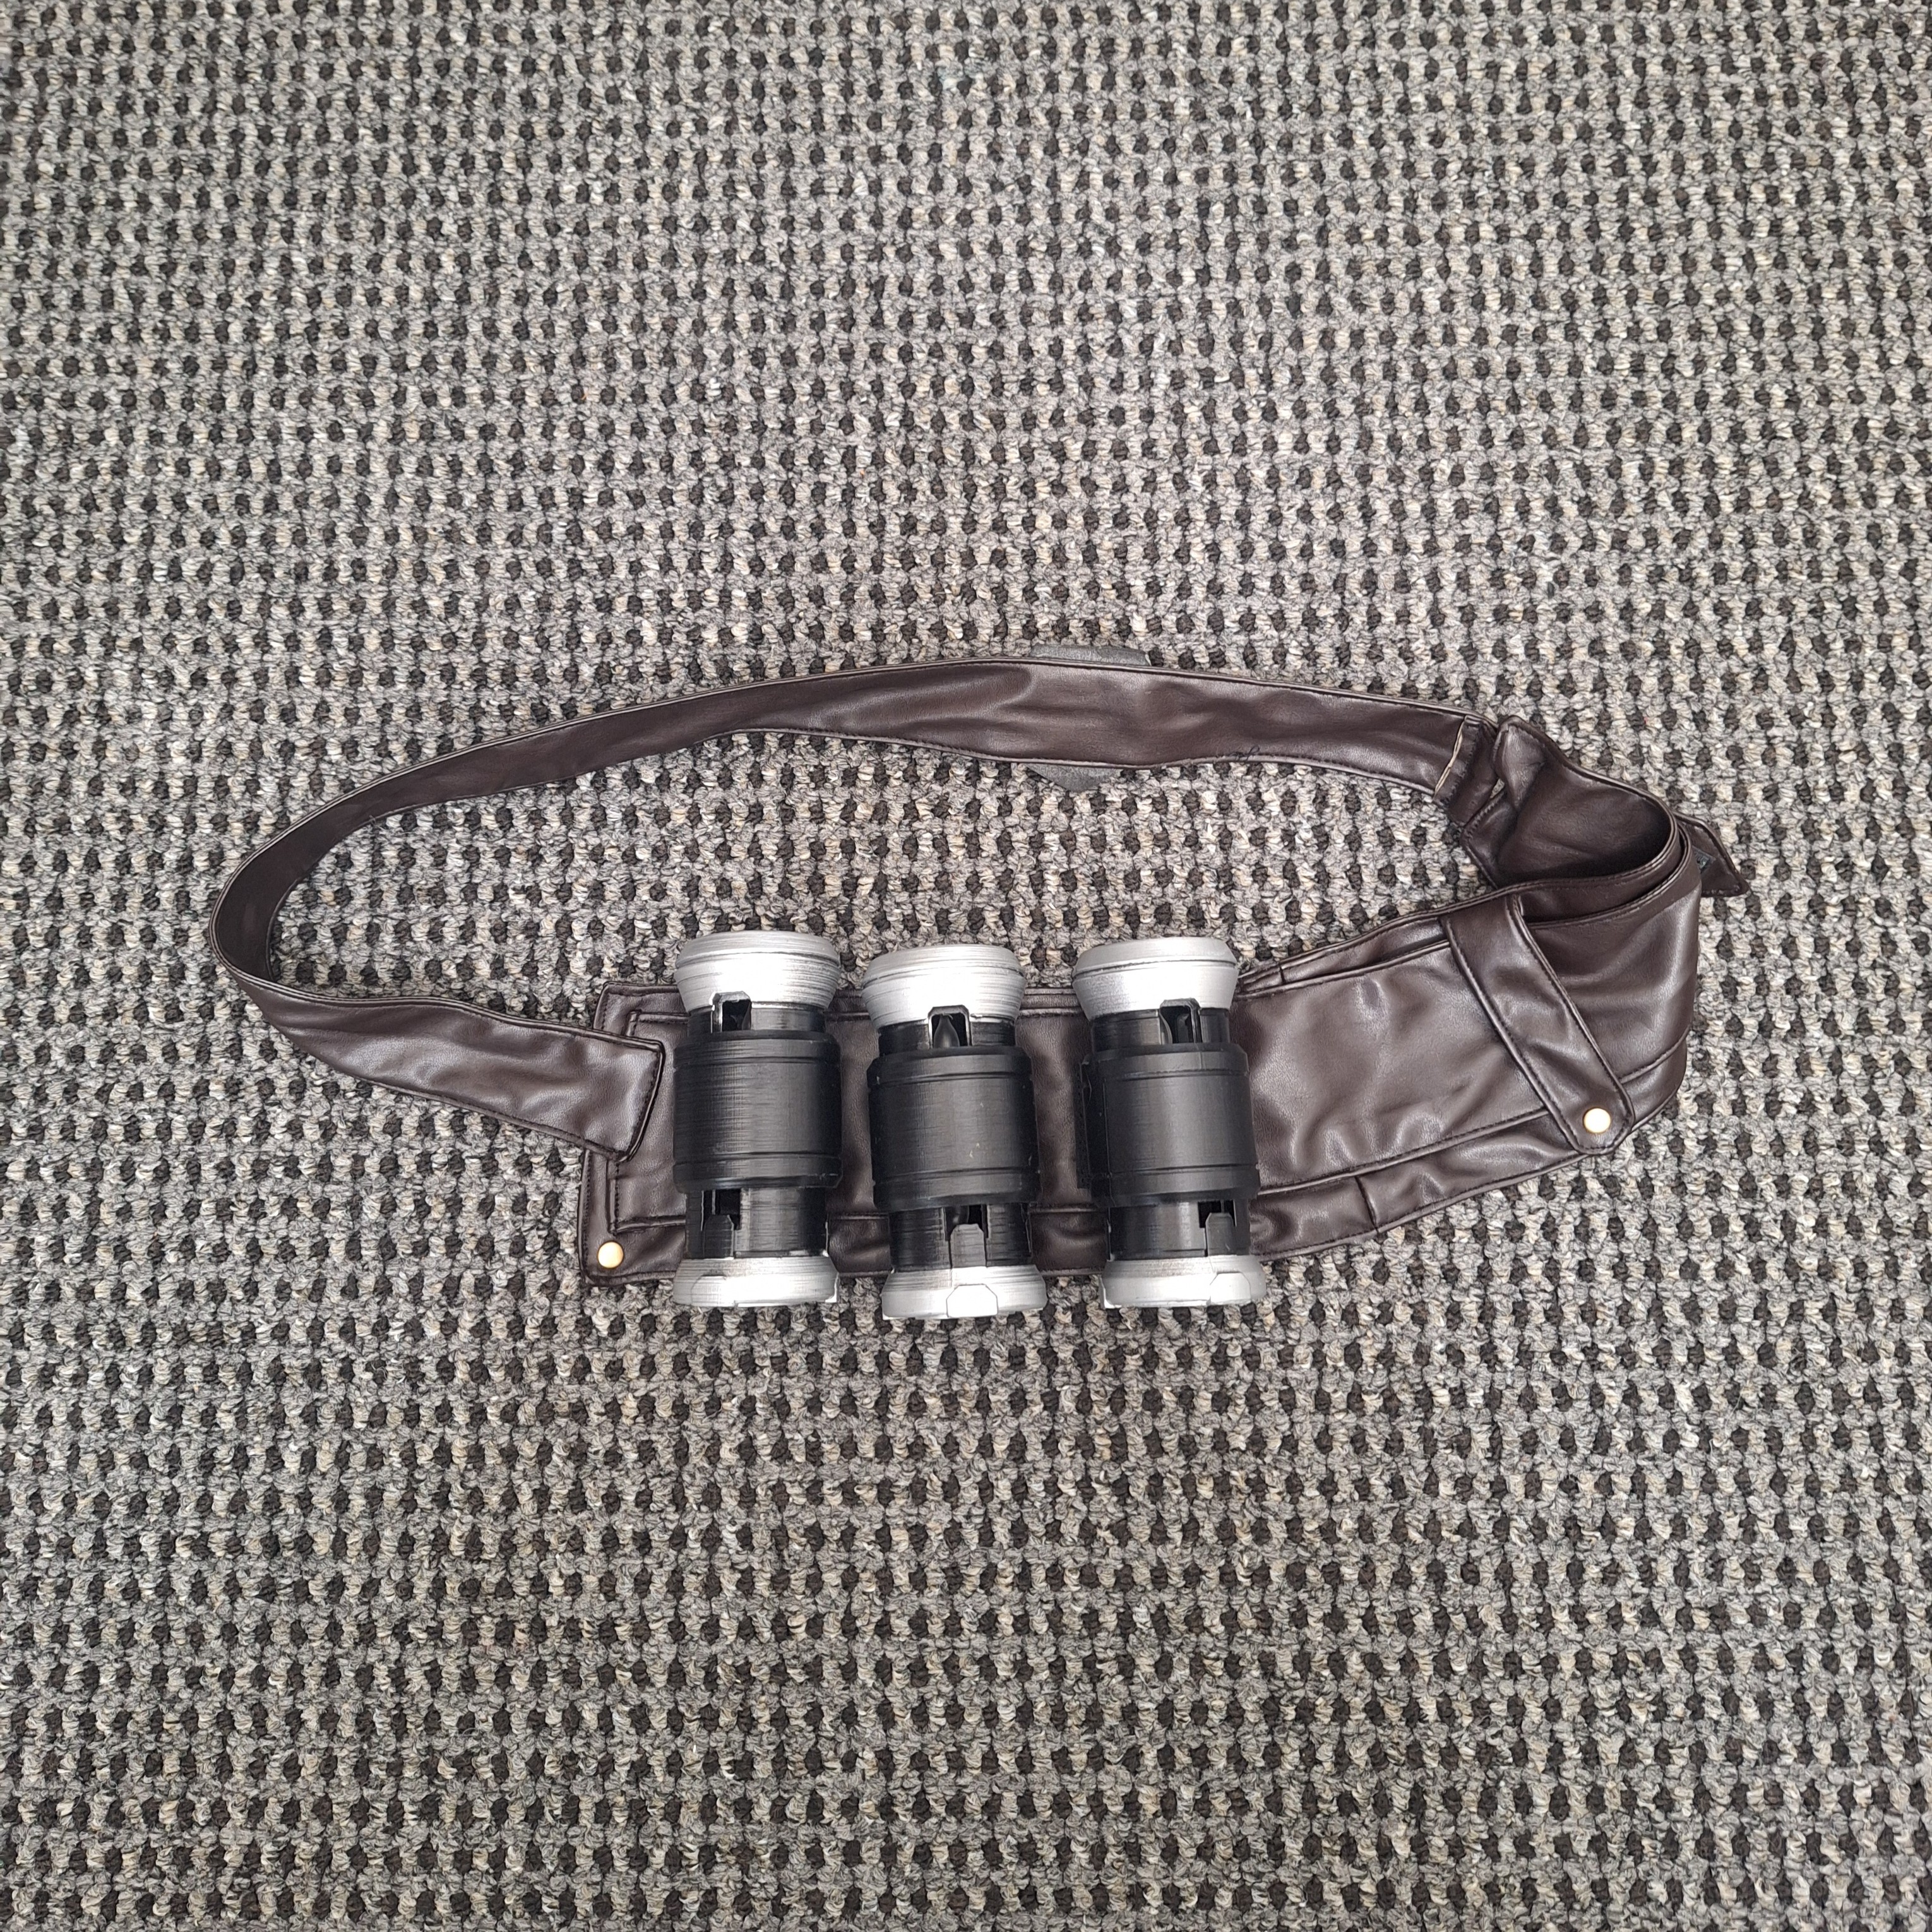
Brown Belt for Grenades
This belt was self-drafted. It has a couple rivets which I painted with metallic spray paint, a D ring which I purchased, and a decorative diamond and skull belt buckle. They are both made from EVA foam. The skull was created using foam clay and painted with spray paint and acrylic paint.
-
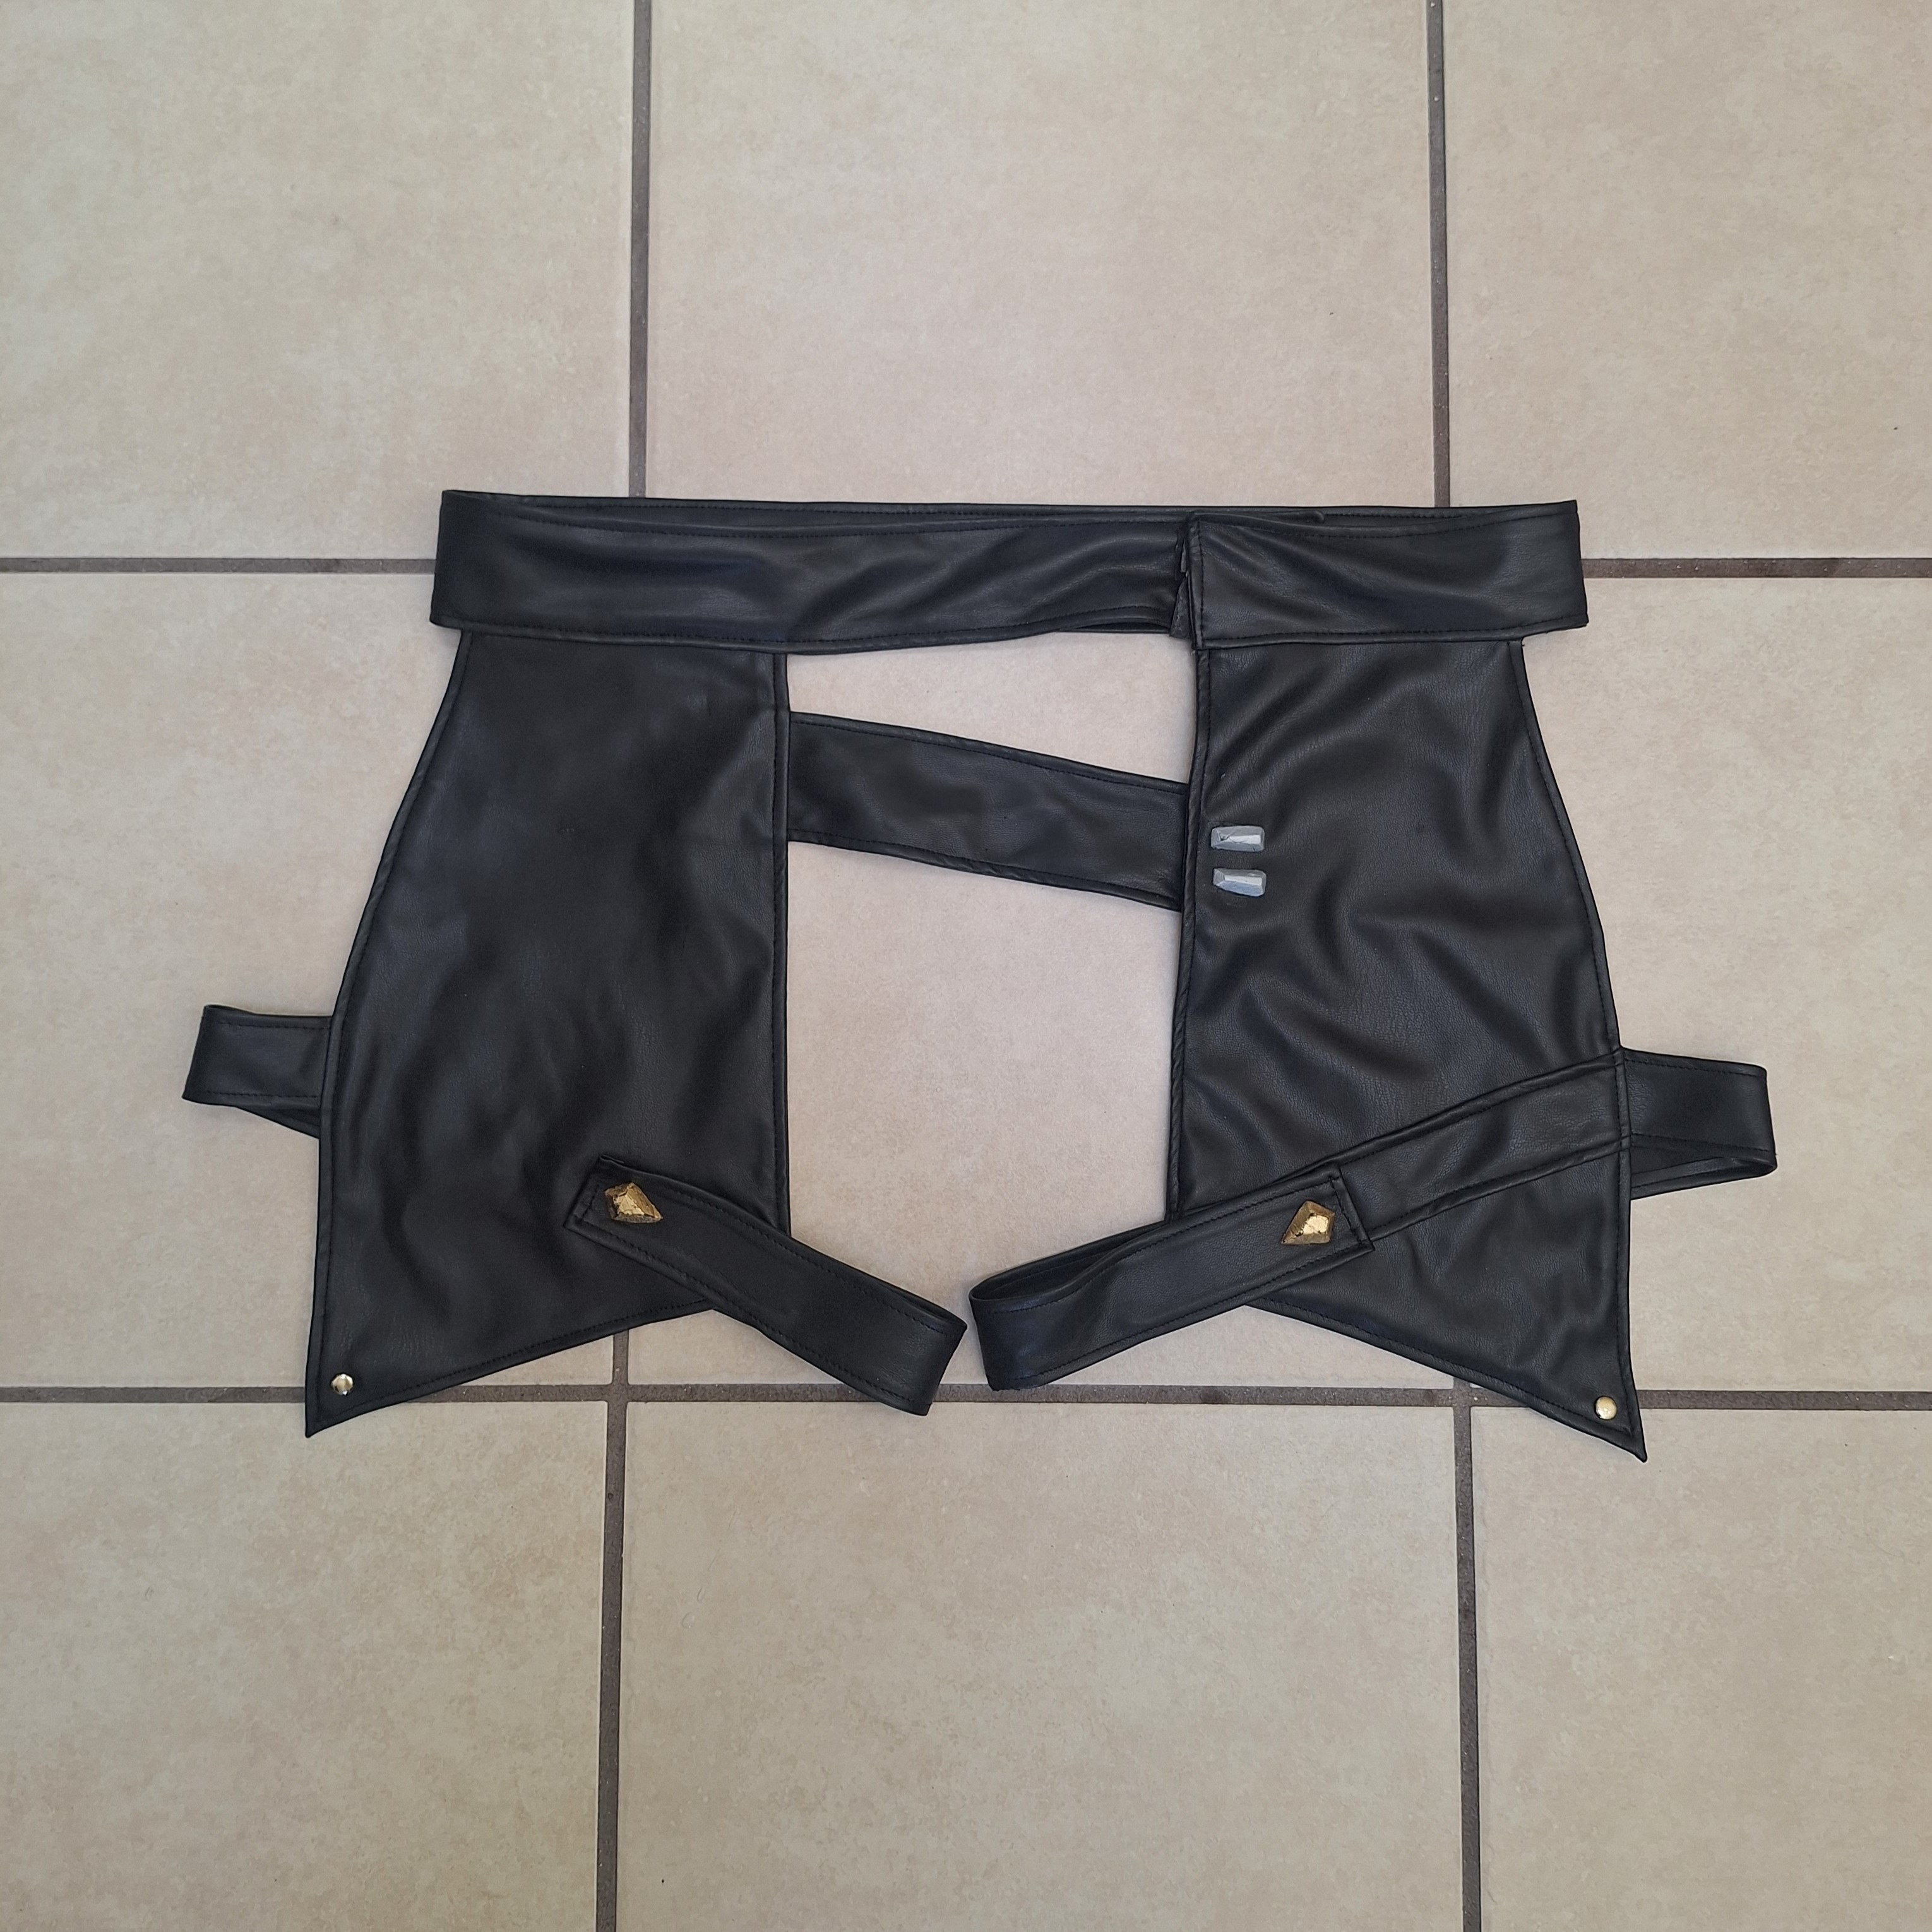
Black Hip Belt
For the main side pieces, I used the piece provided in the pattern in the link below. The rest of the straps were self-drafted. For the details, I carved them out of EVA foam and spray painted them. The belt was secured with velcro on the waist and leg straps. It is also secured to the leggings with large metal snaps.
-
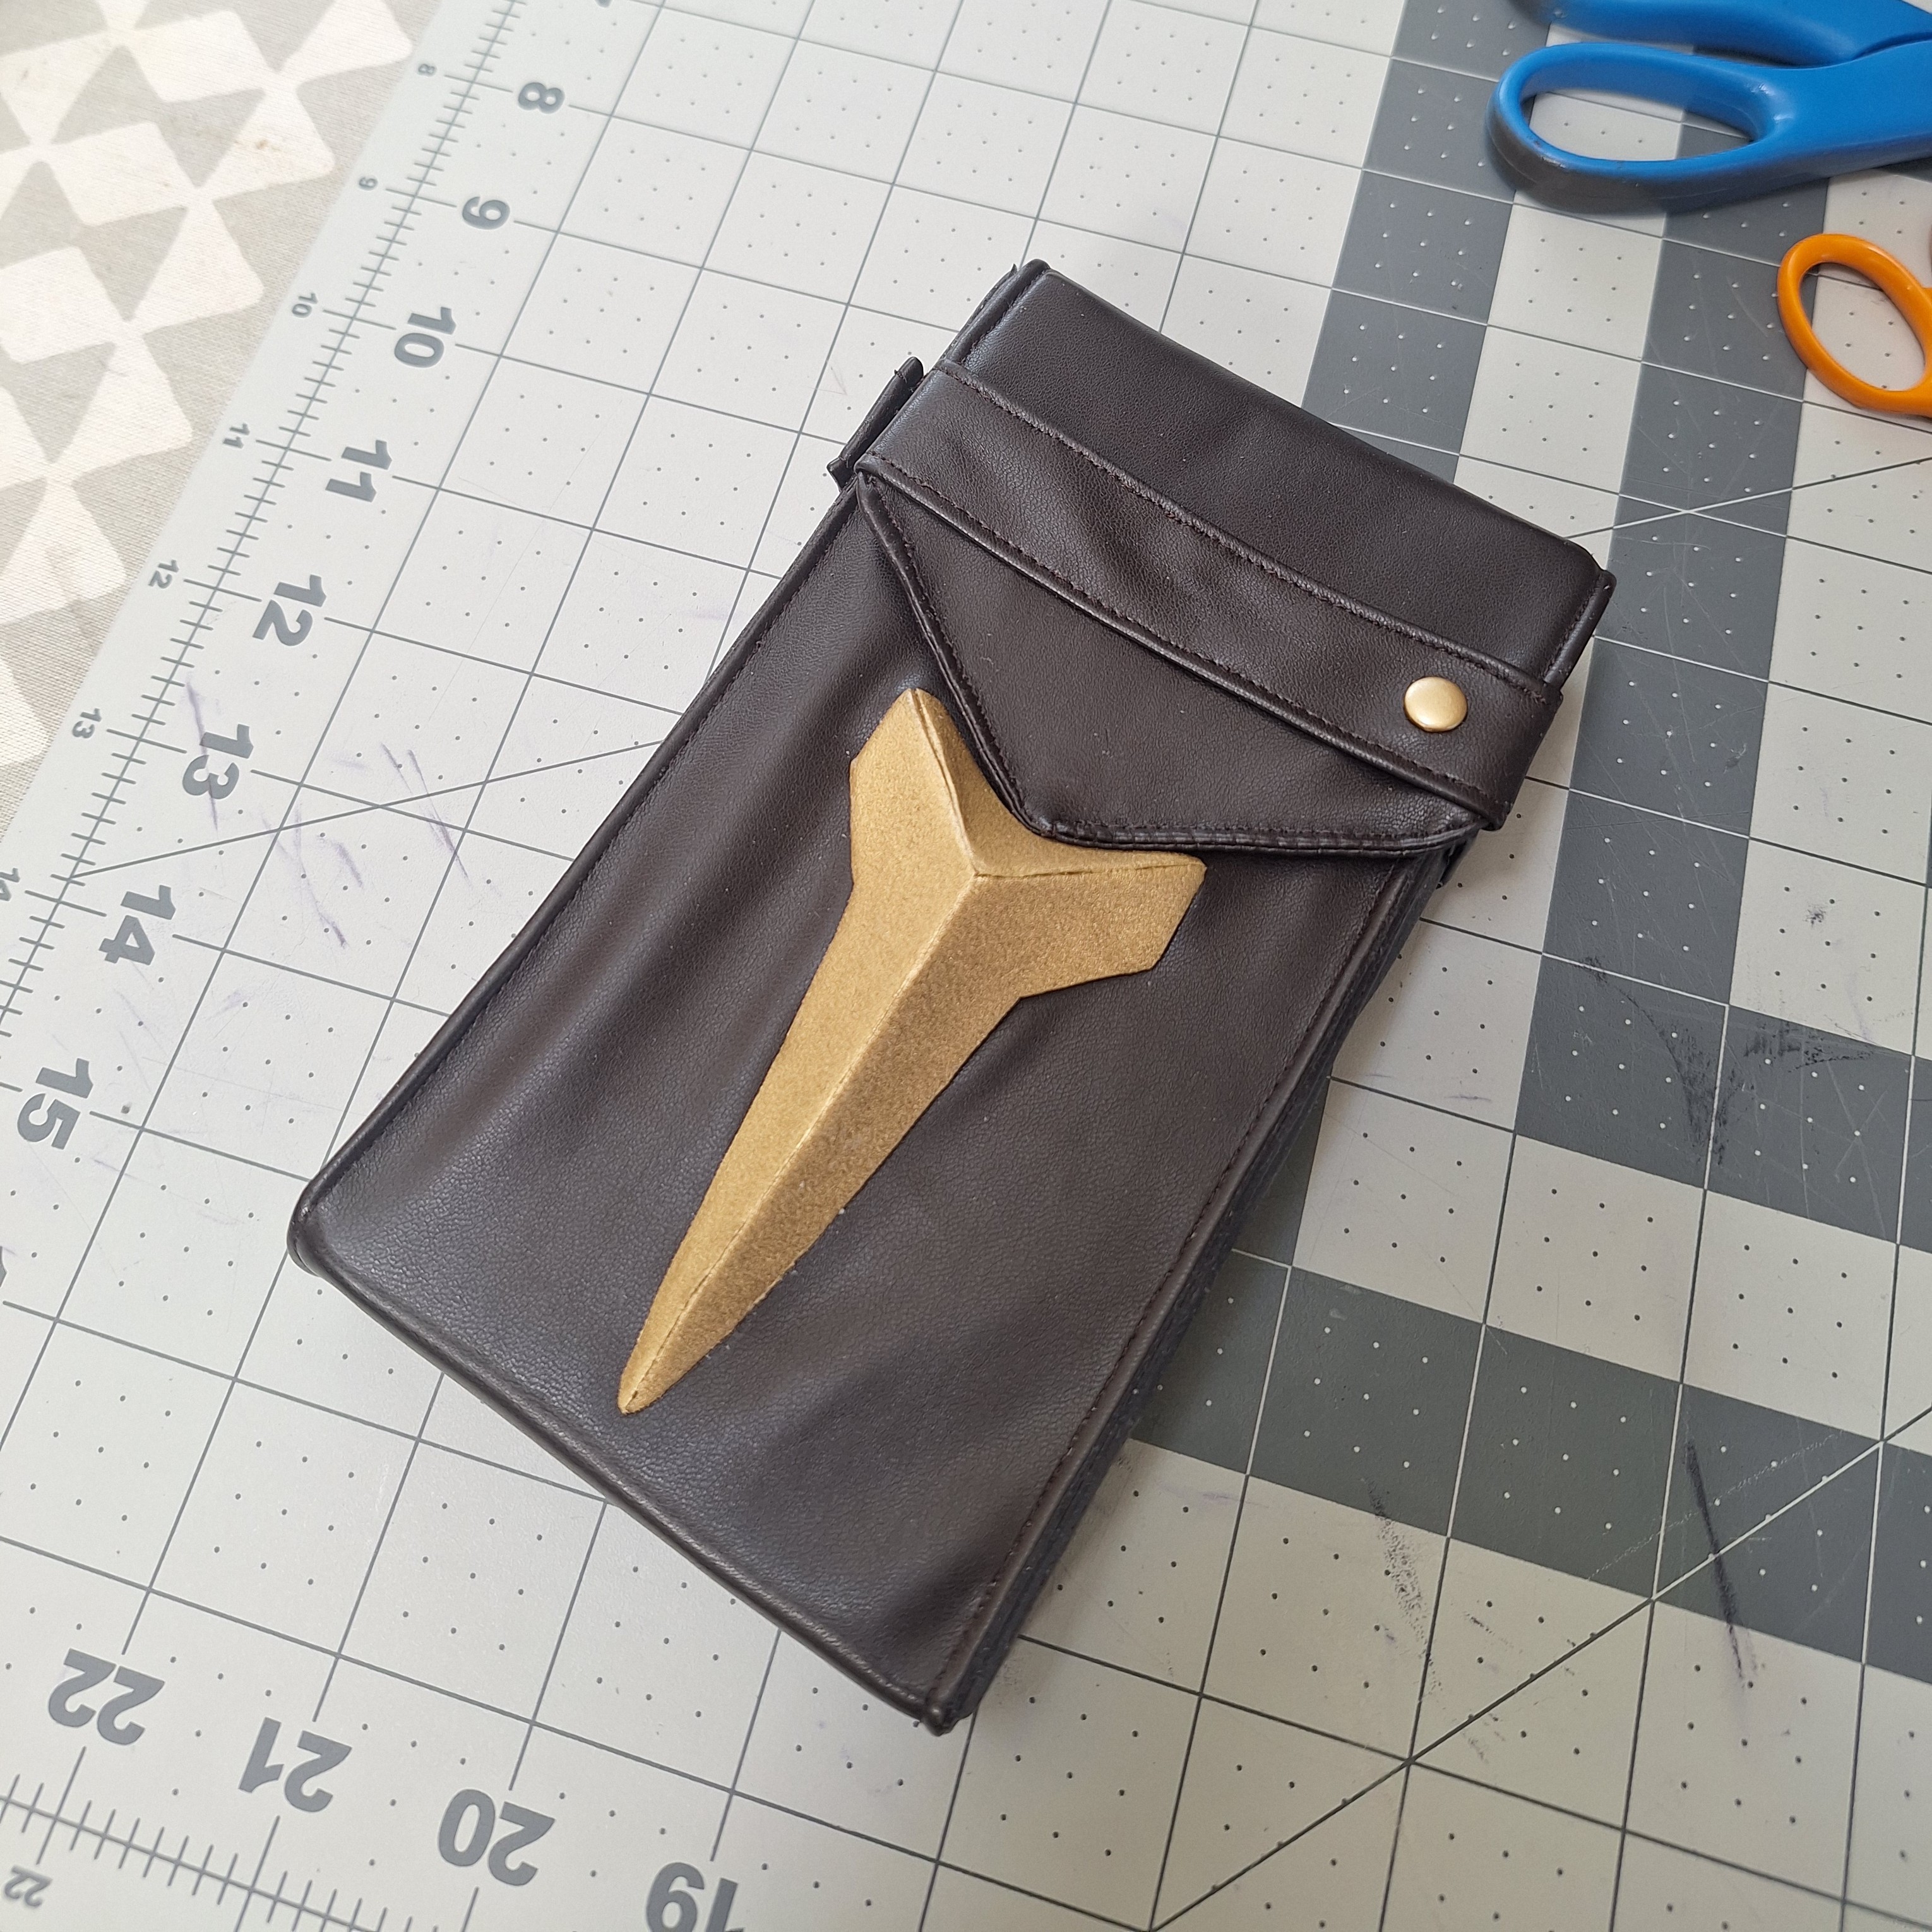
Pouch / Phone Holder
This pouch is made from cardboard and covered with the same brown vinyl used in other pieces of the costume. I embedded magnets in the flap and front to make it close easily. I attached a painted rivet and the emblem is cut and spray painted EVA foam. There are two straps going around the leg but it's actually two large strips of velcro attached to the leggings which hold the pouch up.
-
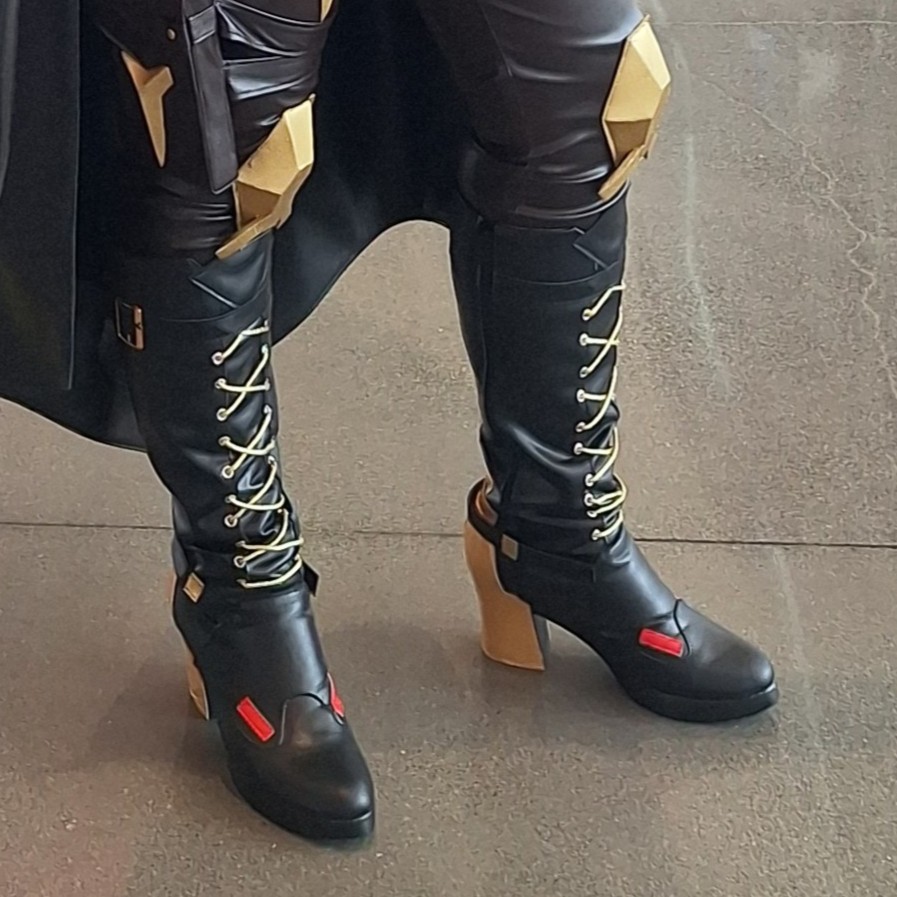
Boots
Purchased from Etsy. The details were accurate and I would recommend. I added shoe inserts so that I could walk around all day.
-
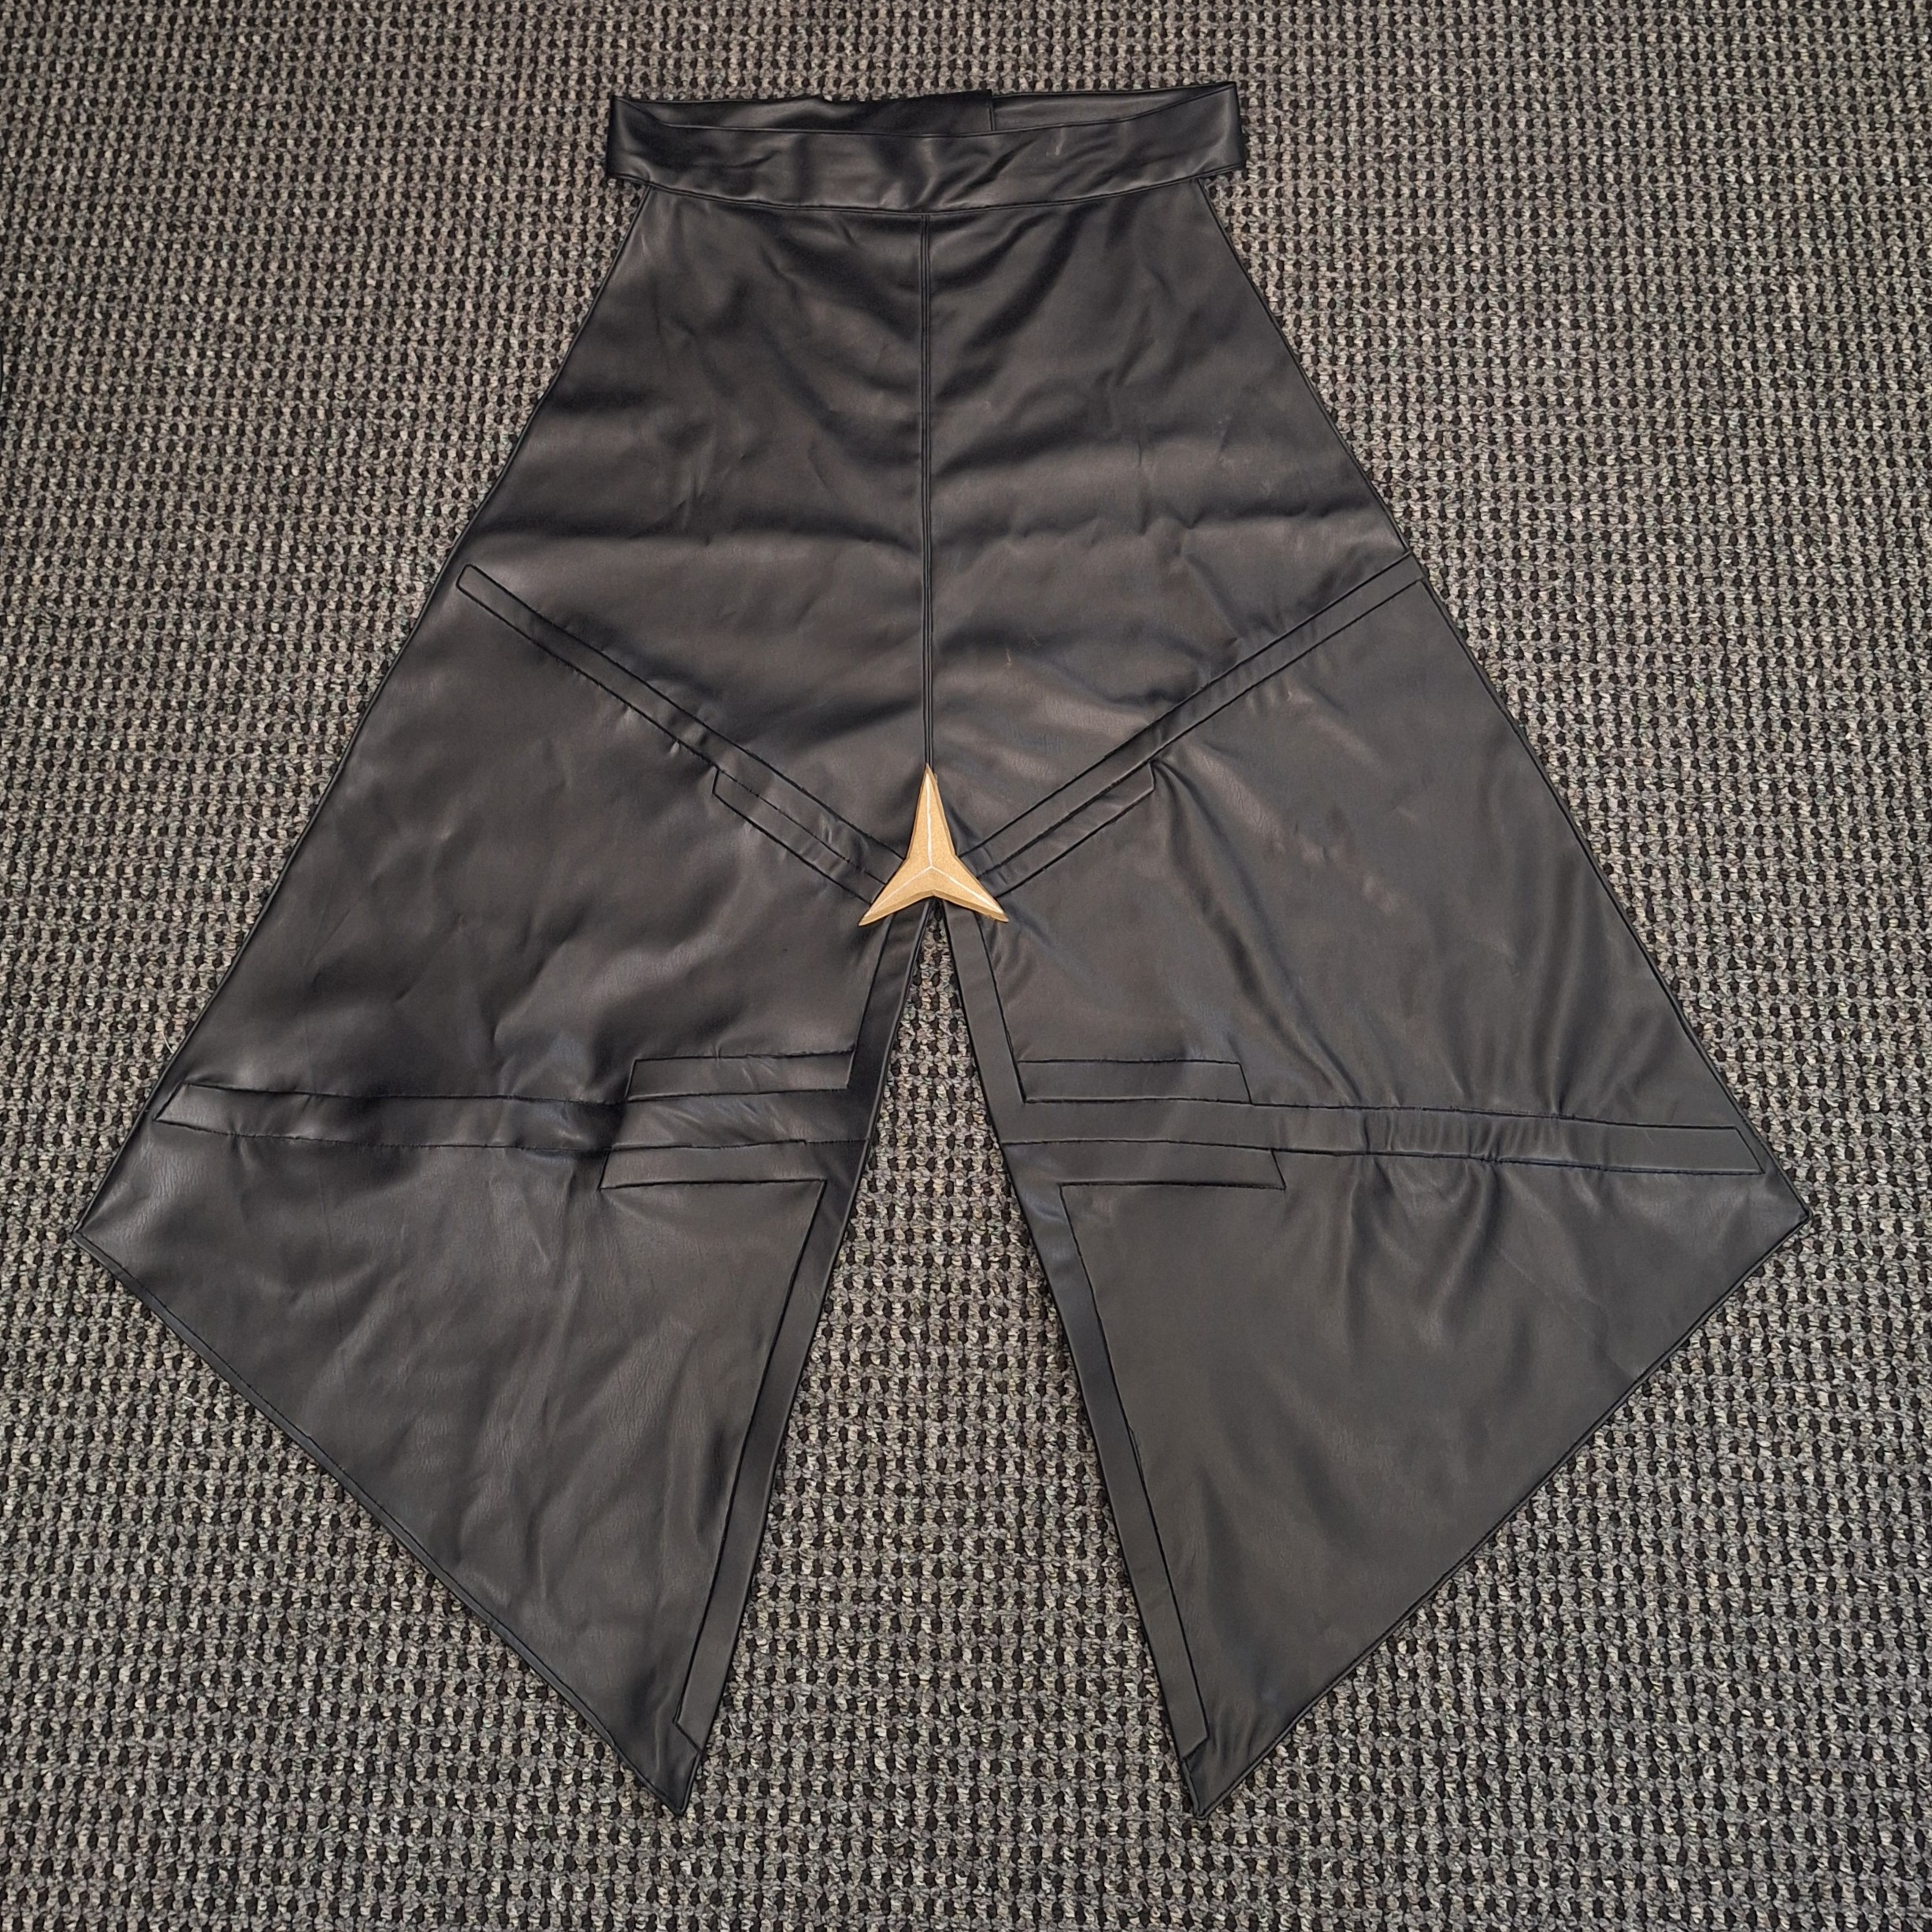
Coattails
I started with a layer of cotton muslin where I glued 2mm pieces of EVA foam to make the pattern. I then sandwiched this layer between two layers of black vinyl and turned it inside out. I topstitched as close as I could to the foam to make the design pop. It is secured with a velcro strap. The emblem in the center is painted EVA foam.
-
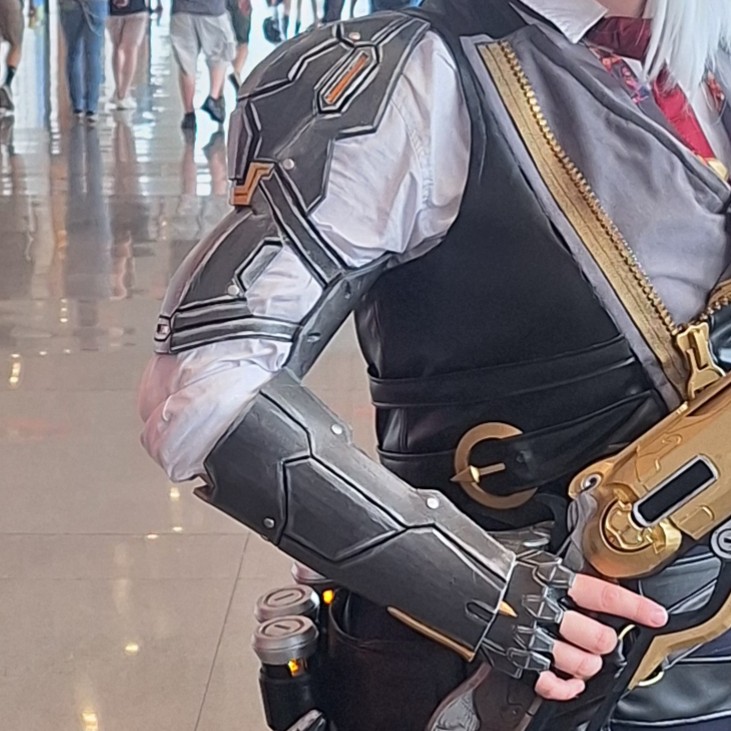
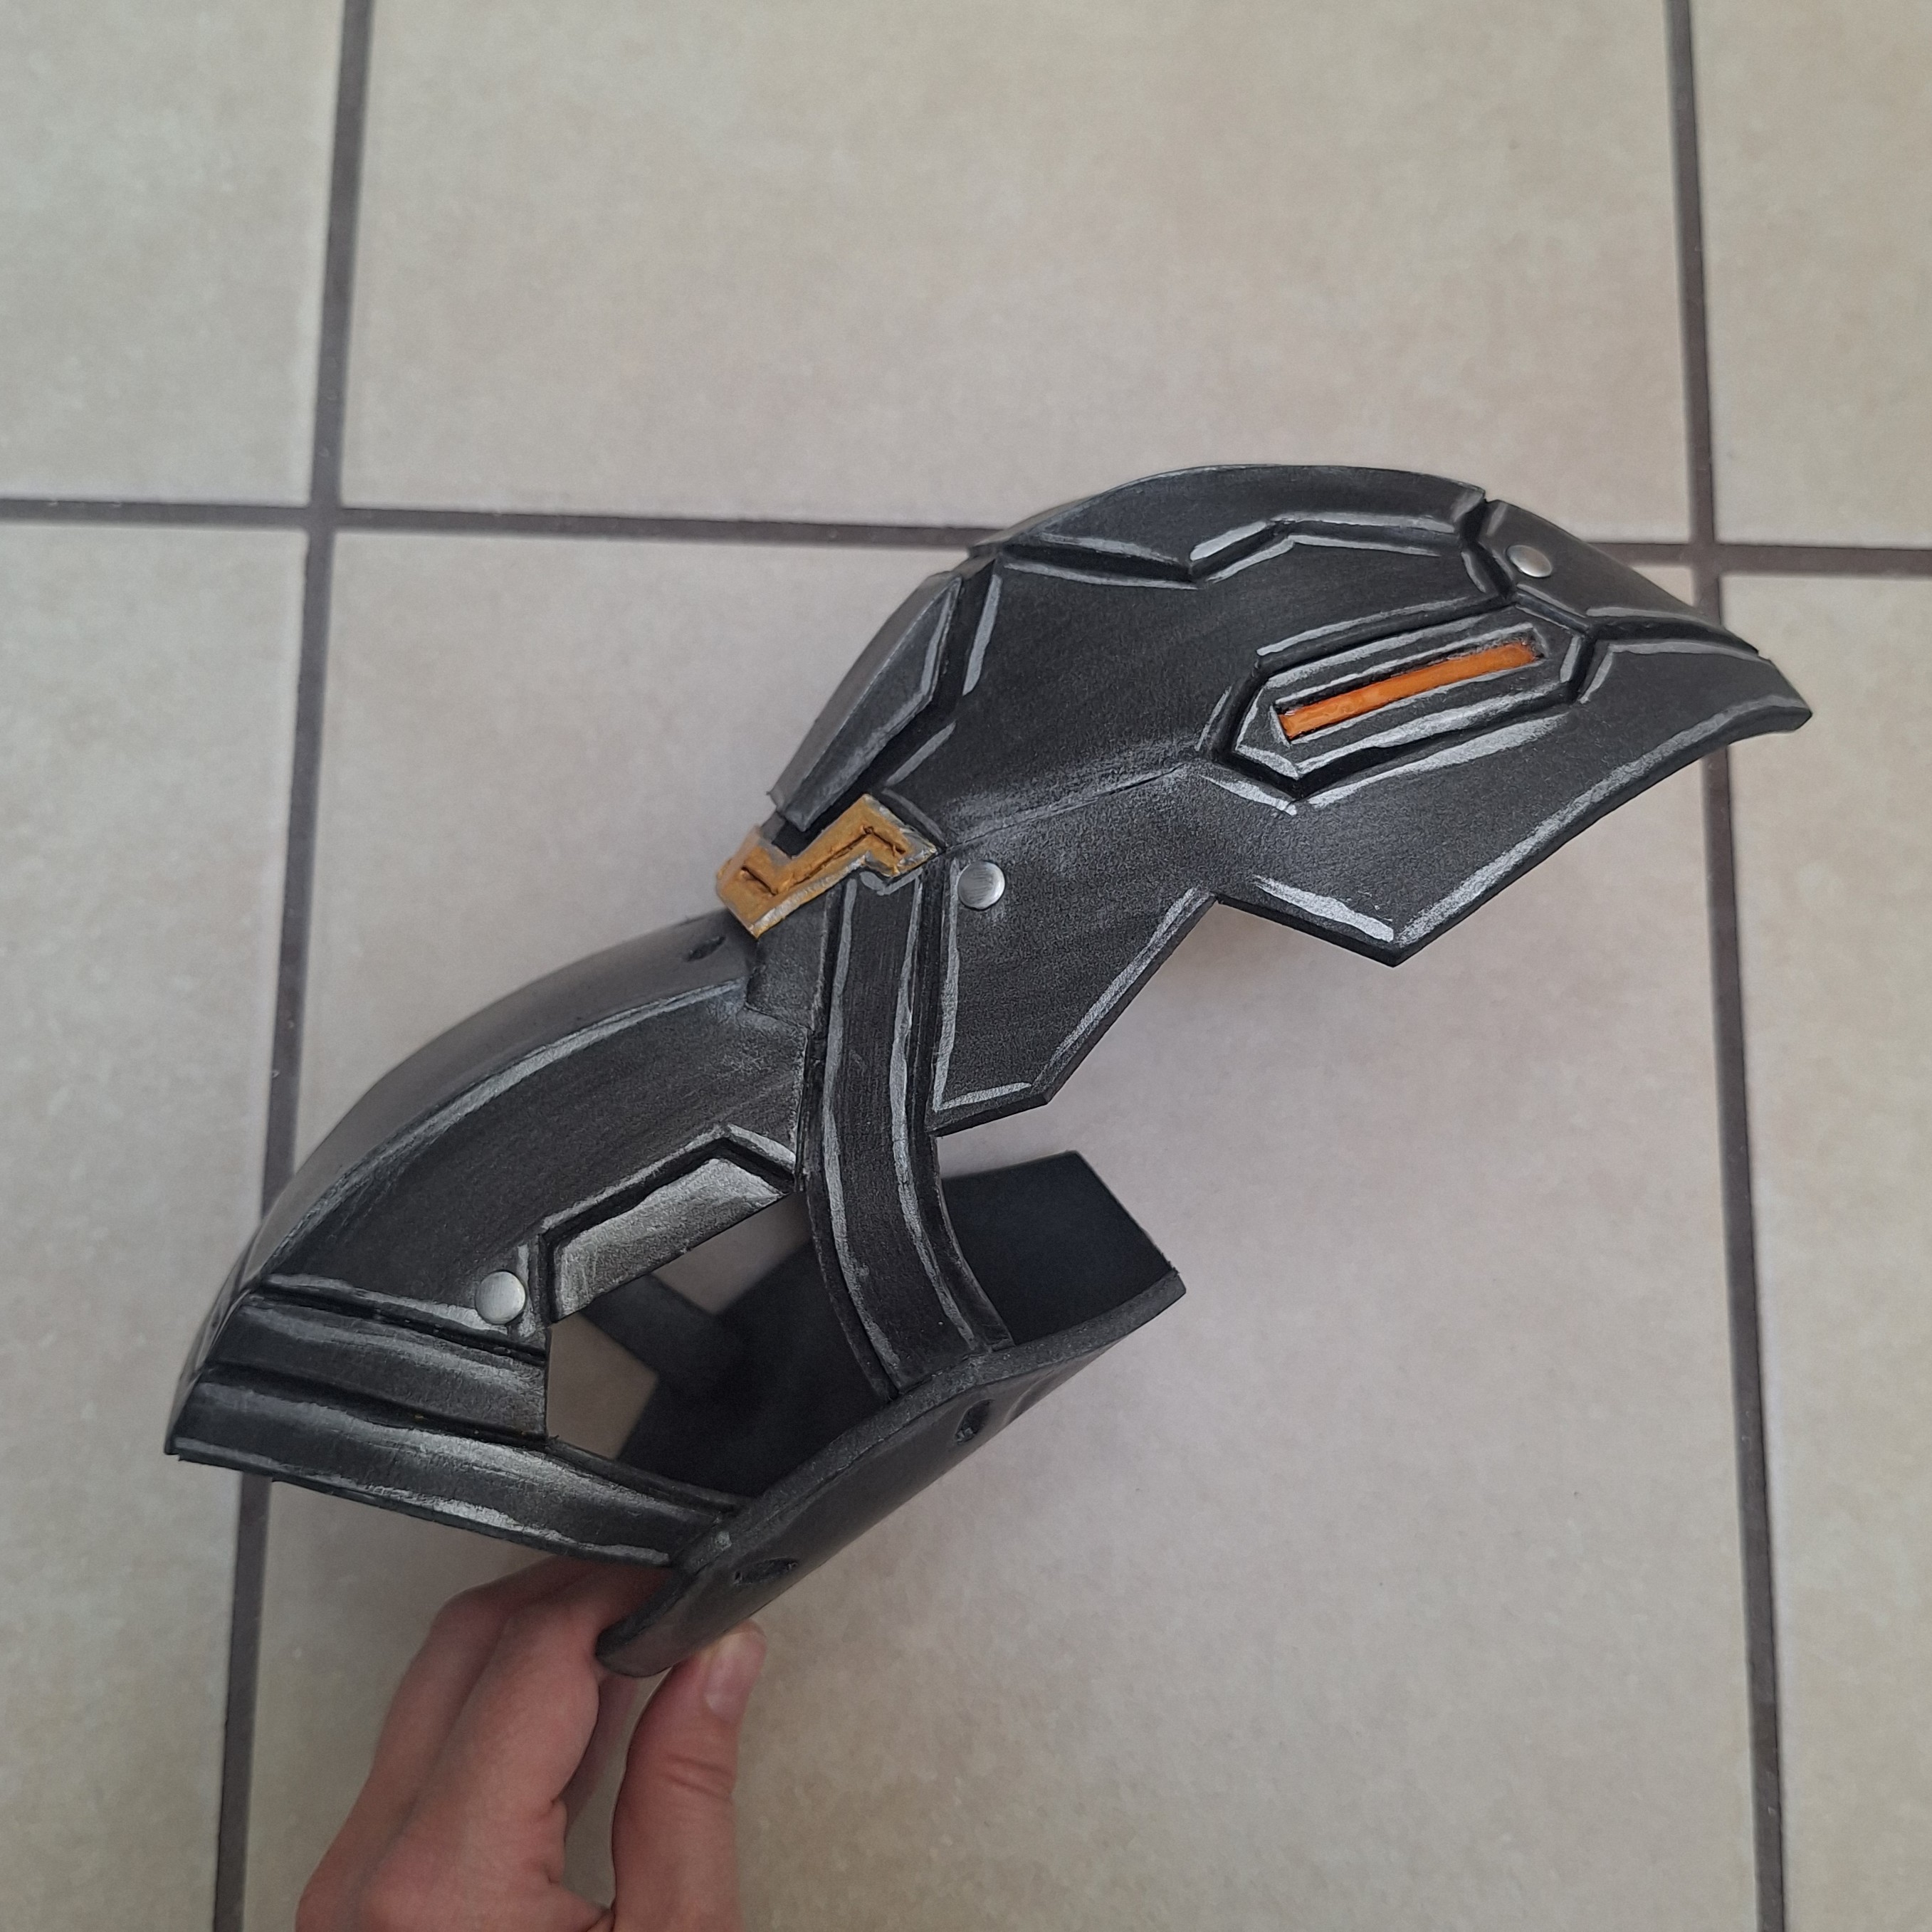
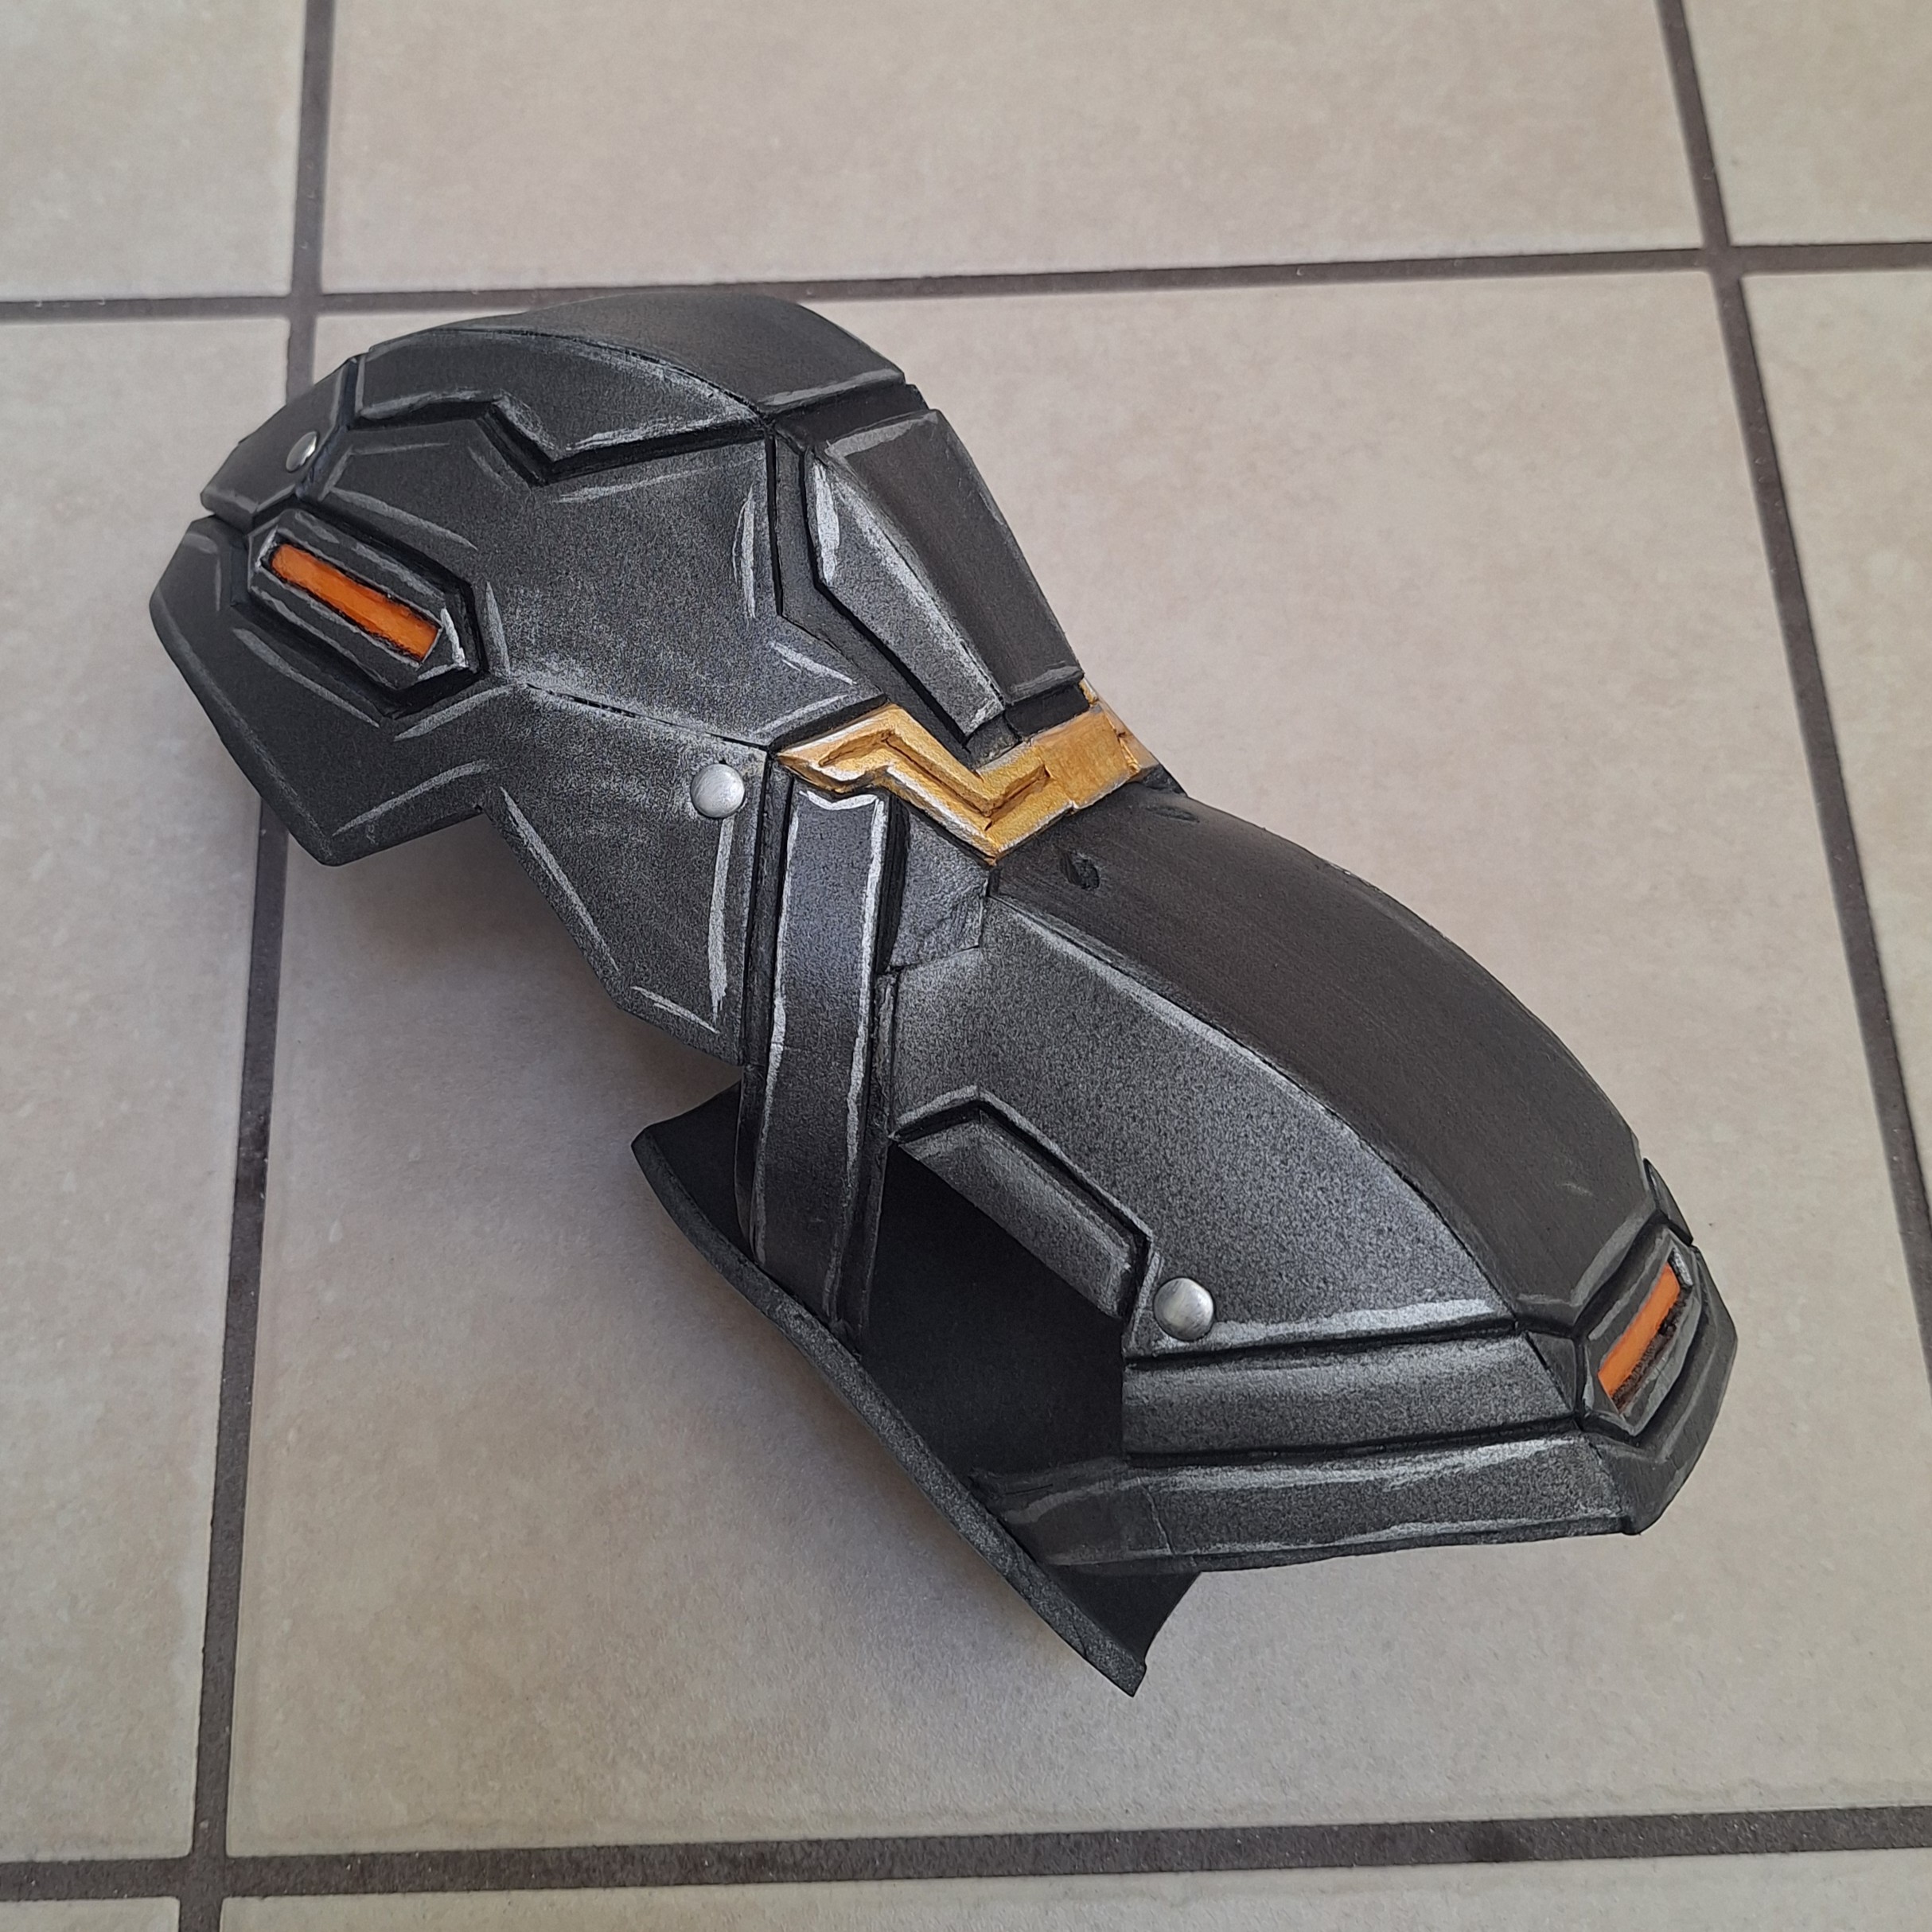
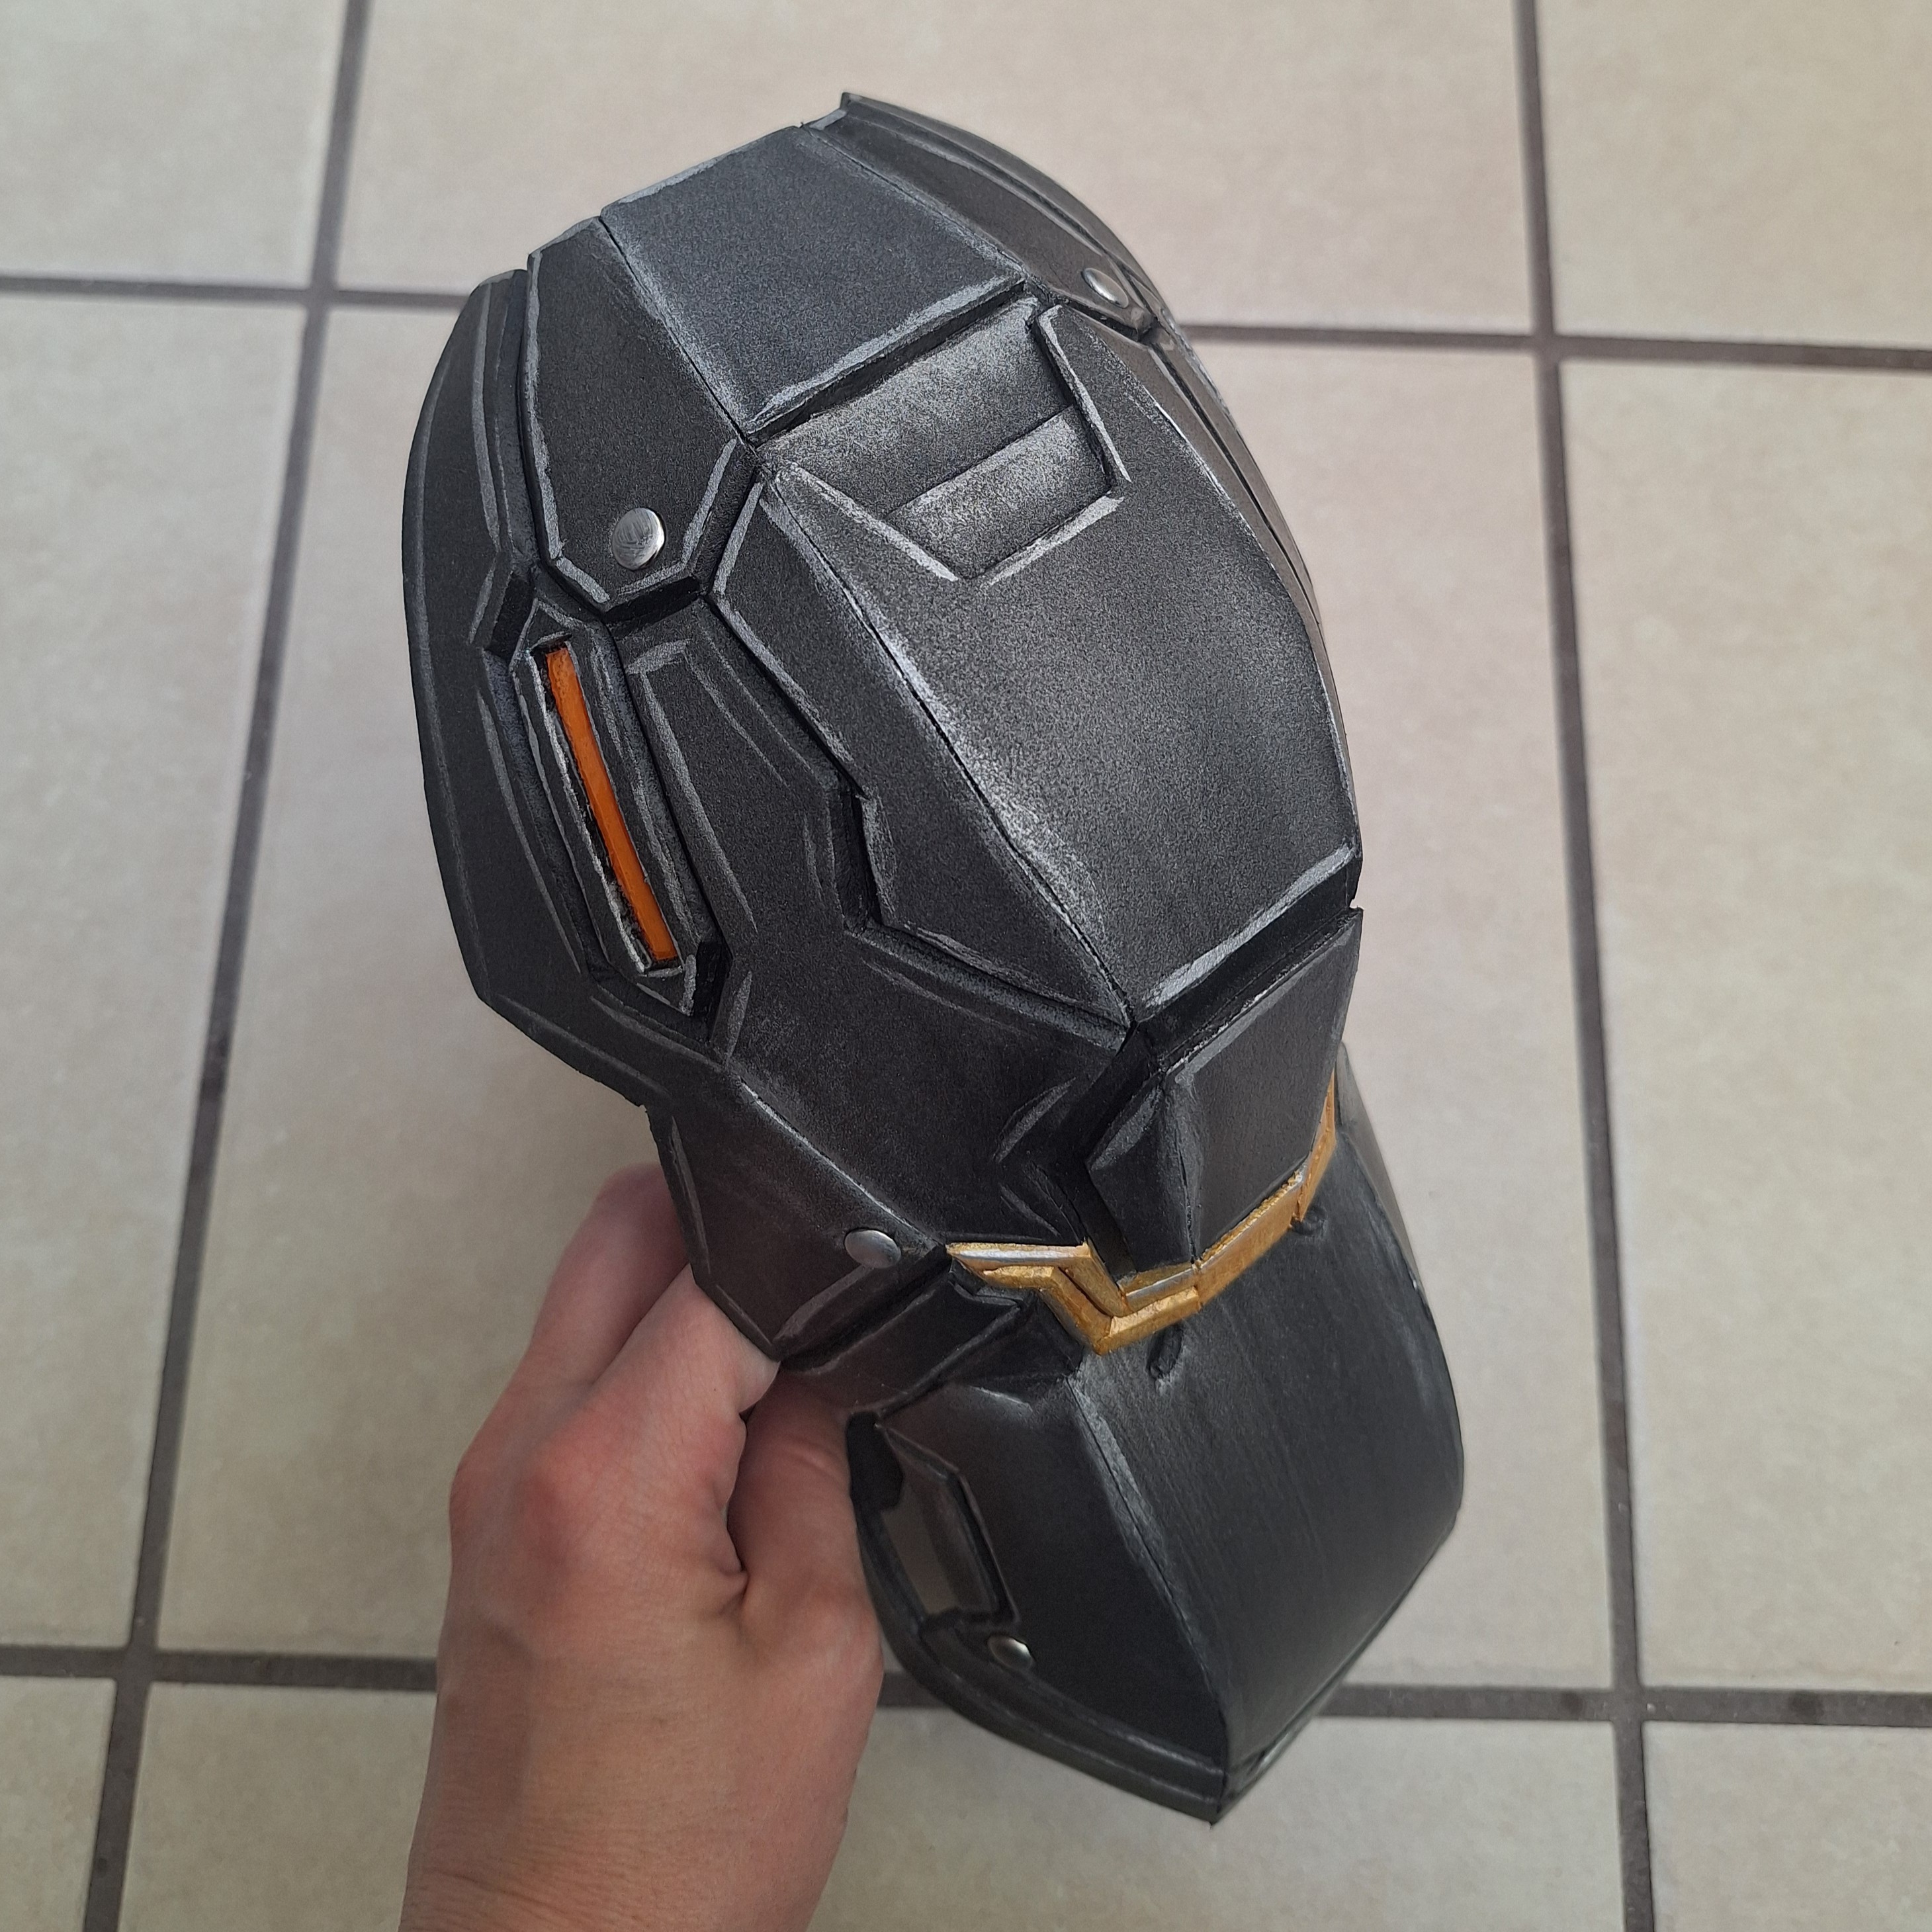
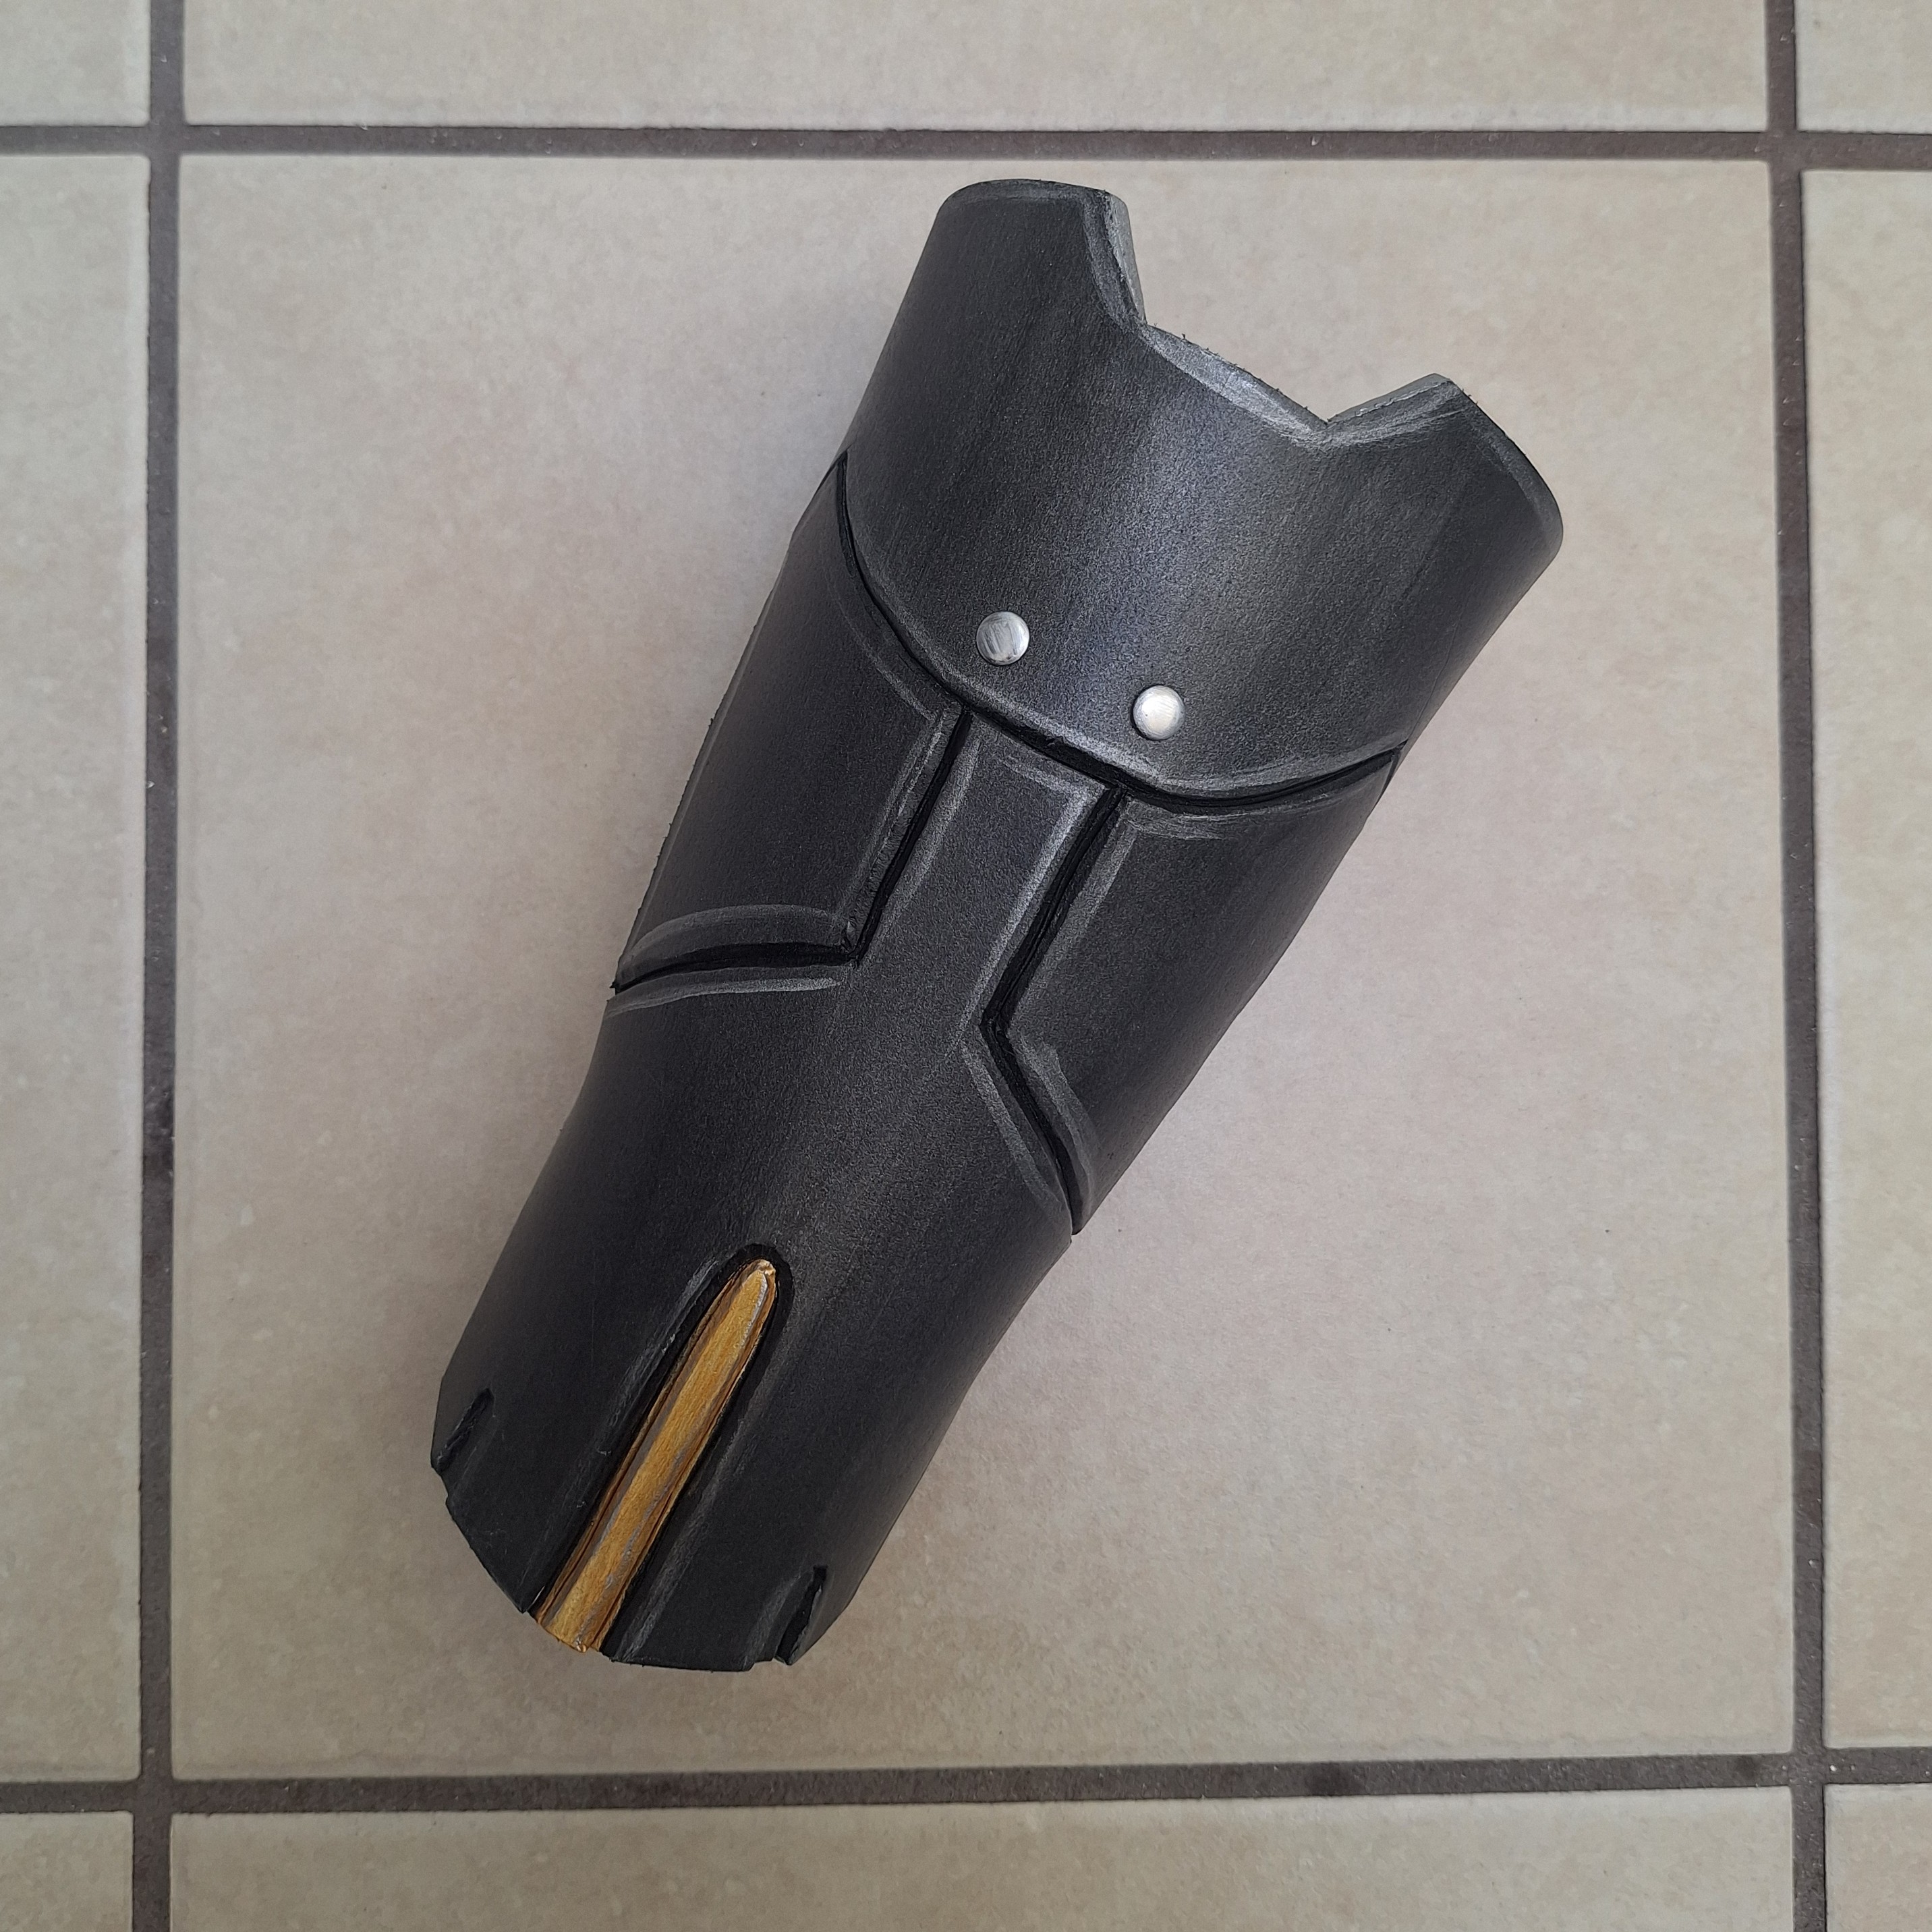
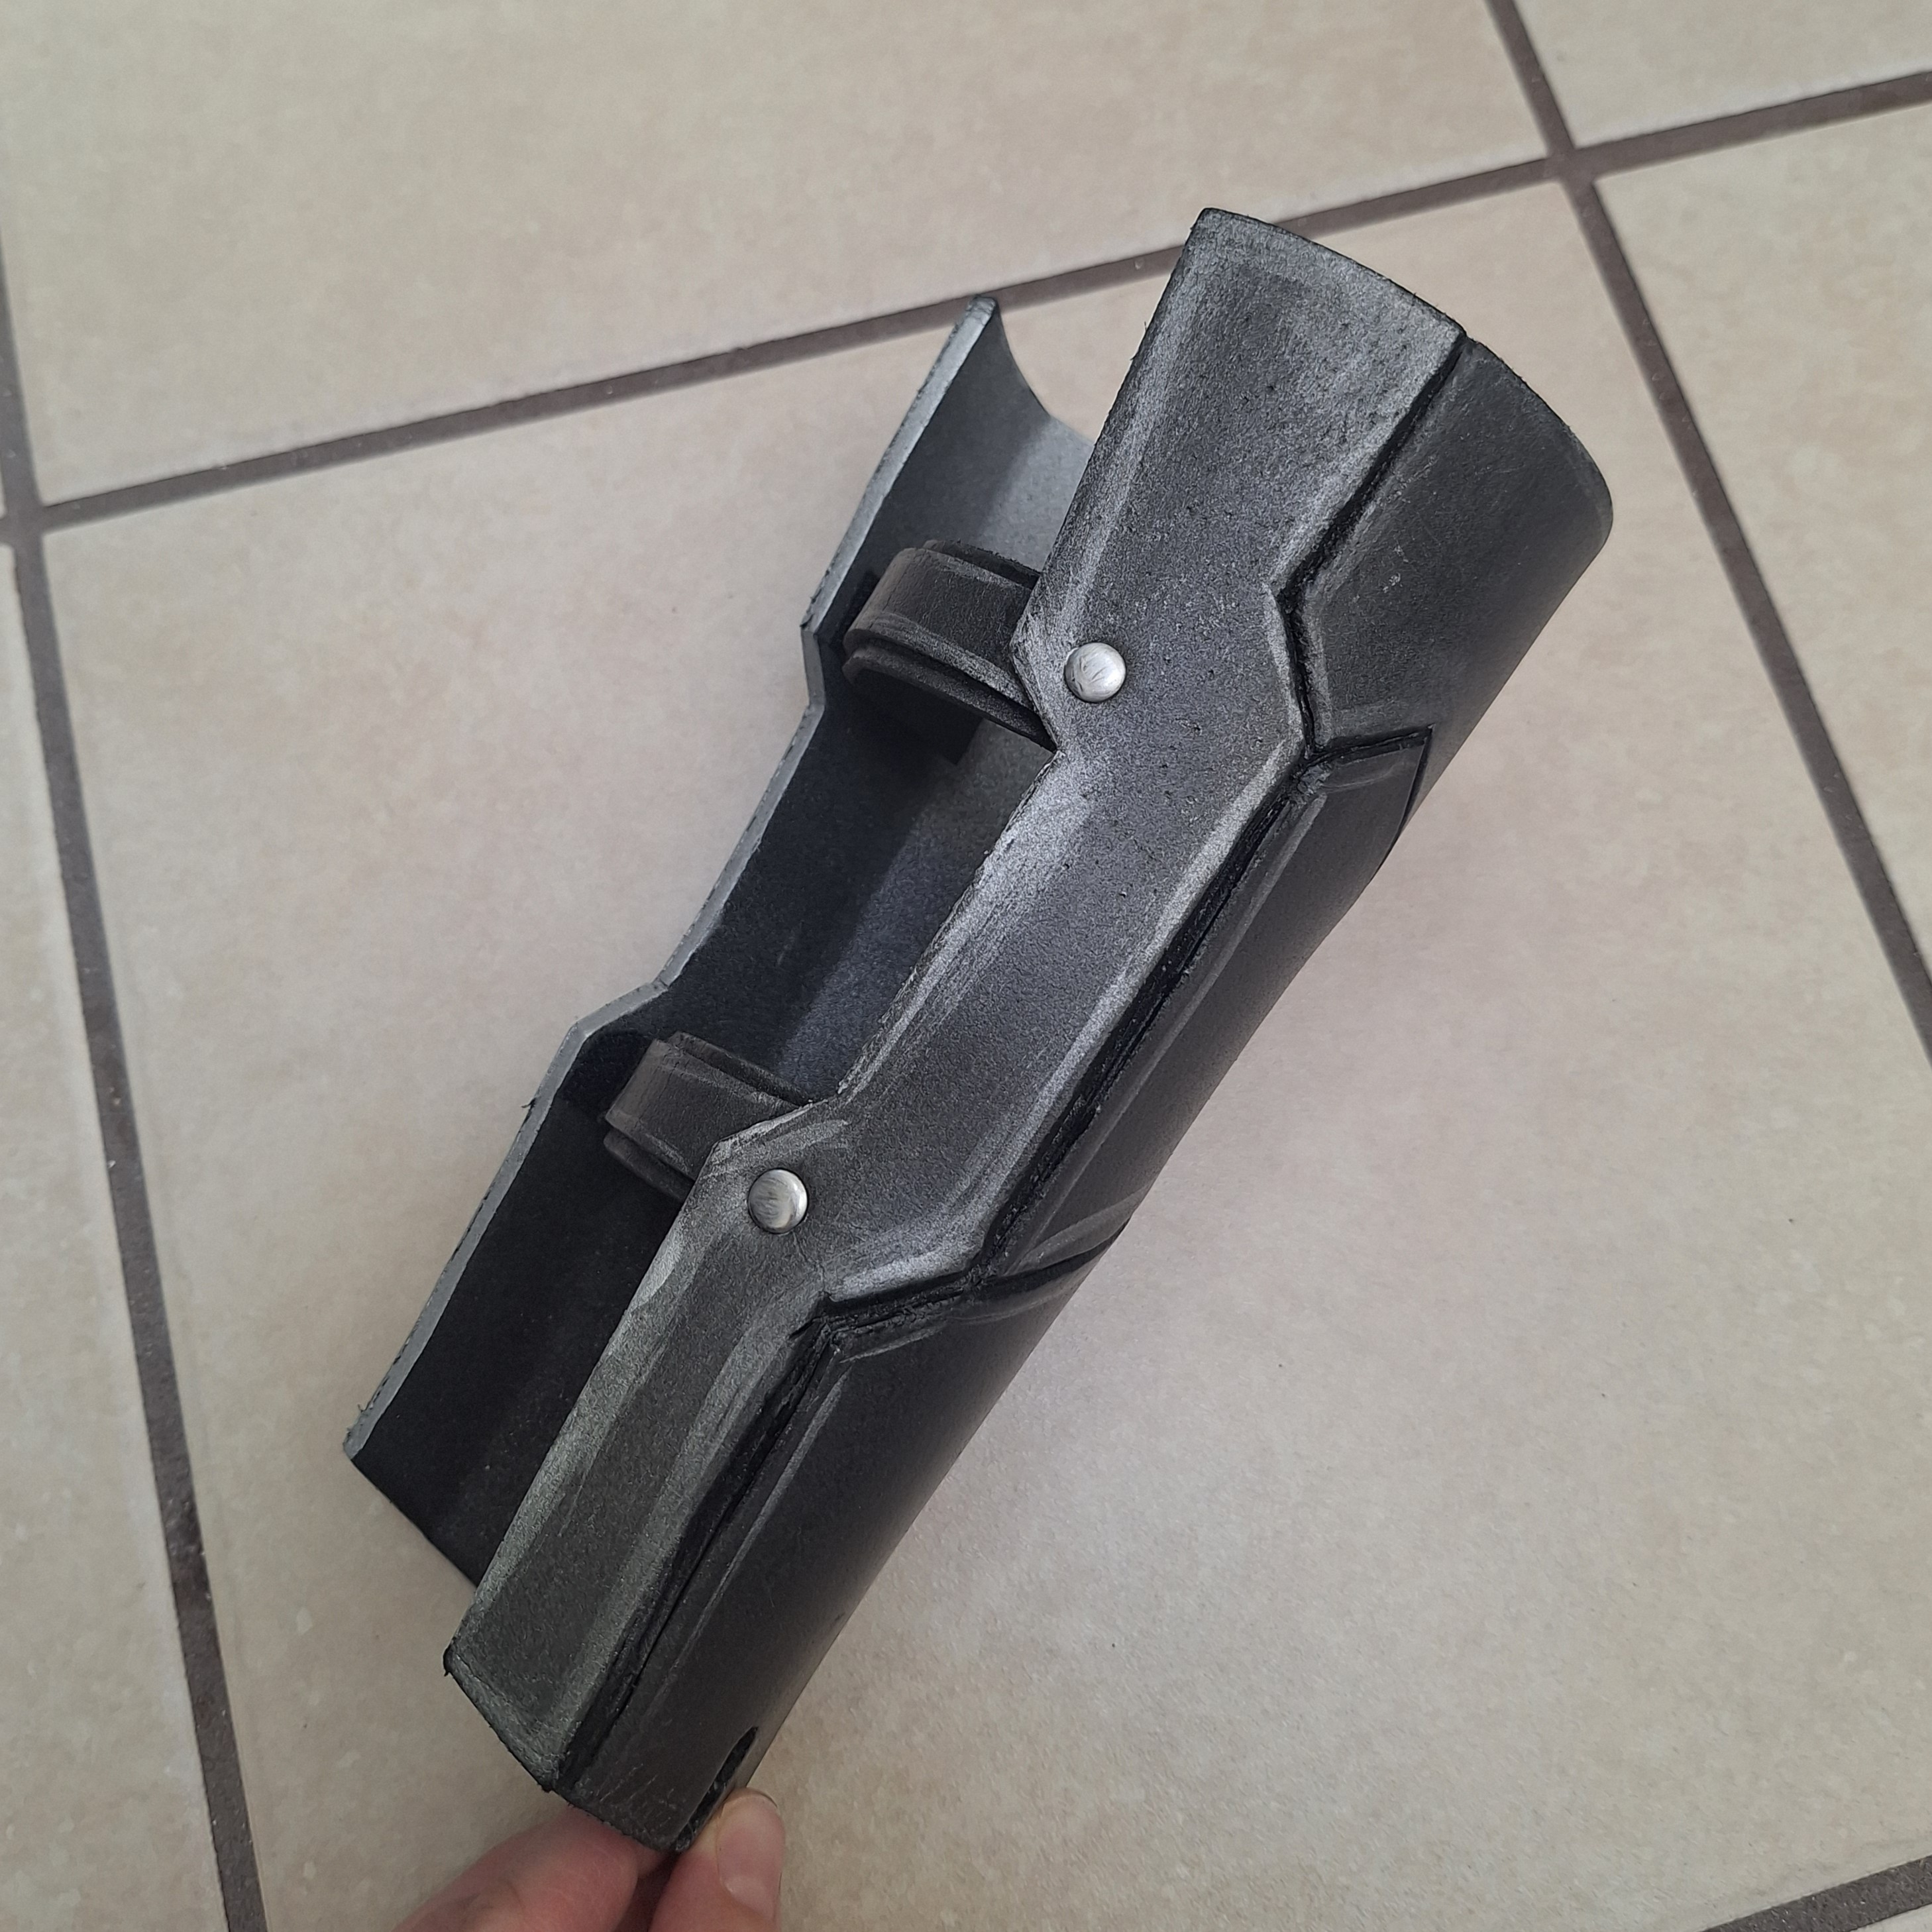
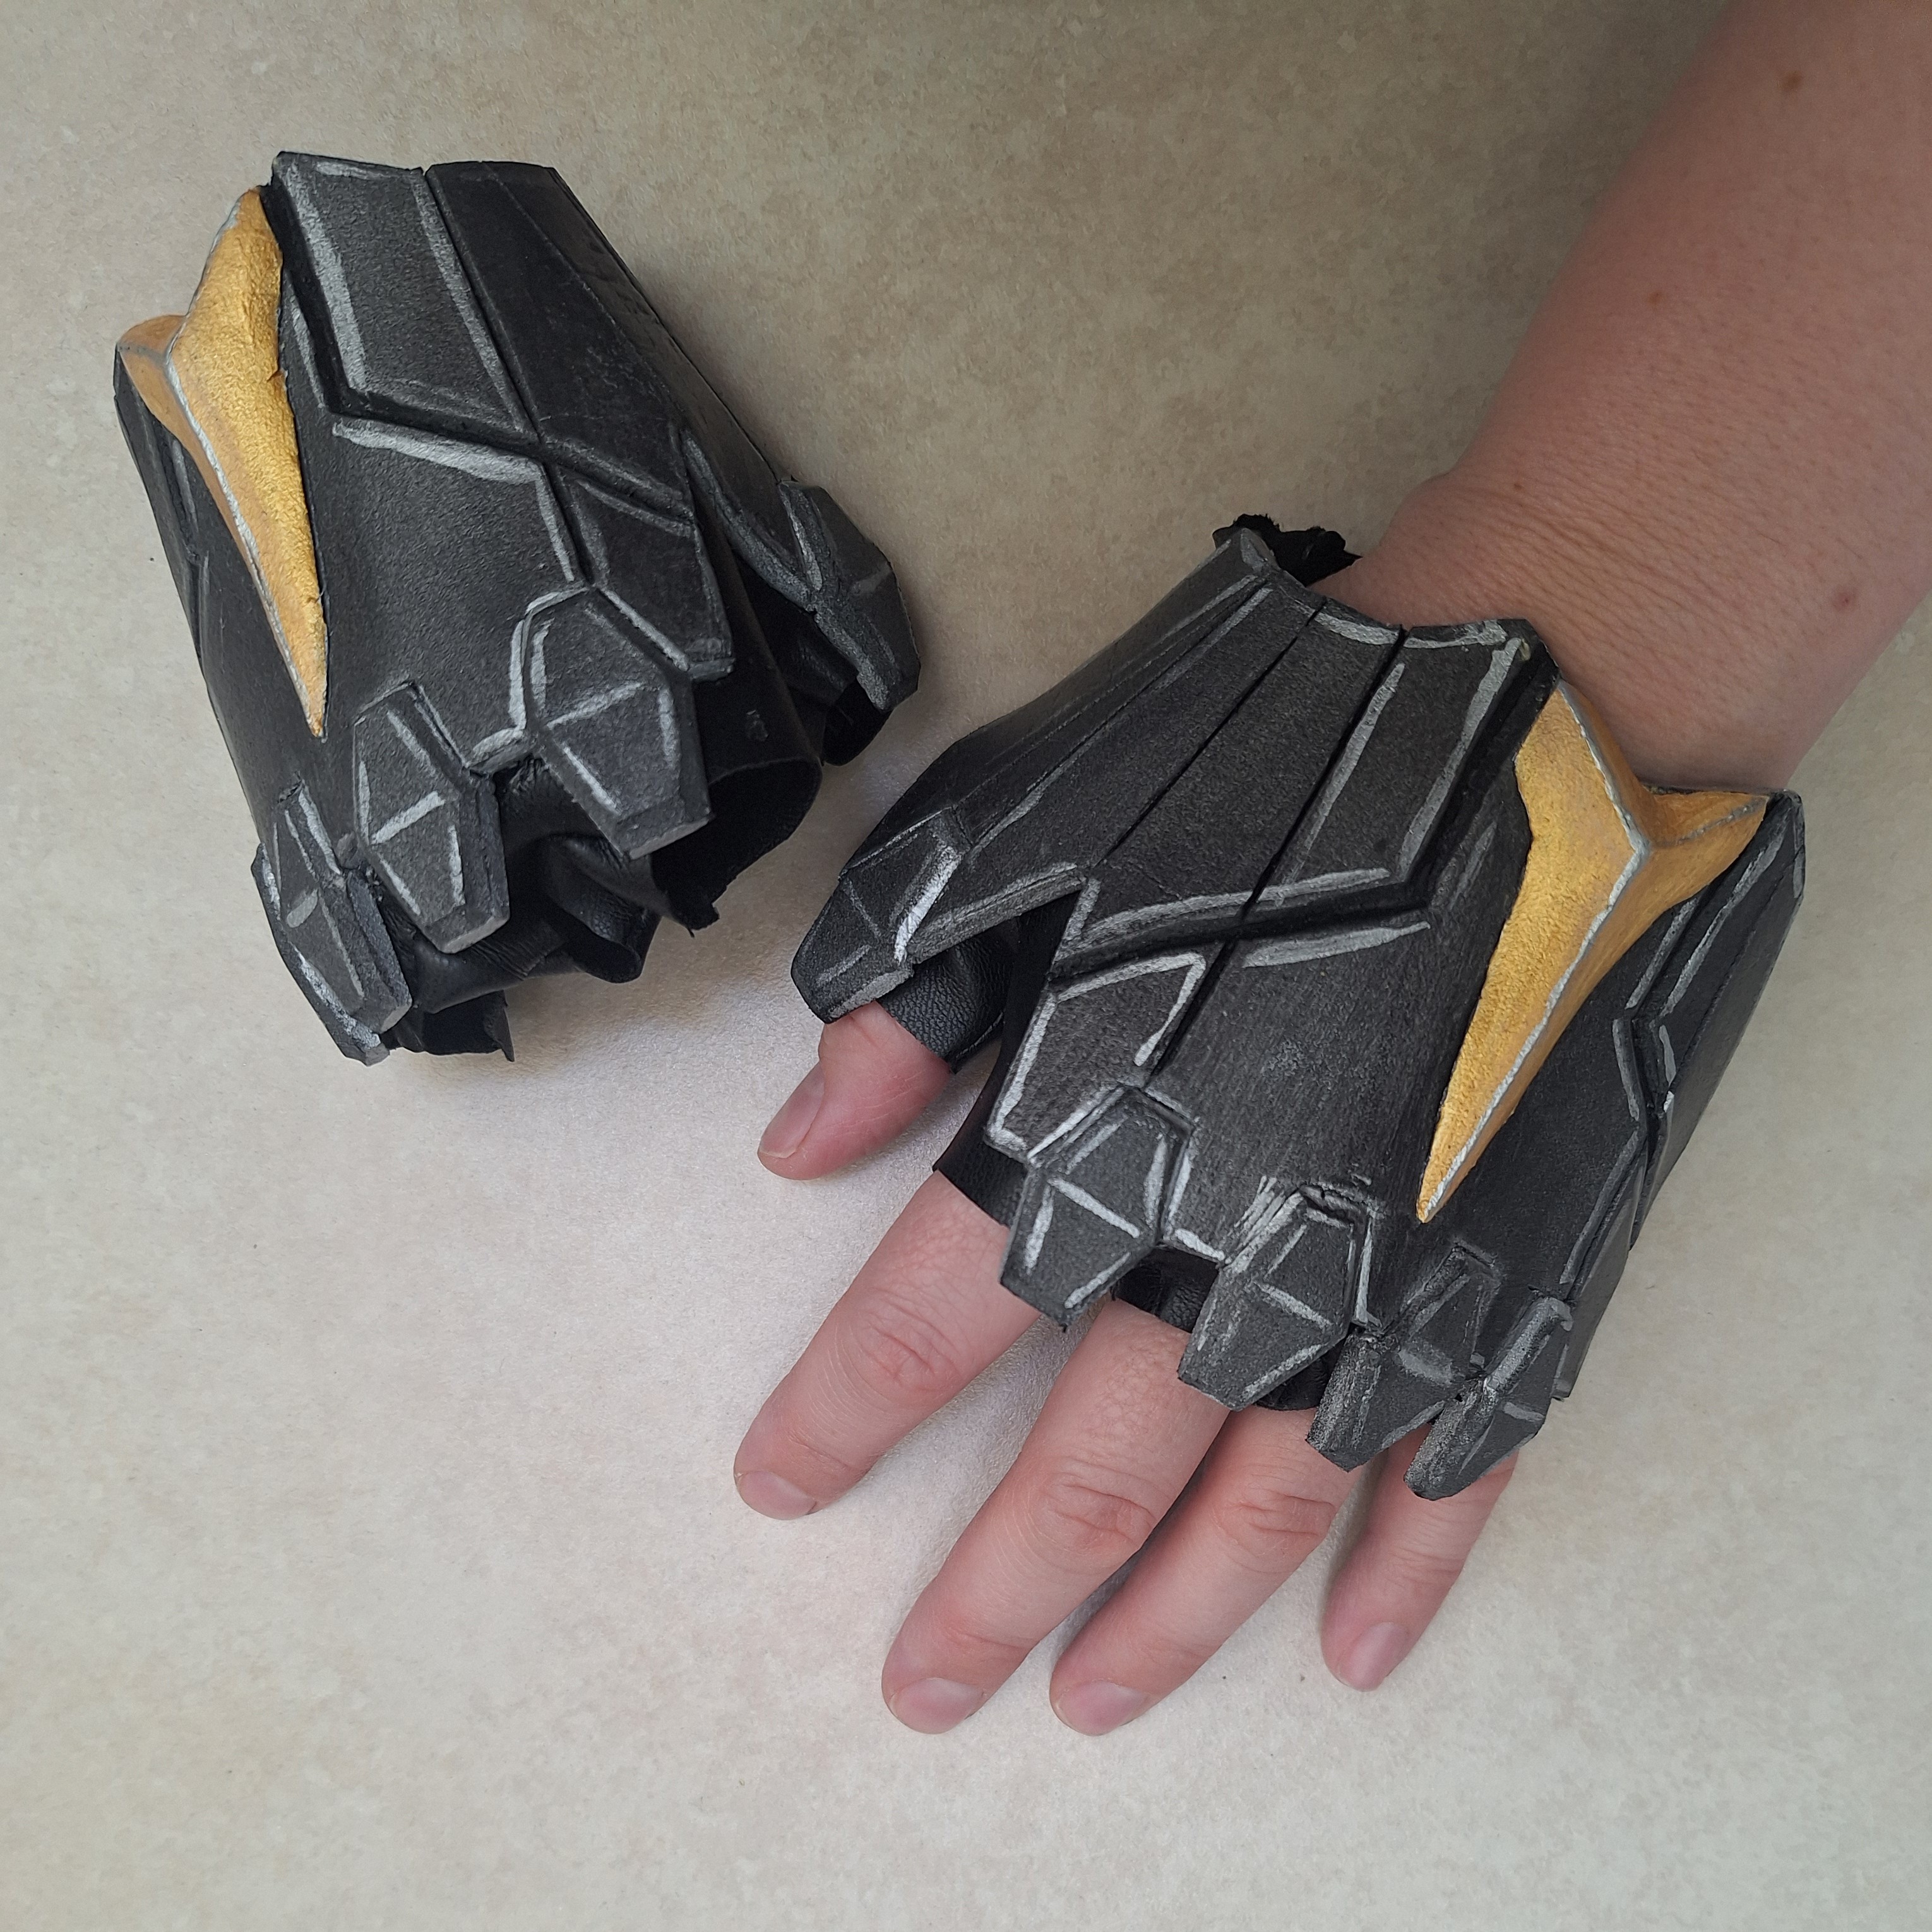
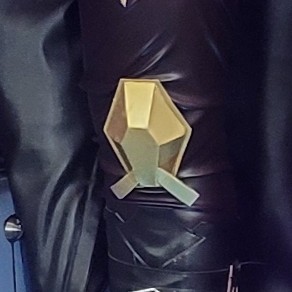
Armor: Bracer, shoulder piece, gloves, knee piece
All pieces are made from EVA foam. The knee piece was created using a pepakura file, while the others I got from watching the YouTube videos listed below.
-
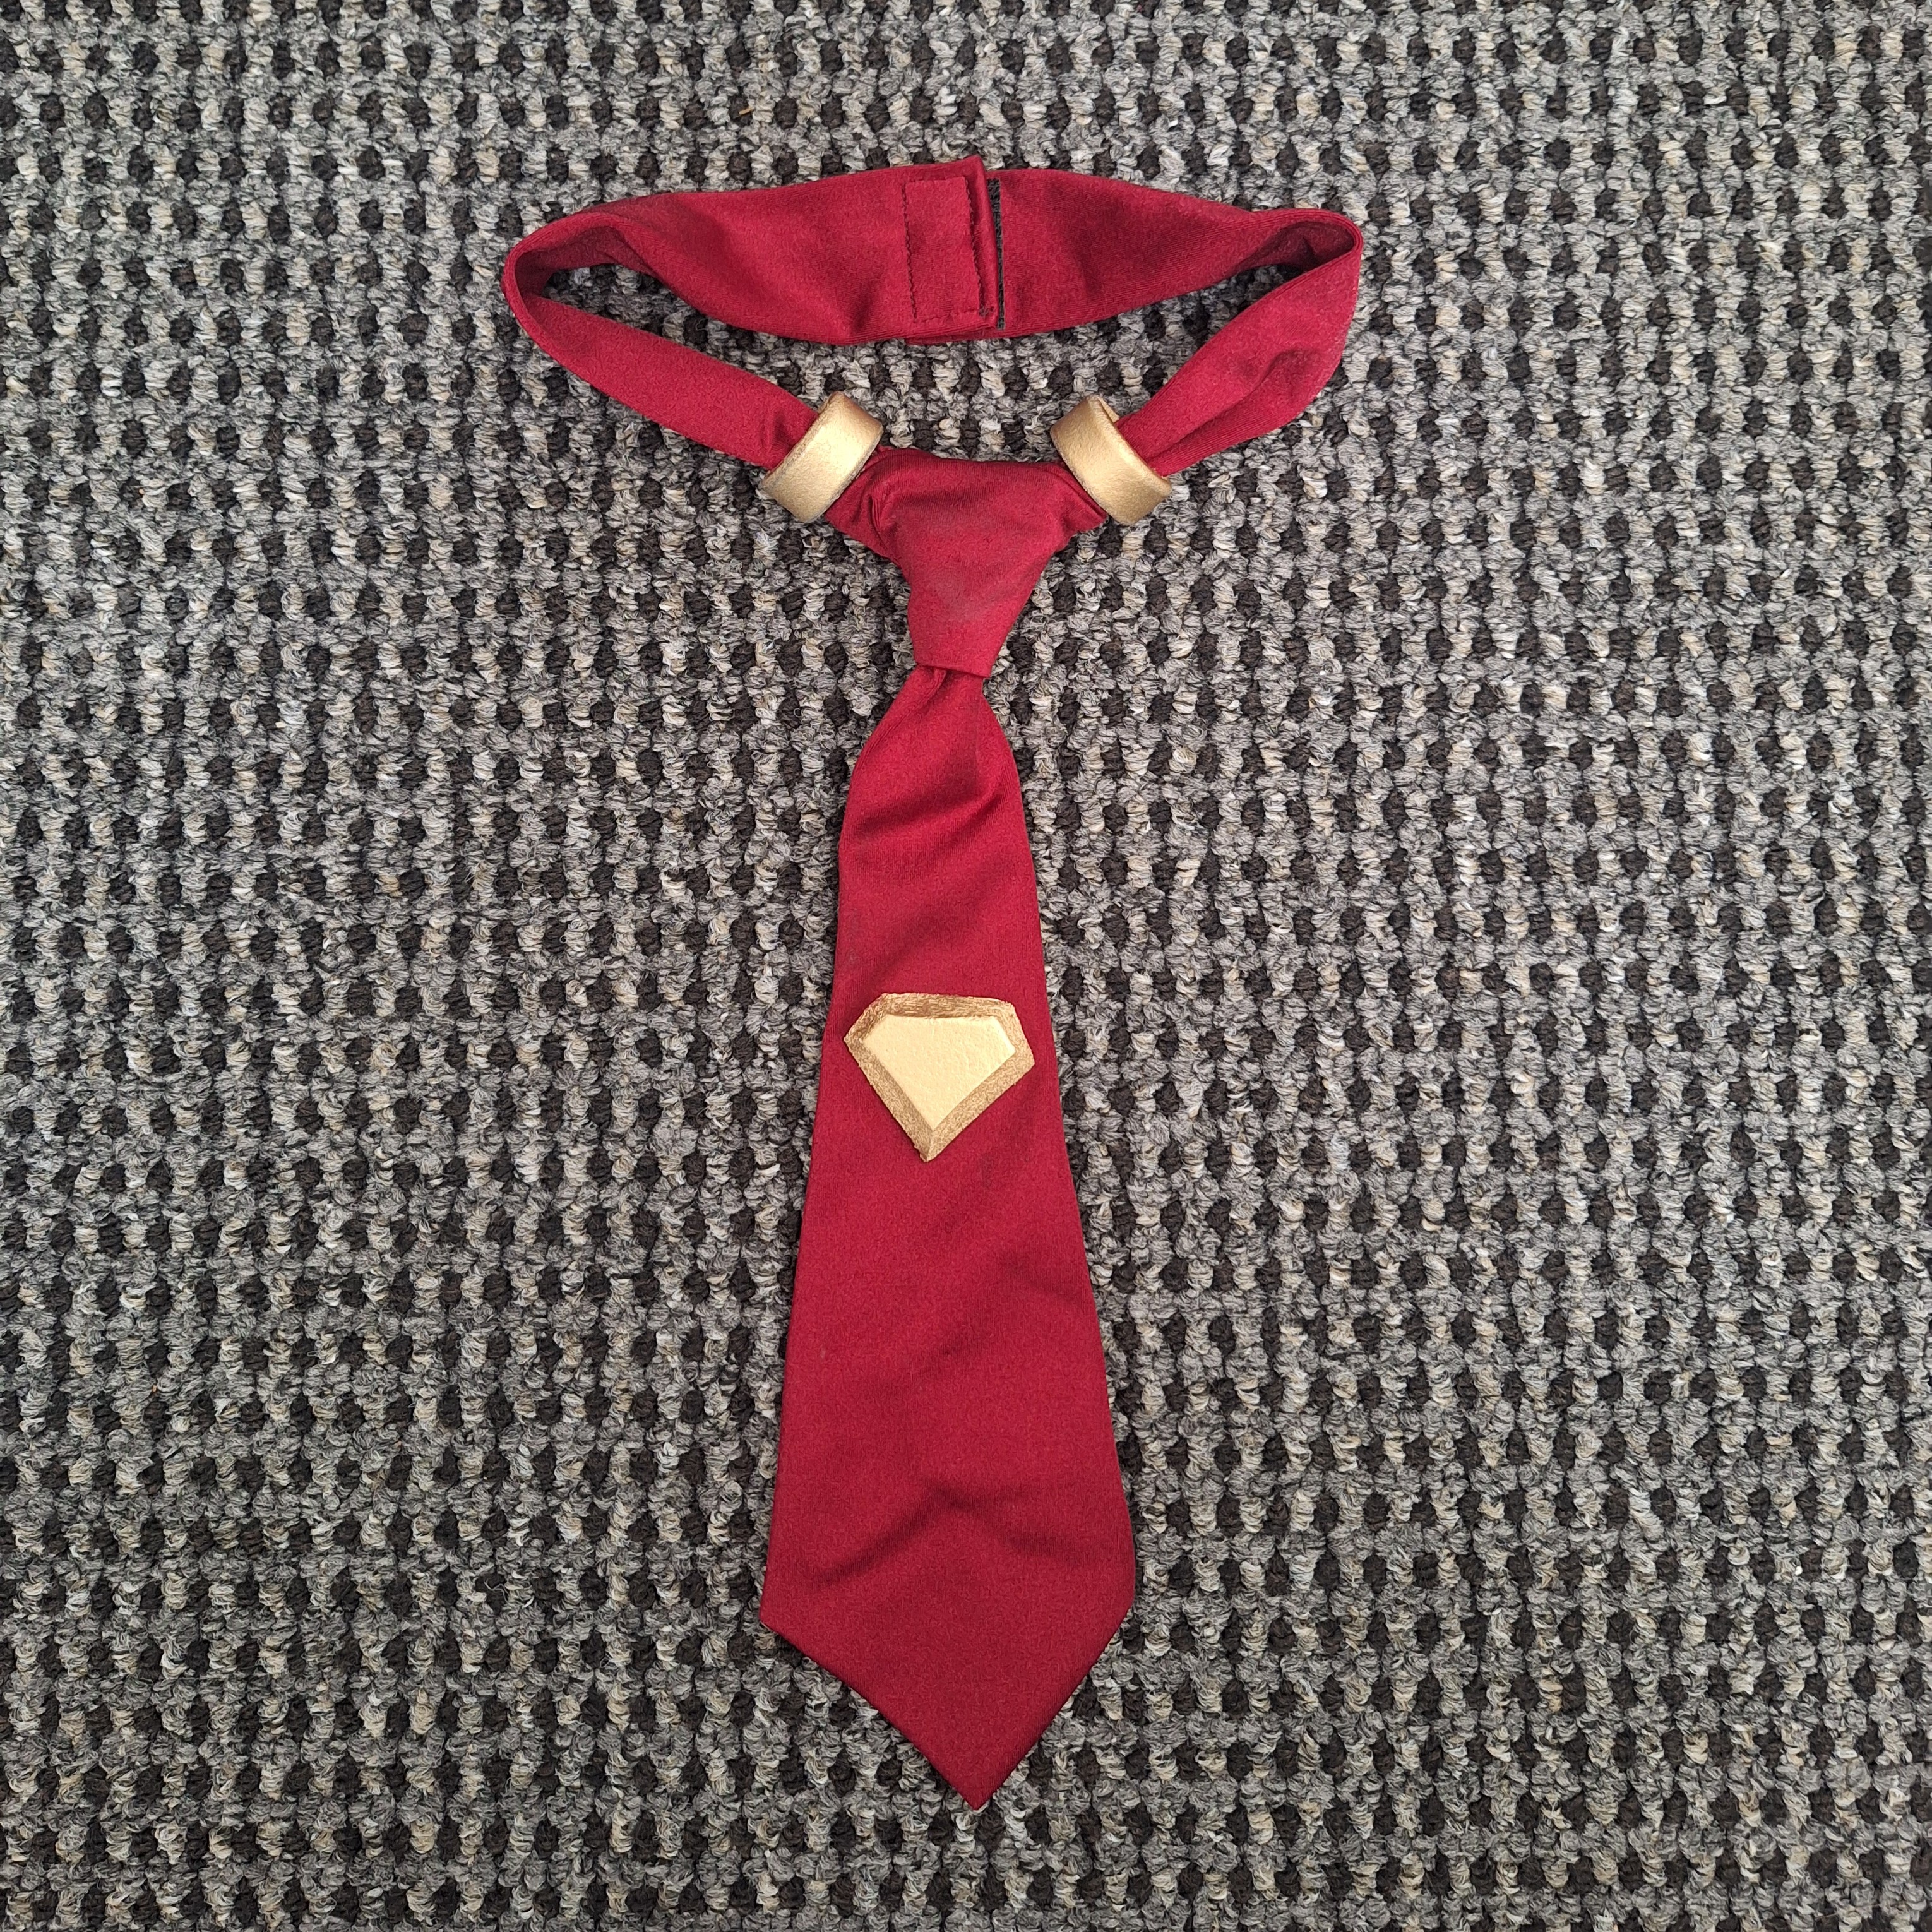
Tie
I followed a YouTube video to make a simple short tie, using some red fabric I had lying around. The decorations are made from EVA foam and painted with metallic spray paint. It is secured with sew-on velcro because that is much easier than figuring out how to tie a tie!
-
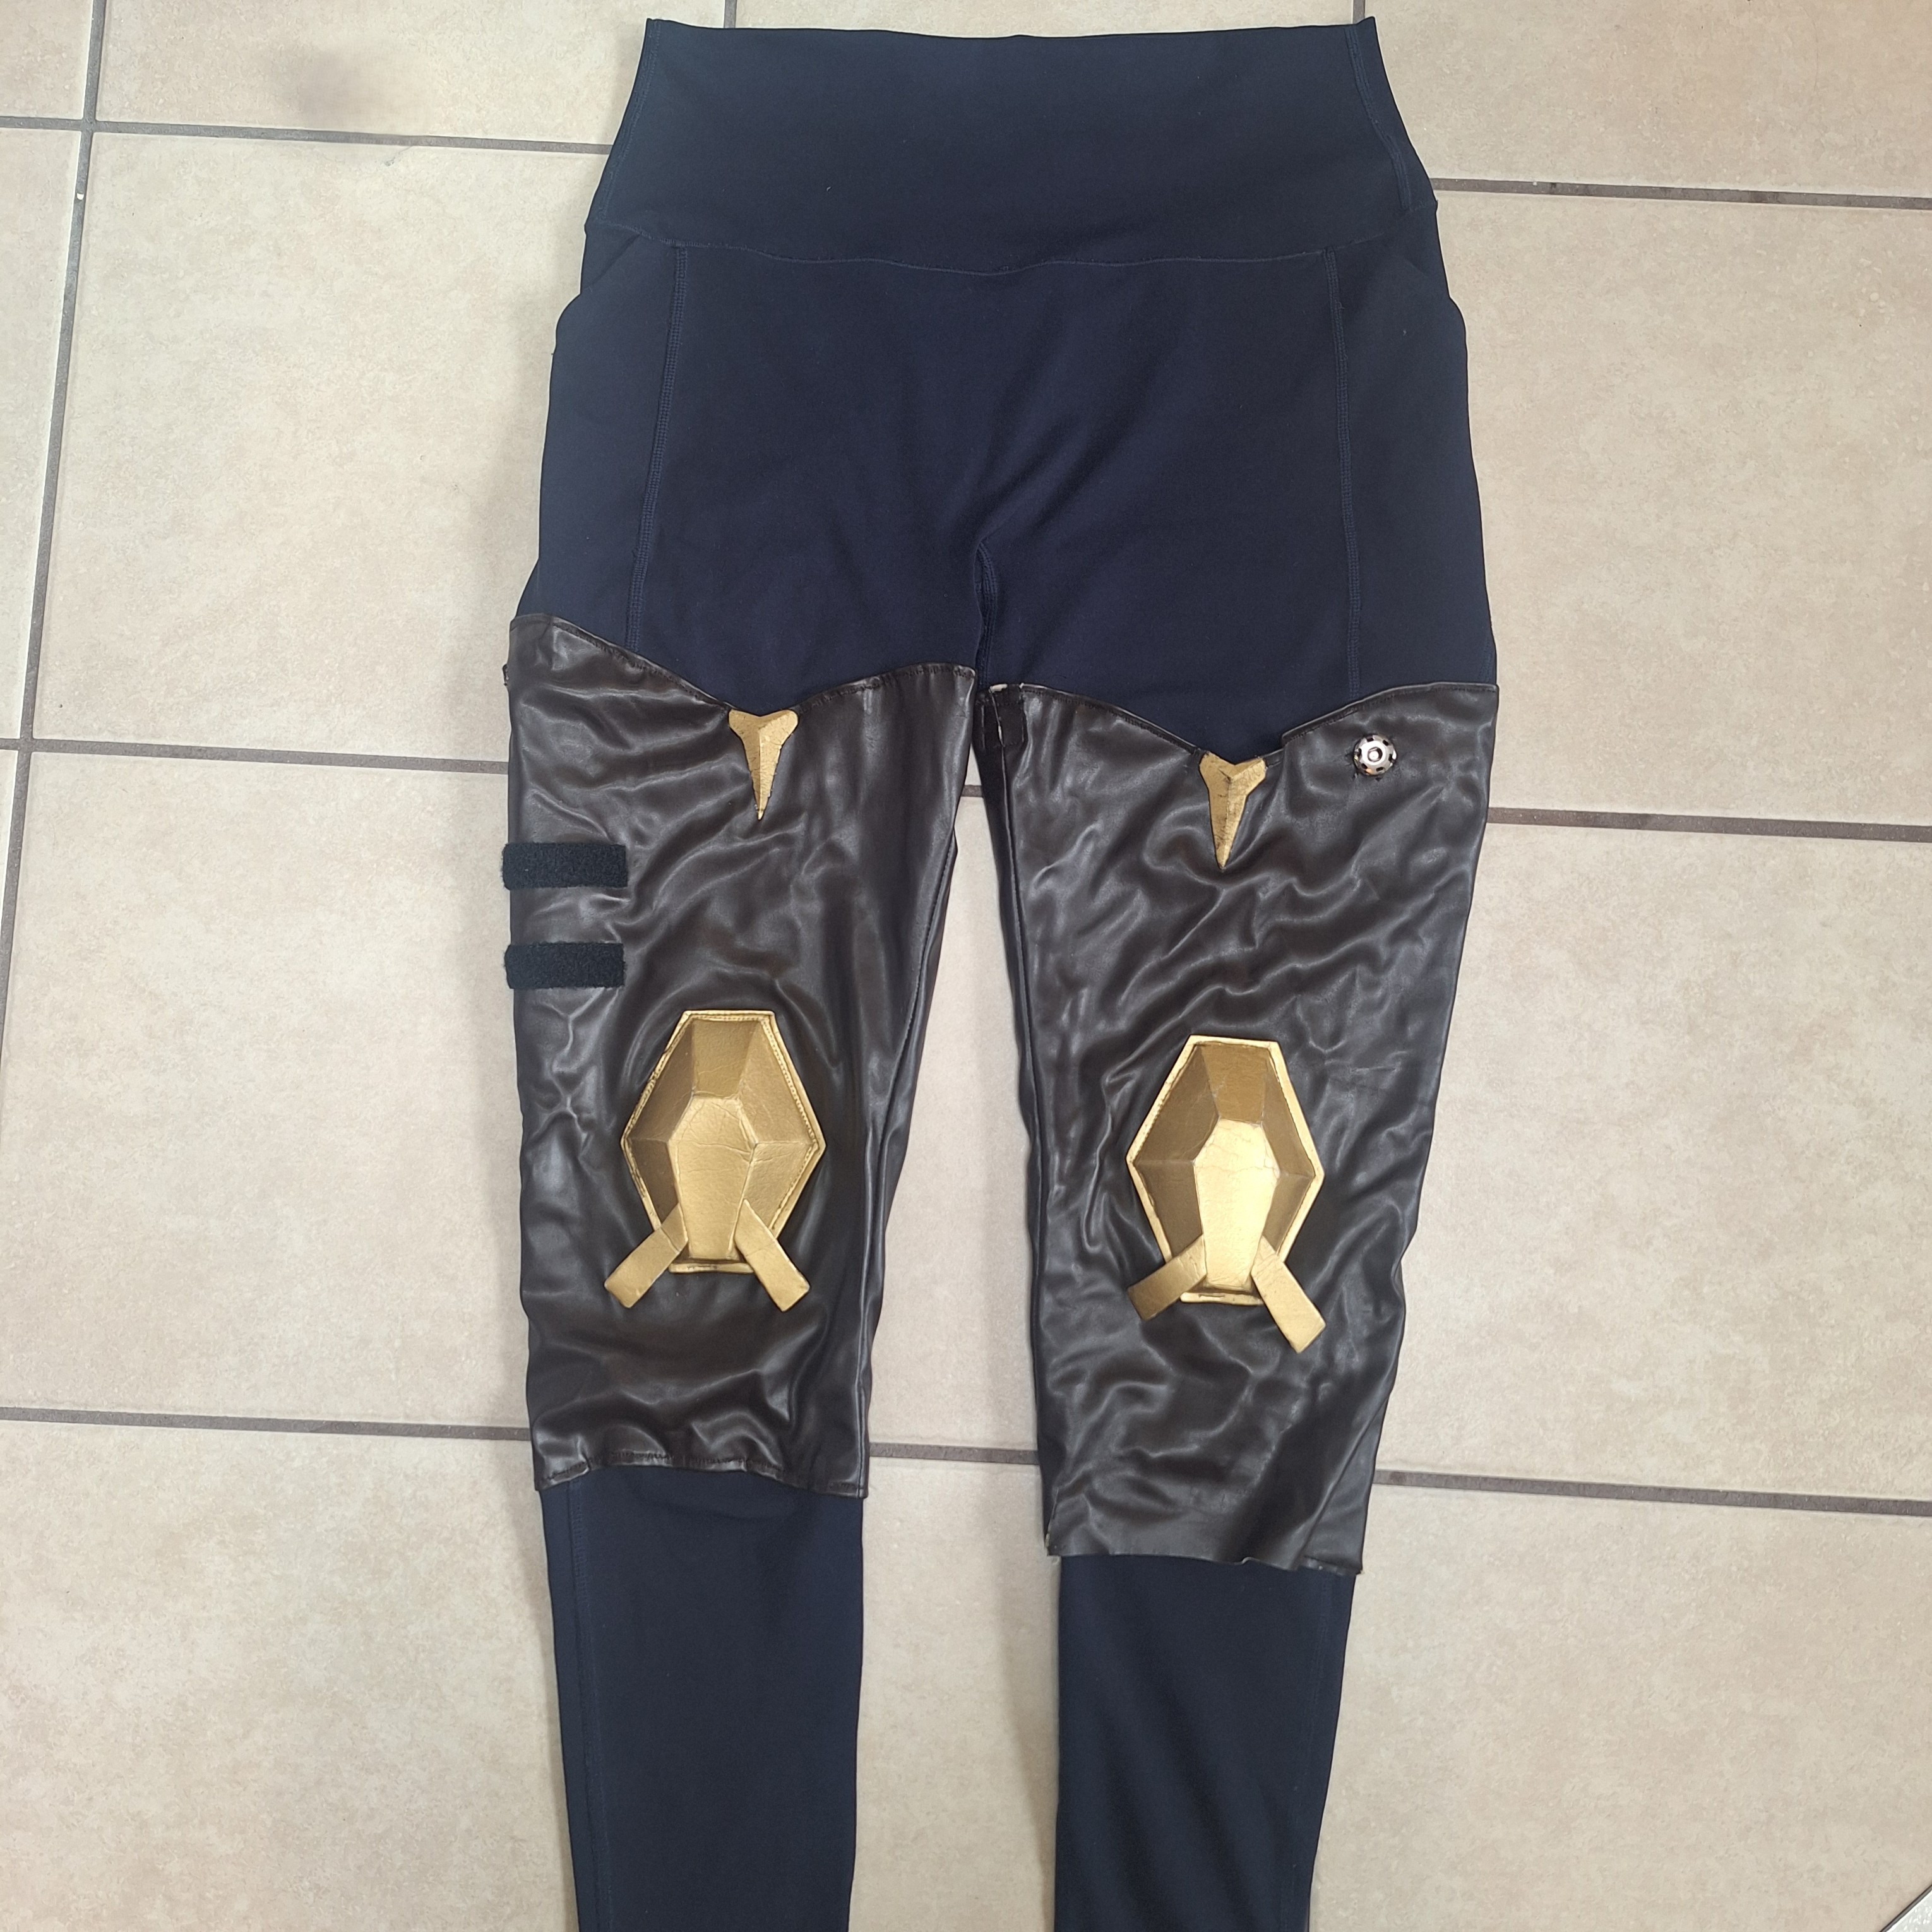
Pants / Legguards
These are regular leggings and at first I had the legguards slide on and attach with velcro. That wasn't working very well. The leg with the phone holder was destroyed because the pouch was heavy and ripped the outer layer of the vinyl. I needed to make a new piece on Saturday. Because I needed to remake the legguard I decided to sew them onto the leggings. This held up. To figure out the pattern, I traced an old pair of leggings and cut them util I got the right shape.
-
Wig
Simple, short white wig. It needed to be straightened, cut a little, and used got2b Glued to make the hair hold better when tucked behind the ear.
-
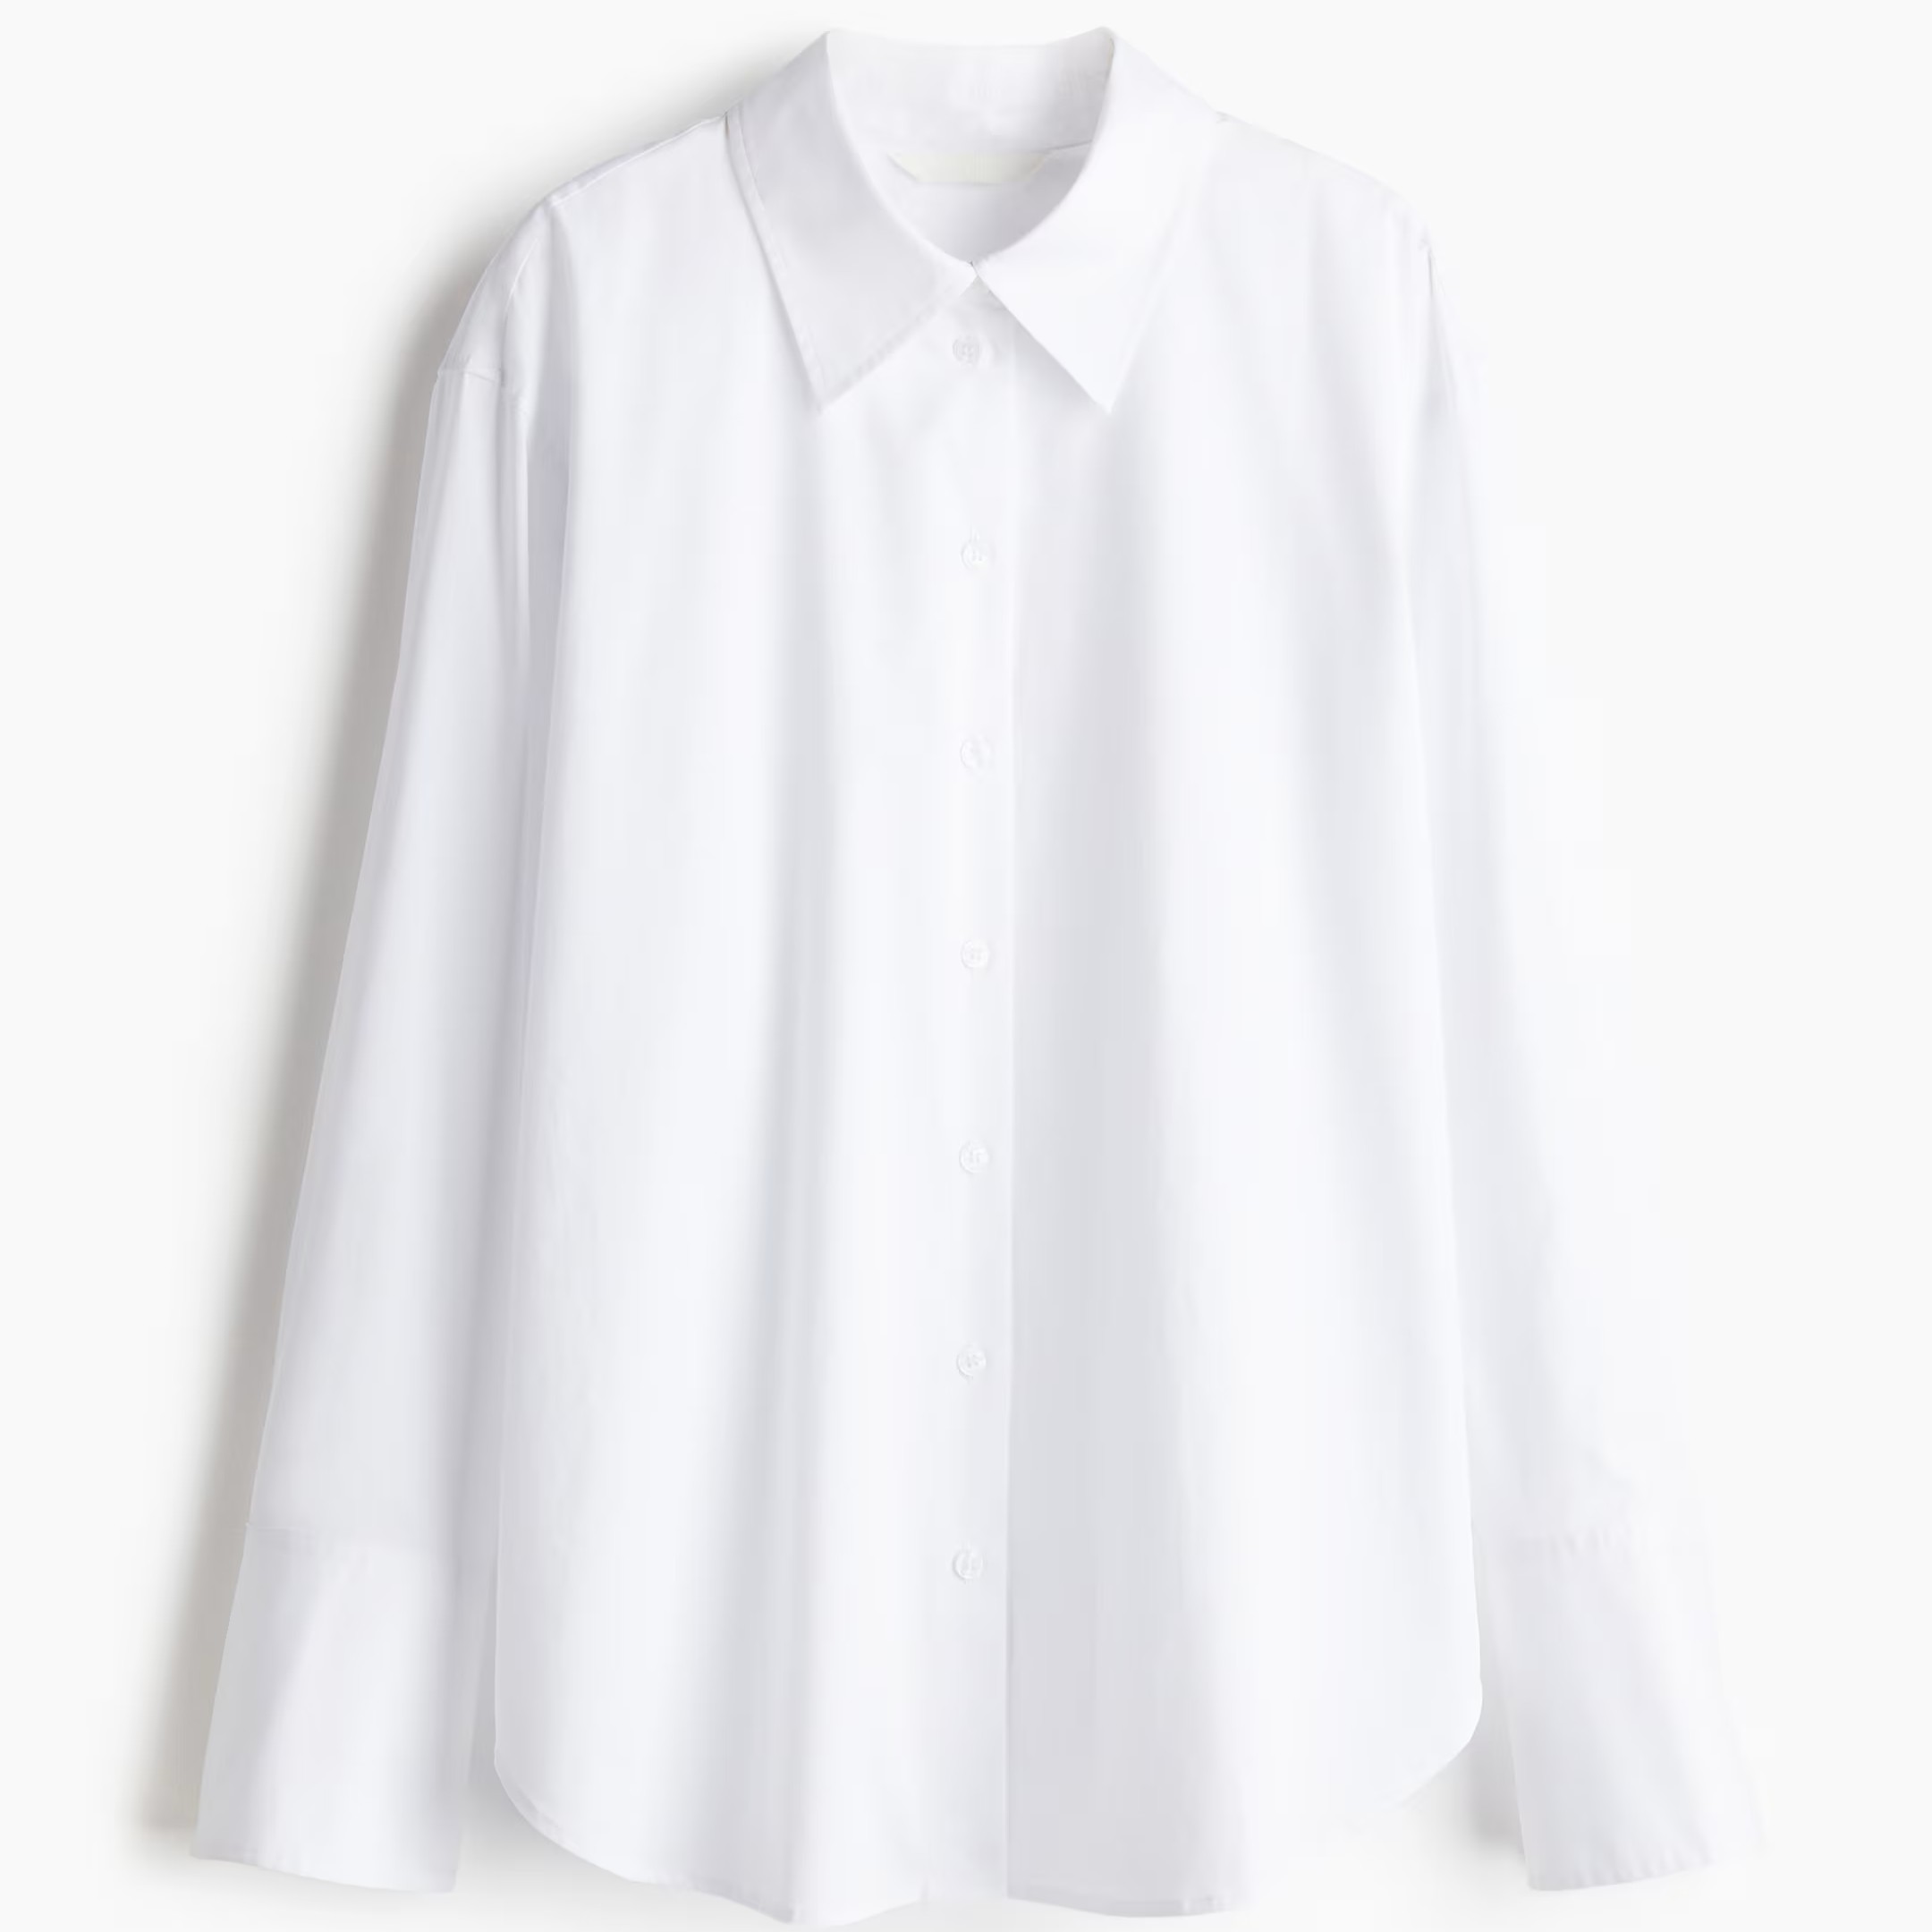
Shirt
I went to several stores at the mall to find a simple white button down shirt with a collar, and it was harder than I thought. I finally settled on this one from H&M and rolled up the sleeves. If I wanted to be more realistic, I could cut the sleeves shorter and make cuffs that better match the shape. Or just make a new one from scratch. The only modification I made was a sewn-on piece of velcro on the shoulder to hold the armor in place.
-
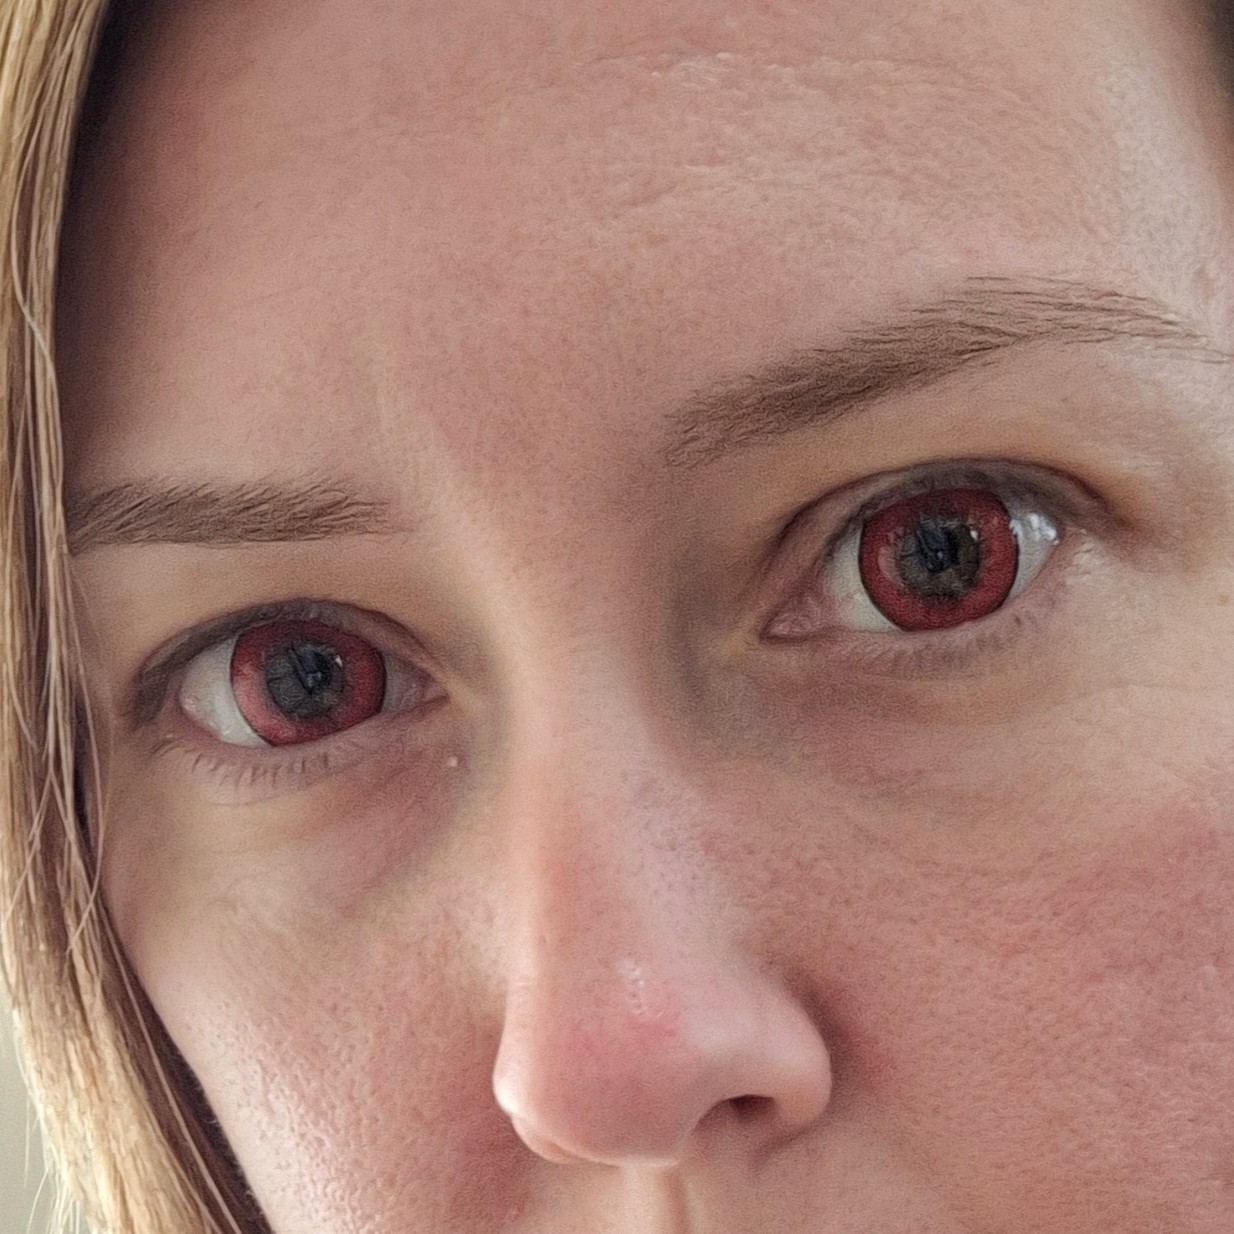
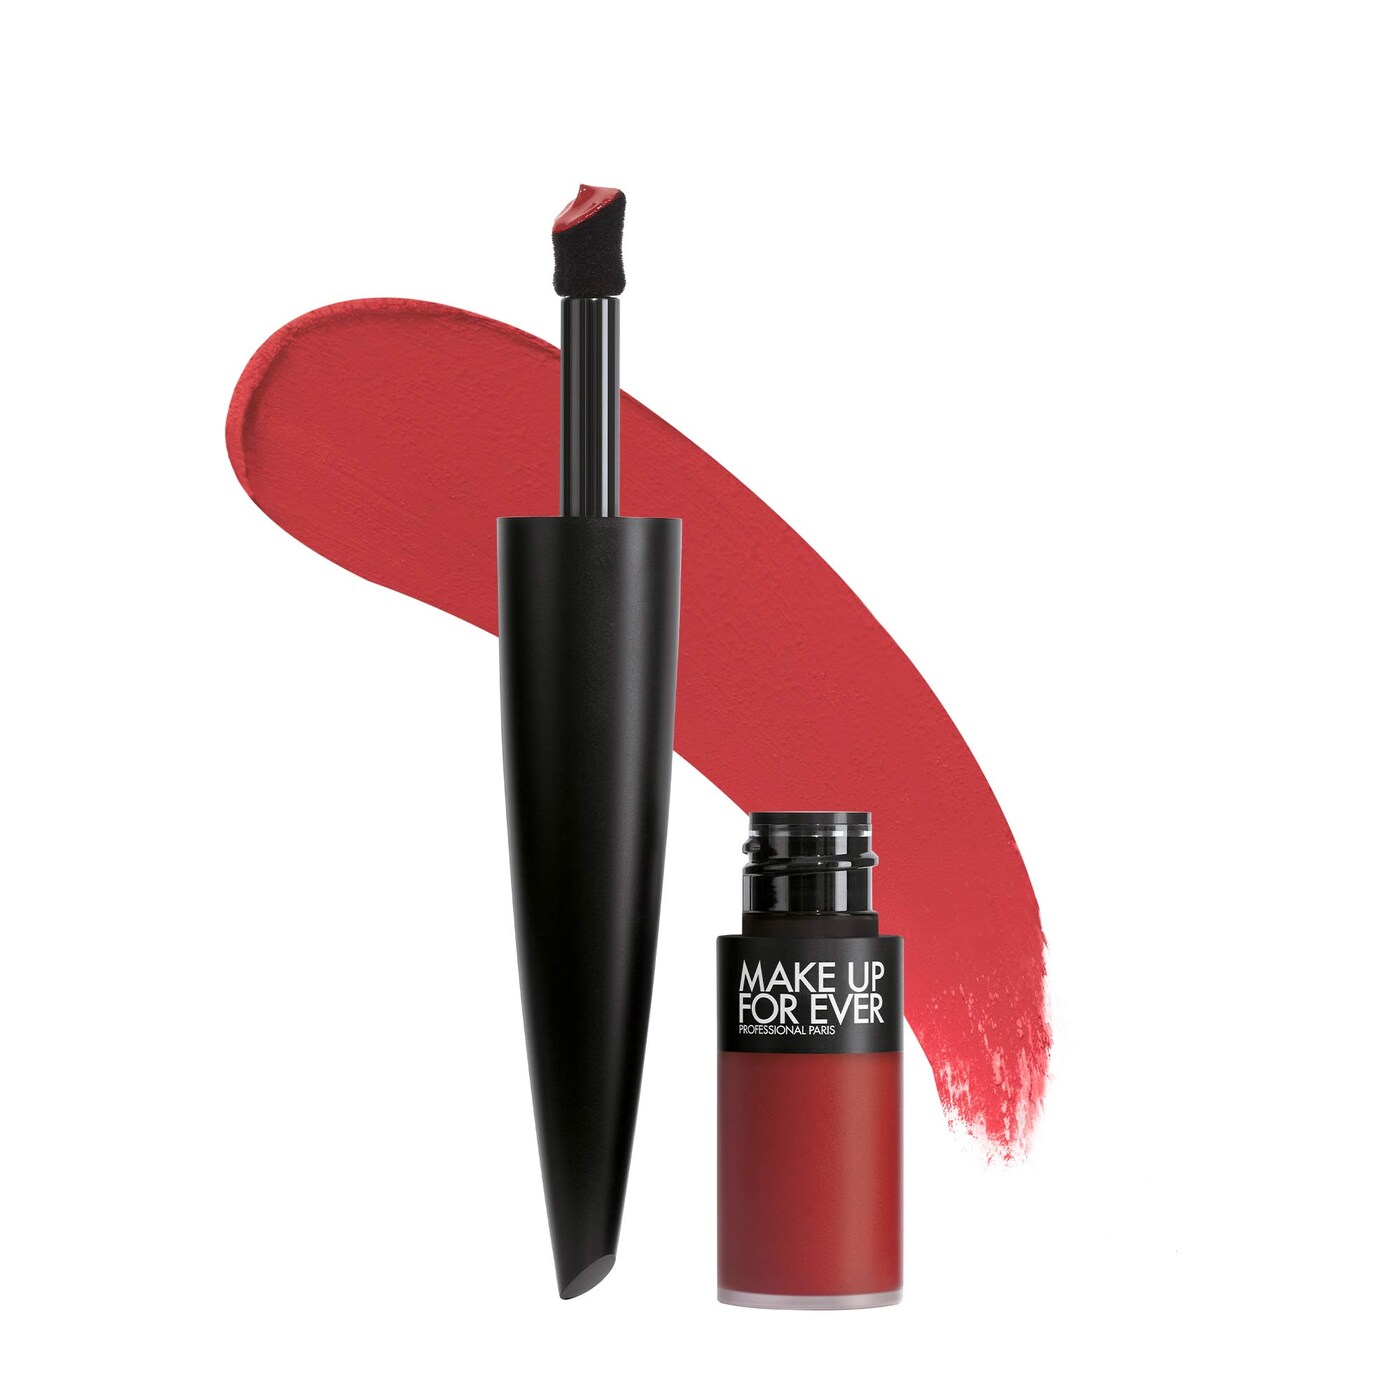
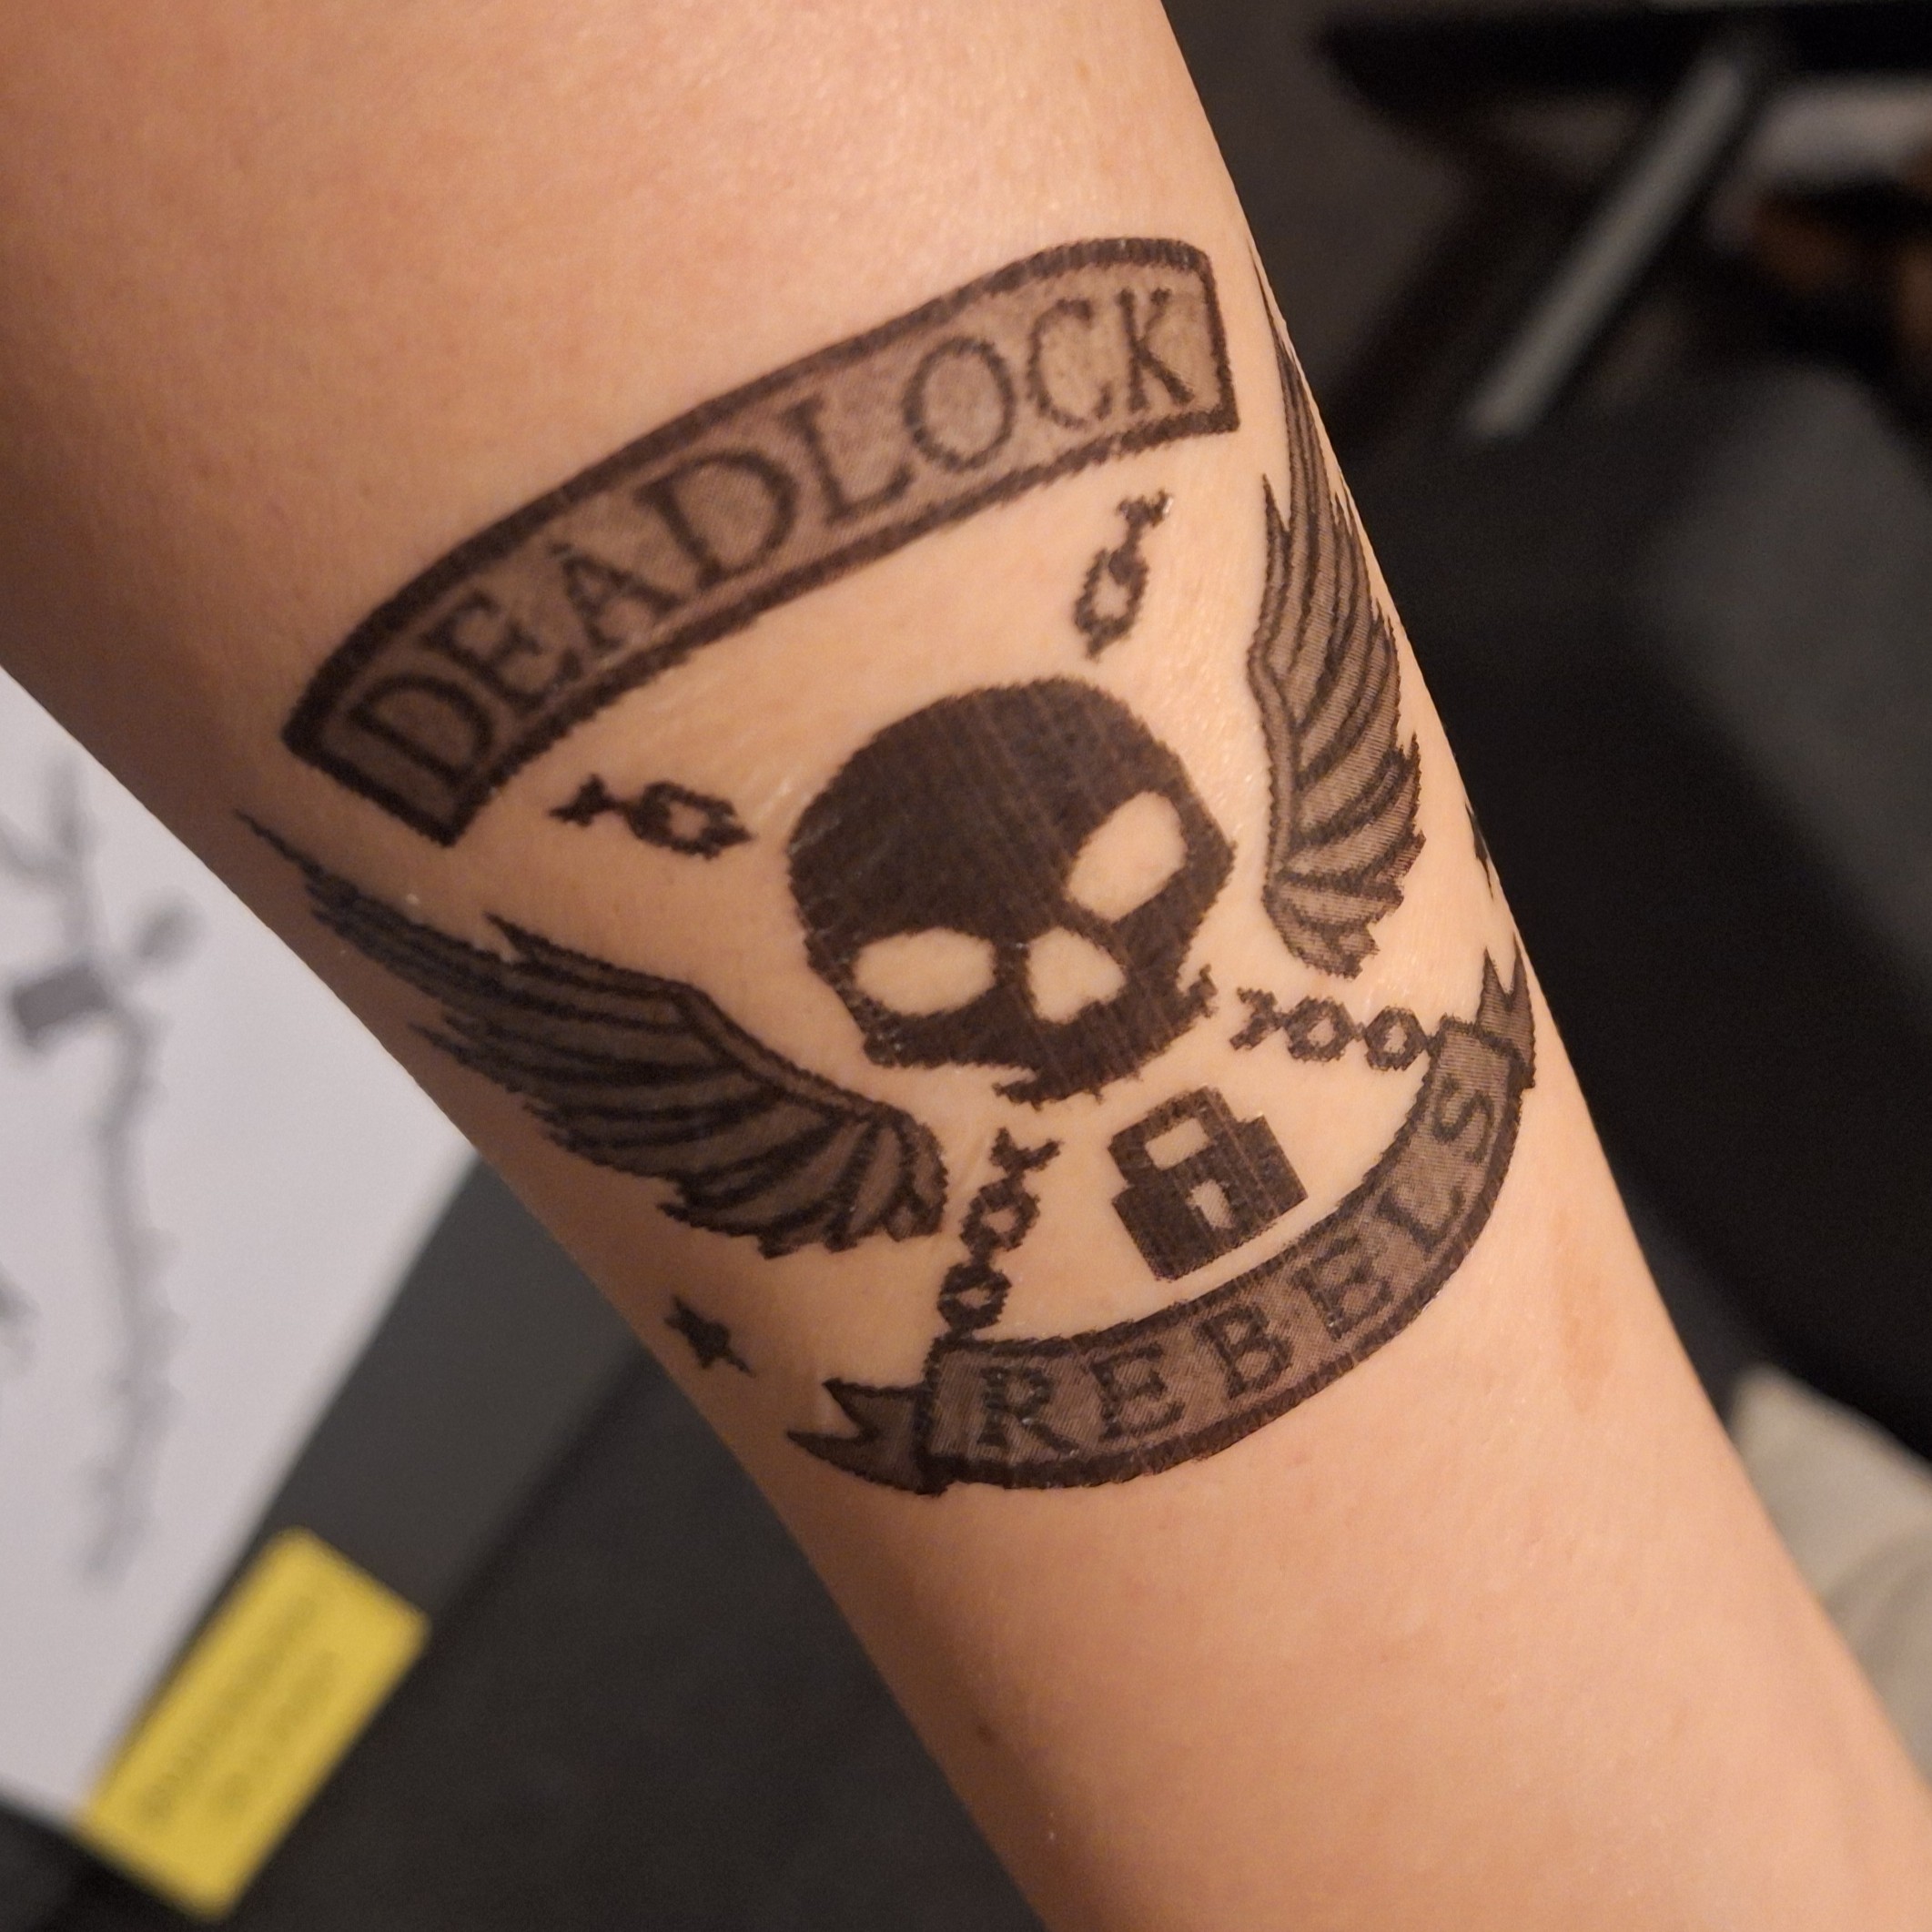
Contacts, Makeup, Tattoos, Jewelry
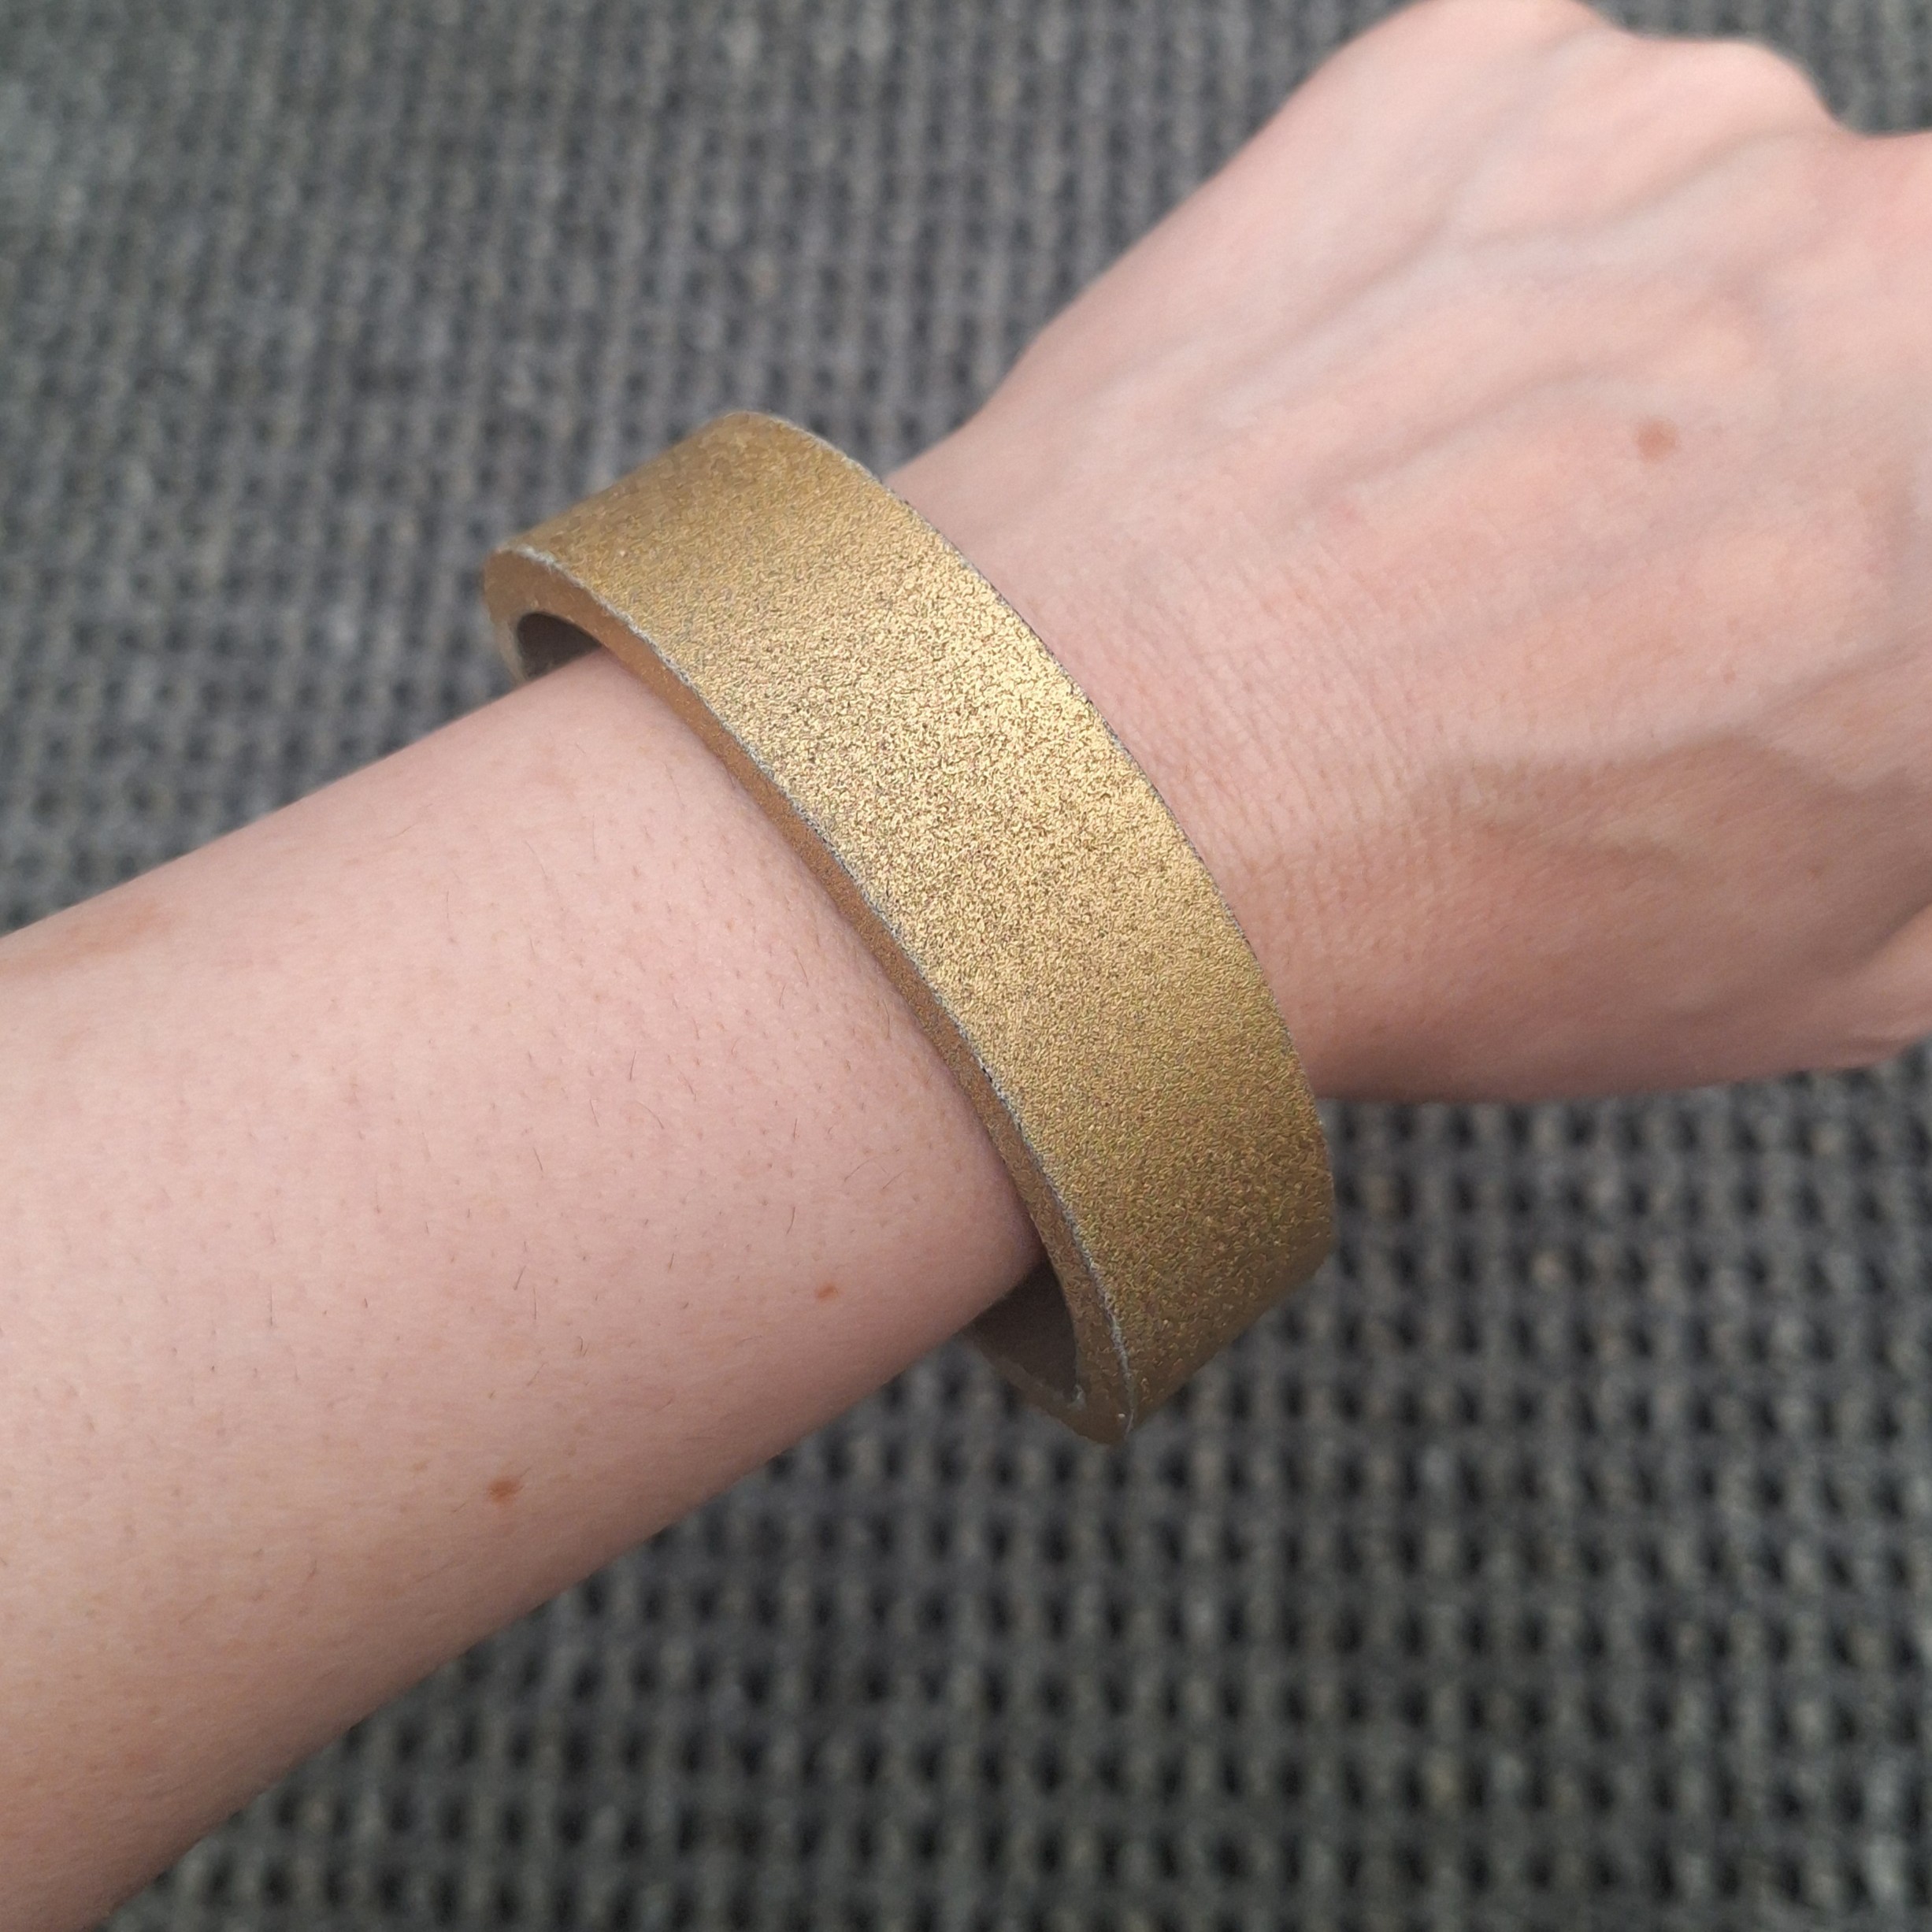
I need prescription contacts, and the ones I bought from PinkParadise worked out just fine! I would go back for my future contacts needs. For makeup, I went to Sephora and they were able to pick out the perfect shade. It goes on really smoothly and has a nice applicator; it comes off when eating or long wear but it was easy to reapply. For the tattoos, I printed them out on tattoo transfer paper (it took me a while to realize you weren't supposed to use your printer's paper!) and they surprisingly lasted the 2 days. Since I couldn't find a bracelet, I made one from EVA foam and spray paint.
Fun Facts & Build Notes
- Made the hat brown...Ashe's hat is black. Does anyone care? No. This is not a hardcore competition piece.
- I broke 2 needles and one went through my fingertip while I was sewing the coattails. This is due to using a zipper foot, where the needle was all the way to the edge and there was no protection from my fingers. We need to be careful next time. Sewing right along the raised foam on the coattails was the hardest part, keeping it straight and trying not to get hurt!
- When I was waiting for the subway, the gust of wind from the train approaching caused my hat and wig to fly off, which also made me drop the Viper. It broke and I had to immediately head to cosplay repair to get it fixed. Thankfully they were able to repair it and it held up for the rest of the con.
Improvements & Next Steps
- Print, paint, and attach the hat piece.
- Redo the vest for a better fit. It was a bit too loose in areas and too short. At the same time, I would spurge on a metal zipper and add in the gold trim.
- Sew new legguards in a material that isn't vinyl, or possibly in thin foam. I could also sew in the detailing that I left out.
- Adjust the cuffs of the shirt to look more like the original. I rolled them up but they should be folded, which means I will need to shorten the sleeves.